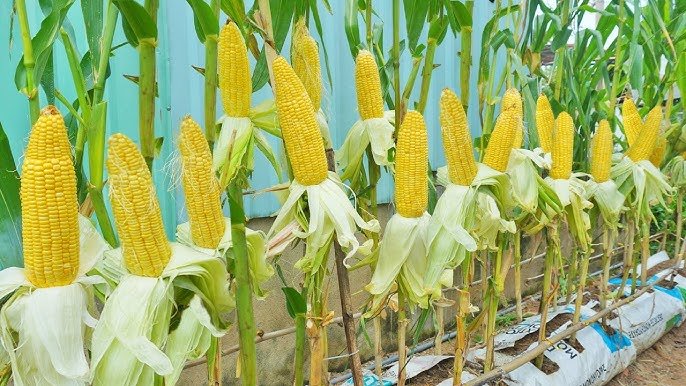
Imagine enjoying fresh, sweet yellow corn straight from your own homegrown plant — even if you don’t have a backyard or traditional garden. Sounds impossible? Not anymore! With the right technique, you can grow large and abundant sweet corn in plastic containers, maximizing space while still producing high-yielding plants.
This method is perfect for apartment dwellers, urban gardeners, or anyone with limited outdoor space. Plastic container gardening allows you to control soil quality, sunlight, and water, creating the perfect environment for sweet, juicy corn. In this guide, we’ll reveal the secret to growing big, flavorful corn in containers, step by step, from planting seeds to harvesting bountiful ears.
Why Grow Sweet Corn in Plastic Containers?
Growing corn in containers is more than a space-saving trick — it’s a revolutionary gardening method that comes with several advantages:
- No Garden Needed: Perfect for balconies, patios, or even large windows.
- Space-Saving: Vertical and container gardening allows multiple plants in a compact area.
- Controlled Environment: Easier to monitor watering, nutrients, and soil quality.
- Reduced Pest Risk: Plants are off the ground, decreasing exposure to soil-borne pests.
- High Yield Potential: With proper care, container-grown corn can produce surprisingly large ears.
Even beginners can grow sweet corn successfully using this method, without needing prior gardening experience.
Step 1: Choosing the Right Sweet Corn Variety

Selecting the right variety is essential for container cultivation. For the best results, choose short-stature, high-yield varieties that produce sweet yellow kernels.
- Golden Bantam: Compact, sweet, and ideal for container growth.
- Butterstick: Known for its creamy kernels and medium height.
- Sweet Nugget: Produces multiple ears per plant and adapts well to containers.
- Sugar Buns: Short plants, perfect for small spaces with heavy yields.
These varieties are easier to manage in containers and can thrive without a full garden plot.
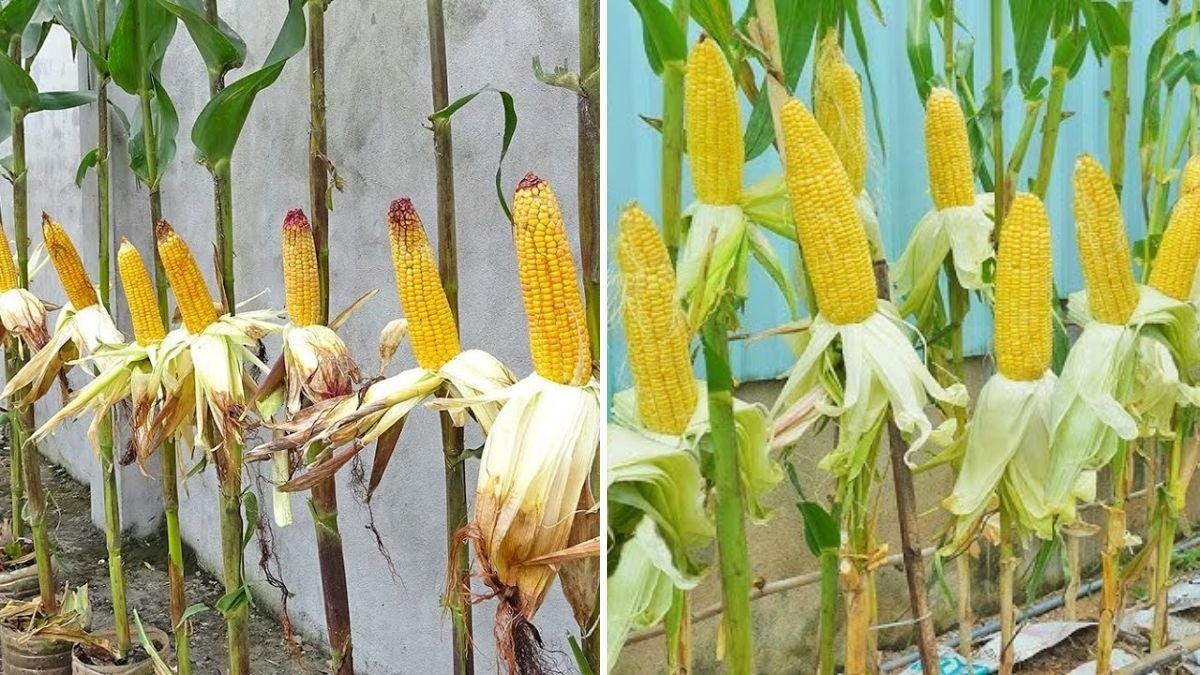
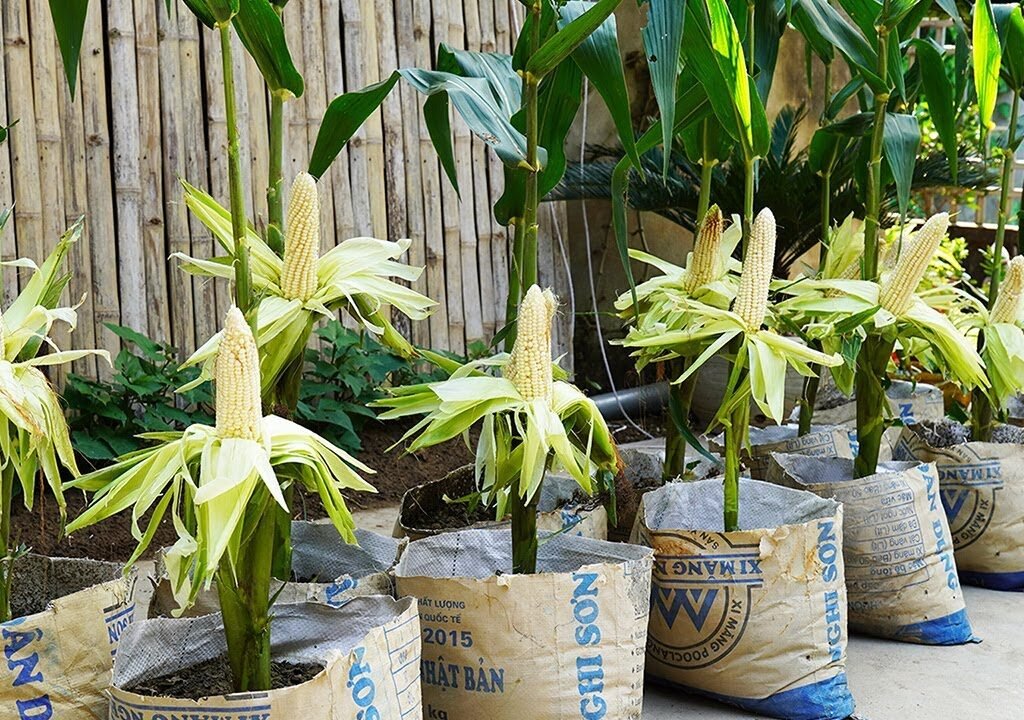
Step 2: Choosing and Preparing Plastic Containers
The key to growing corn in containers is providing enough space for roots to develop.
Container tips:
- Size: At least 12–16 inches deep and wide. Larger containers help plants develop bigger ears.
- Material: Plastic is lightweight, retains moisture, and is easy to move.
- Drainage: Ensure there are multiple holes at the bottom to prevent waterlogging.
- Optional Vertical Setup: For balconies, consider stacking or hanging containers to save space.
Plastic containers are inexpensive and easy to repurpose, making them ideal for urban gardeners.
Step 3: Preparing the Soil
Corn is a heavy feeder, meaning it requires nutrient-rich soil to grow large, abundant ears.
Ideal soil mix for container corn:
- 1 part high-quality potting soil
- 1 part compost or organic matter
- 1 part perlite, coco peat, or sand for aeration
Optional banana amendment: Adding chopped banana peels provides potassium and phosphorus, enhancing growth, flower formation, and ear development.
Ensure the soil is loose, well-draining, and slightly acidic to neutral (pH 6.0–6.8). This provides a fertile environment for robust corn plants.
Step 4: Planting Sweet Corn Seeds
Starting with high-quality seeds ensures strong, healthy plants.
Steps for planting:
- Fill the container with prepared soil, leaving a couple of inches at the top.
- Sow 2–3 seeds per container, about 1–2 inches deep.
- Space seeds evenly to allow room for root and stalk growth.
- Water lightly to settle the soil around the seeds.
Within 7–10 days, seeds will germinate. Thin seedlings to one strong plant per container to focus energy on producing large ears.
Step 5: Providing Sunlight and Temperature
Sweet corn needs plenty of sunlight and warmth to grow effectively.
- Sunlight: Minimum of 6–8 hours of direct sunlight per day.
- Optimal Temperature: 70–85°F during the day; avoid nighttime temperatures below 55°F.
If growing indoors, supplement with LED grow lights for 12–14 hours per day. Rotate containers occasionally to ensure all sides of the plant receive sunlight.
Step 6: Watering Sweet Corn
Proper watering is crucial to producing large, juicy ears.
Watering tips:
- Keep soil consistently moist, especially during tasseling and ear development.
- Avoid waterlogging — use containers with proper drainage holes.
- Mulch the soil surface with straw or dry leaves to retain moisture and reduce evaporation.
Consistent watering ensures steady growth and prevents stress, which can affect ear size and sweetness.

Step 7: Fertilizing for Maximum Yield
Container-grown corn requires regular feeding to support healthy growth.
Fertilization tips:
- Early Growth: Use a balanced liquid fertilizer every 2–3 weeks to strengthen stalks and roots.
- Tasseling & Ear Formation: Switch to potassium and phosphorus-rich fertilizer to boost ear development and kernel sweetness.
- Organic Options: Compost tea, fish emulsion, or diluted cow manure work perfectly.
Avoid excessive nitrogen during ear formation, as it encourages leafy growth rather than larger corn ears.
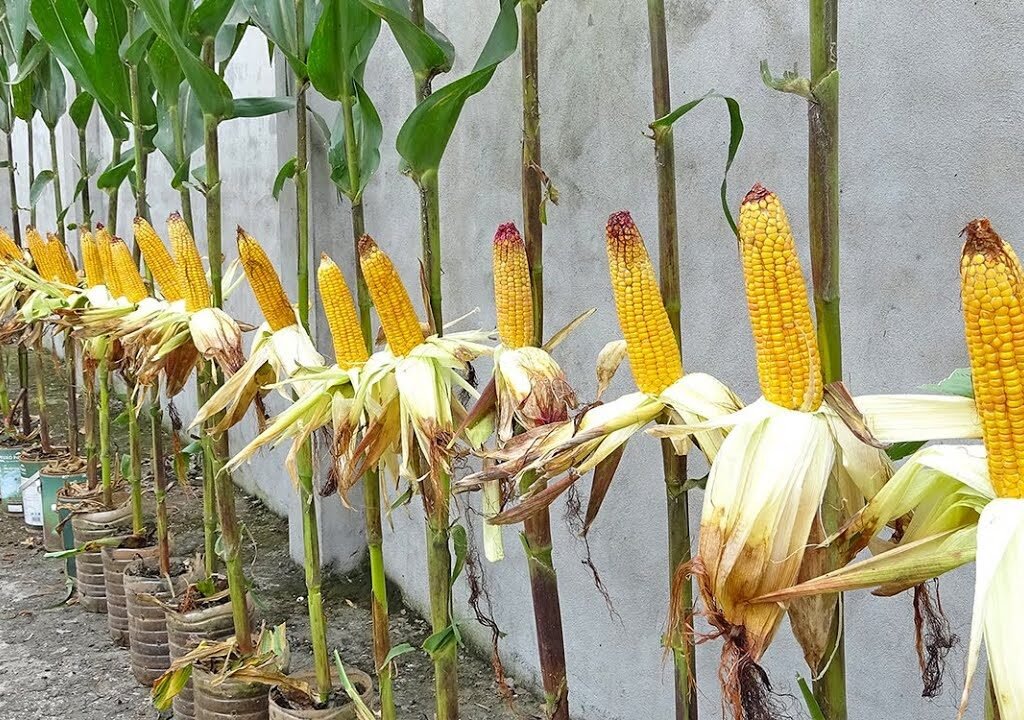
Step 8: Supporting Corn Plants
Even in containers, corn plants can grow tall and become top-heavy with ears.
- Use a small stake or bamboo stick inside the container to provide support.
- Tie the stalk gently with soft cloth or twine.
- Ensure each container has enough space for airflow to reduce disease risk.
Support prevents stalks from bending or breaking, keeping plants upright for optimal sunlight exposure.
Step 9: Pollination
Corn is wind-pollinated, so proper pollination is critical for abundant ear production.
- Outdoor plants are naturally pollinated by wind.
- Indoor or balcony plants may require hand pollination: gently shake the tassels over the silks to transfer pollen.
- Successful pollination results in kernels developing evenly along the cob.
Pollination is essential to maximize fruit formation in container-grown corn.
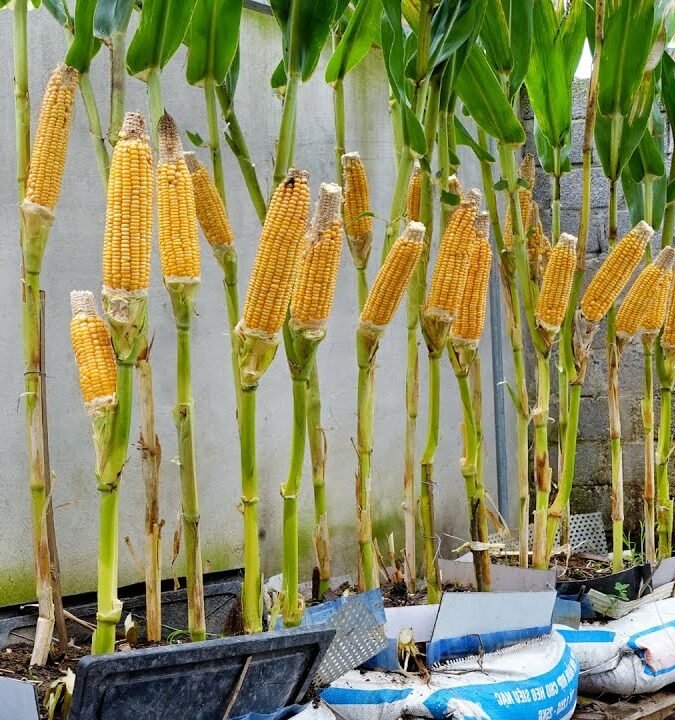
Step 10: Harvesting Sweet Yellow Corn
Sweet corn is usually ready for harvest 70–100 days after planting, depending on the variety.
Harvesting tips:
- Check the silks: they should be brown and dry, but kernels should be plump and milky.
- Use scissors or a sharp knife to cut ears from the stalk.
- Harvest regularly to encourage continuous growth and prevent over-maturity.
Well-maintained container corn can produce multiple harvests per plant, even without a traditional garden.
Step 11: Tips for Maximizing Yield
- Ensure containers receive adequate sunlight and rotate regularly.
- Keep plants healthy by removing yellow or diseased leaves.
- Feed consistently with organic or chemical fertilizers.
- Maintain proper spacing between containers for airflow.
- Use banana peels or compost to boost nutrients naturally.
Even beginners can grow big, sweet, abundant corn with minimal space and effort by following these steps.
Step 12: Benefits of Container-Grown Corn
Growing sweet corn in containers offers multiple advantages:
- Accessibility: Grow fresh corn anywhere, even in apartments.
- Eco-Friendly: Reduce garden space usage and recycle plastic bottles.
- High Yield: Proper care leads to large, abundant ears.
- Pesticide Control: Easier to monitor and reduce chemical use.
- Fun and Educational: Ideal project for families and urban gardening enthusiasts.
This method proves that you don’t need a traditional garden to enjoy homegrown, delicious sweet corn.
Conclusion
Growing sweet yellow corn in plastic containers is a simple, effective, and rewarding gardening technique. By using nutrient-rich soil, bananas as a natural fertilizer, proper sunlight, and consistent watering, even small-space gardeners can achieve big, abundant harvests.

From planting seeds to supporting stalks, pollination, and harvesting, container-grown corn demonstrates that space limitations don’t have to limit productivity. With a little care, patience, and creativity, you can enjoy the taste of fresh, juicy sweet corn directly from your balcony or patio — no traditional garden required.
Start small with a few containers, follow these steps, and unlock the secret to growing large, flavorful sweet corn at home. It’s time to revolutionize your garden — even if your garden is just a few plastic containers on your balcony!
Leave A Comment