
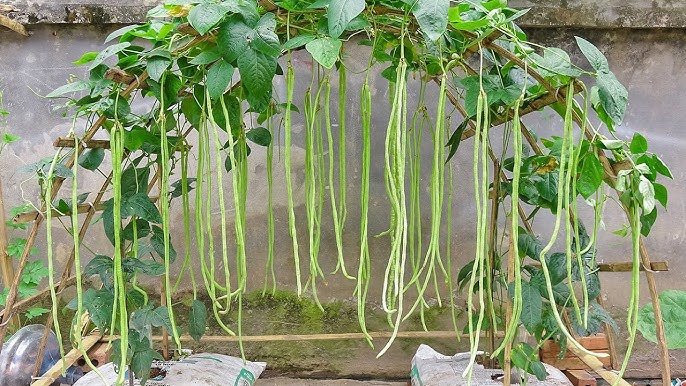
Yardlong beans, also known as Asparagus beans, Long-podded beans, or Snake beans, are a favorite in home gardens due to their vigorous growth, prolific yield, and delicious taste. These long, tender beans can grow up to 18–36 inches in length and are packed with vitamins A, C, and K, fiber, and protein, making them a nutritious addition to any meal. Growing yardlong beans organically at home allows you to enjoy fresh, chemical-free produce while creating a beautiful, thriving kitchen garden.
In this guide, we’ll explore everything you need to know to cultivate organic yardlong beans in your home garden, from preparing the soil to harvesting a bountiful crop.
Why Grow Yardlong Beans at Home?
Growing yardlong beans in your kitchen garden offers several benefits:
- Fresh and organic produce: You know exactly what goes into your food.
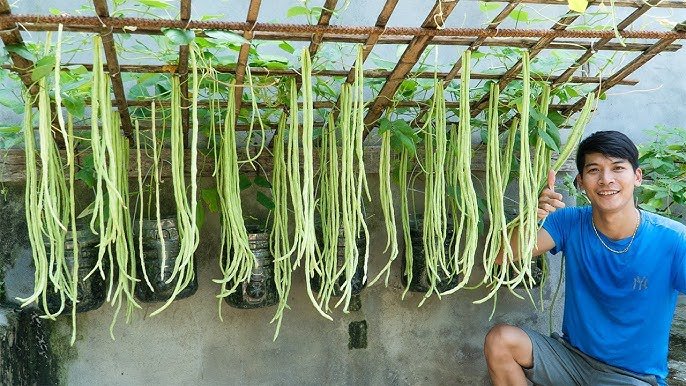
- High yield: Vining plants produce abundant beans throughout the season.
- Nutritious: Beans are rich in vitamins, minerals, and fiber.
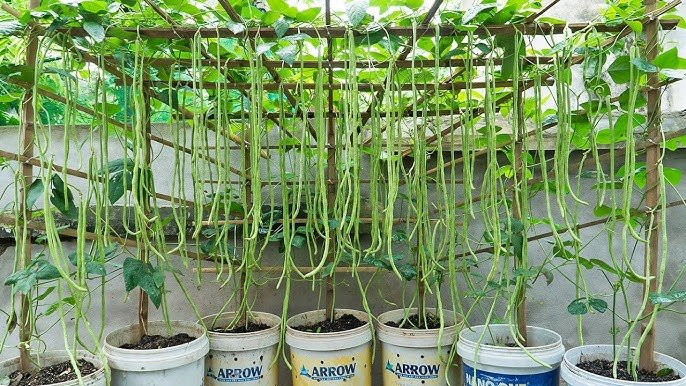
- Easy to grow: Perfect for small gardens, containers, or vertical setups.
- Beautifies your garden: Long, green vines add charm and vibrancy.
Yardlong beans are ideal for stir-fries, curries, soups, and salads, making them a versatile vegetable for home cooking.
Choosing the Right Variety
There are several varieties of yardlong beans suitable for home gardens:

- Green-podded varieties: Most common, tender, and fast-growing.
- Purple-podded varieties: Add visual interest to your garden; they turn green when cooked.
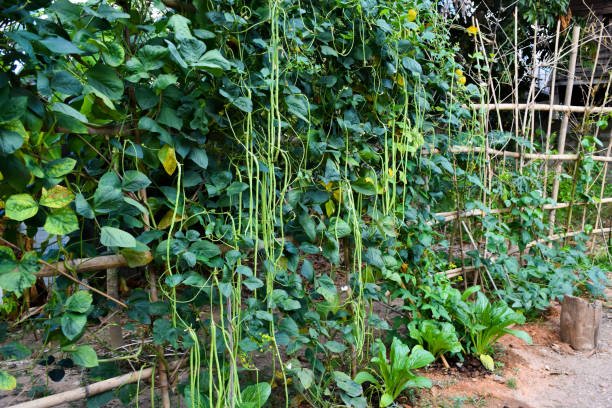
- Bush vs. climbing varieties: Climbing varieties produce higher yields if given proper support.
For small spaces, climbing varieties are ideal as they grow vertically and save ground space, while bush varieties are better for container gardening.
Materials Needed for Growing Yardlong Beans
Before planting, gather these essentials:
- Yardlong bean seeds – Choose fresh, healthy seeds from a reliable source.
- Trellis, bamboo sticks, or netting – Beans are climbers and need support.
- Containers, raised beds, or garden soil – Well-draining, nutrient-rich soil is key.
- Compost or organic fertilizer – To enrich the soil naturally.
- Water source – Consistent moisture is important for growth.
Optional: Mulch to retain moisture and protect roots.
Step 1: Preparing the Seeds
Yardlong bean seeds have a hard outer coat, so pre-treatment improves germination:
- Soak seeds in warm water for 8–12 hours before planting.
- Choose seeds that are plump and firm, avoiding damaged or shriveled ones.
- Sow directly in soil or in seed trays for early seedlings.
Seeds typically germinate within 7–10 days, depending on temperature and soil moisture.

Step 2: Preparing the Growing Area
Yardlong beans thrive in sunny, warm locations:
- Sunlight: Full sun for at least 6–8 hours per day.
- Soil: Loamy, fertile soil enriched with compost or organic matter.
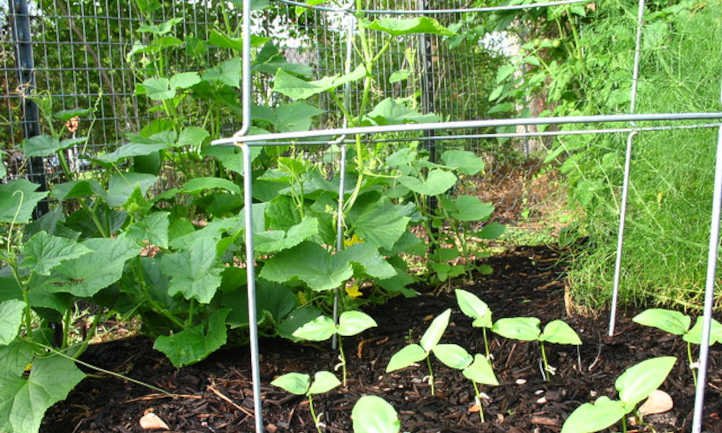
- Spacing: Plant seeds 6–12 inches apart to allow ample room for growth.
- Support: Install trellis, bamboo poles, or netting for climbing varieties.
For container gardening, ensure pots are at least 12 inches deep with proper drainage holes.
Step 3: Planting Yardlong Beans
- Direct sowing: Plant seeds 1 inch deep in prepared soil.
- Container planting: Use a mix of garden soil and compost; ensure proper drainage.
- Watering: Keep soil consistently moist but not soggy.
- Orientation: For climbers, plant near trellis or vertical support.
Beans are sensitive to transplant shock, so direct sowing in their final location is often preferred.
Step 4: Supporting the Vines
Yardlong beans are vigorous climbers:
- Trellis or bamboo sticks: Guide young vines as they grow.
- Vertical netting: Useful for small spaces and maximizes yield.
- Pruning: Not essential, but you can trim excessive lateral growth to improve airflow.
Supporting the vines vertically reduces disease risk, keeps beans clean, and makes harvesting easier.

Step 5: Watering and Fertilizing
Yardlong beans need regular watering and nutrients for healthy growth:
- Watering: Water deeply 2–3 times per week or whenever the soil surface feels dry.
- Mulching: Apply organic mulch to retain moisture and suppress weeds.
- Fertilizing: Use compost or well-rotted manure; organic liquid fertilizers every 2–3 weeks encourage strong vines and abundant flowering.
Avoid excess nitrogen, which encourages leaf growth at the expense of flowers and pods.
Step 6: Pest and Disease Management
Common pests include:
- Aphids: Spray with neem oil or use insecticidal soap.
- Bean beetles: Handpick or use organic controls.
- Caterpillars: Check leaves regularly and remove manually.
Common diseases:
- Powdery mildew: Ensure proper spacing and airflow.
- Root rot: Avoid waterlogged soil.
- Rust or leaf spots: Remove affected leaves and apply organic sprays if necessary.
Regular monitoring and early intervention keep your plants healthy and productive.

Step 7: Flowering and Pollination
Yardlong beans produce small, delicate flowers before pods appear:
- Flowers are mostly self-pollinating, but bees help increase fruit set.
- Encourage pollinators by planting companion flowers nearby, such as marigolds or sunflowers.
- Remove damaged flowers to allow the plant to focus on healthy pod production.
Step 8: Harvesting Yardlong Beans
Yardlong beans are ready to harvest 50–60 days after sowing:
- Pod size: Pick beans when they are 12–18 inches long, tender, and crisp.
- Method: Use scissors or gently twist the pod to remove it from the vine.
- Continuous harvest: Regular harvesting encourages more flowers and pods, resulting in a longer season.
Tip: Harvest in the morning for the freshest taste and maximum nutrient retention.
Cooking and Enjoying Yardlong Beans
Yardlong beans are versatile in the kitchen:
- Stir-fries: Quickly sauté with garlic, chili, and soy sauce.
- Curries and stews: Add to vegetable or meat dishes.
- Soups: Chop and simmer for tender, flavorful beans.
- Salads: Use lightly blanched beans for a crisp, fresh addition.
They retain their vibrant green color and crunch when cooked briefly, making them a favorite in Asian cuisine.

Tips for a Thriving Kitchen Garden
- Vertical growth: Maximize space and yield by supporting climbing varieties.
- Mulching: Retain moisture and protect roots in warm weather.
- Regular harvesting: Keep vines productive throughout the season.
- Organic practices: Compost, kitchen waste, and natural fertilizers maintain healthy plants.
- Companion planting: Beans fix nitrogen in the soil, benefiting neighboring plants like tomatoes or cucumbers.
With consistent care, yardlong beans can transform your garden into a productive and beautiful kitchen garden.
Final Thoughts
Growing organic yardlong beans at home is rewarding, fun, and sustainable. With proper care, sunlight, and support, these climbing vines produce abundant, nutritious pods throughout the growing season. By incorporating compost and organic fertilizers, you can maintain a healthy, eco-friendly garden that not only feeds your family but also adds greenery and beauty to your home.
Whether you have a small balcony, container garden, or backyard plot, yardlong beans are easy to grow and a perfect addition to your kitchen garden. Start planting today and enjoy fresh, crisp, and flavorful beans straight from your own backyard!
Leave A Comment