Cabbage is one of the most rewarding vegetables you can grow at home — it’s nutritious, beautiful, and surprisingly easy to cultivate even if you don’t have a traditional garden. Whether you live in a city apartment or have limited outdoor space, you can grow both red and green cabbage in plastic containers right on your balcony, patio, or rooftop garden.
In this comprehensive guide, you’ll learn how to grow cabbage from seed in plastic containers — from germination all the way to harvest. With a little care, patience, and the right techniques, you can enjoy crisp, homegrown cabbage that’s perfect for salads, soups, and stir-fries.
Why Grow Cabbage in Plastic Containers?
Growing cabbage in containers offers several benefits:
- Space-saving: You don’t need large garden beds — just a few containers and some sunlight.
- Pest control: It’s easier to manage cabbage worms and other insects when plants are in containers.
- Better soil management: You control the quality of soil and nutrients.
- Mobility: Containers can be moved to catch the best sunlight or to protect from heavy rain.
Red and green cabbage both adapt well to container gardening, as long as they receive enough nutrients and consistent watering.
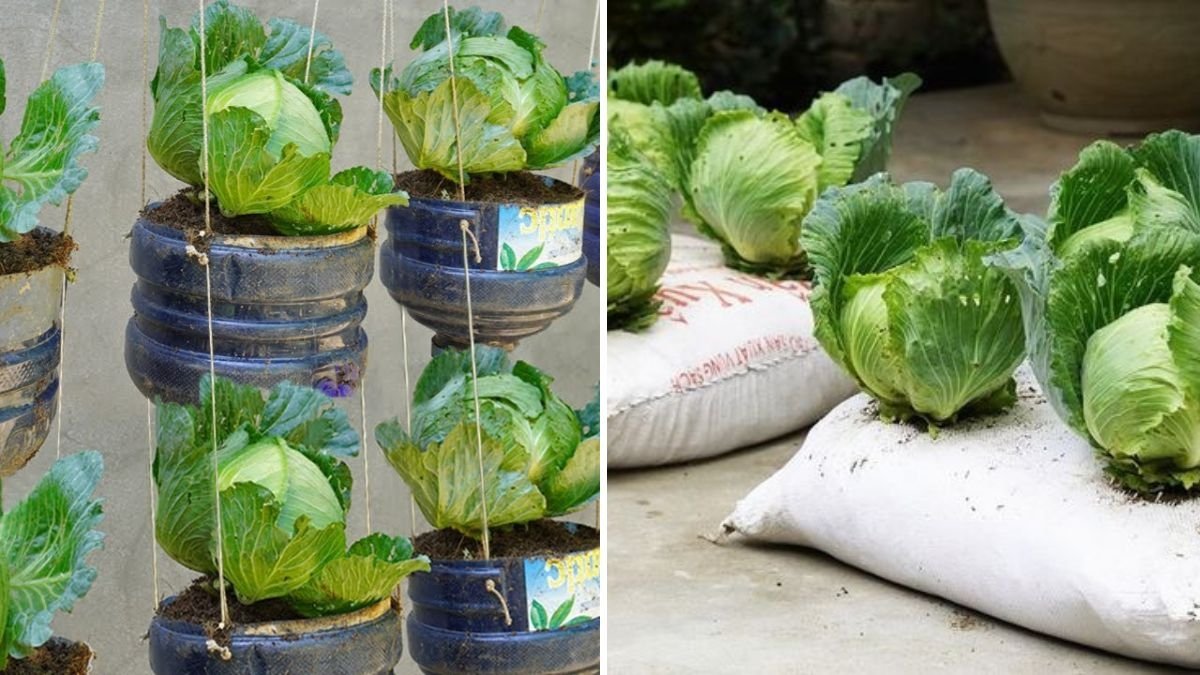
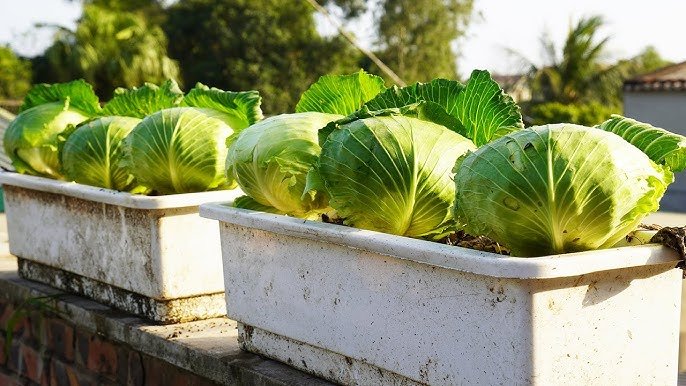
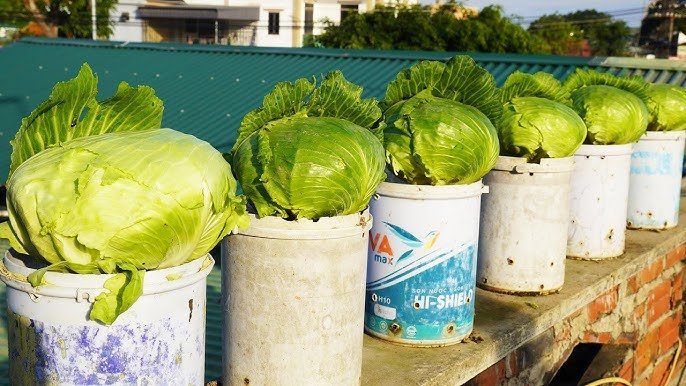
Step 1: Choosing the Right Plastic Containers

The first step to growing healthy cabbage starts with choosing the right container.
Container size:
- Each cabbage plant needs at least 12–16 inches (30–40 cm) of space for its roots.
- Choose a plastic pot that’s 12–14 inches deep and wide.
- Make sure the container has good drainage holes to prevent root rot.
You can reuse old plastic buckets, tubs, or paint cans — just clean them thoroughly and drill holes at the bottom for proper drainage.

Tip: Line the bottom of the container with small pebbles or broken clay pieces to improve water flow and prevent soggy soil.
Step 2: Preparing the Ideal Soil Mix

Cabbage grows best in rich, well-draining soil that’s slightly acidic to neutral (pH 6.0–7.0).
Best soil mix for cabbage:
- 40% garden soil or loam
- 30% well-rotted compost or organic manure
- 20% cocopeat or peat moss
- 10% perlite or coarse sand for drainage
Mix these components well to create a fluffy, nutrient-rich growing medium.
Before planting, sprinkle some bone meal or organic vegetable fertilizer into the mix — cabbage is a heavy feeder and needs a strong start.
Step 3: Sowing Cabbage Seeds
Now comes the exciting part — planting your cabbage seeds!
Timing:
- For cool climates, start seeds in early spring or late summer.
- In warmer regions, it’s best to grow cabbage during winter or cooler months.
How to sow cabbage seeds:

- Fill a seed tray or small cups with seed-starting mix.
- Place 2–3 seeds per hole, about ¼ inch (0.6 cm) deep.
- Lightly cover with soil and mist with water.
- Keep the tray in a warm, bright place — around 70°F (21°C) is ideal for germination.
Within 5–10 days, you’ll see tiny green sprouts emerging. Once seedlings develop two to three true leaves, they’re ready to be transplanted into your larger plastic containers.
Step 4: Transplanting the Seedlings
Before transplanting, make sure your container soil is moist and well-prepared.
Steps to transplant cabbage seedlings:
- Choose the healthiest seedlings with sturdy stems.
- Dig small holes in the container, spaced 10–12 inches apart.
- Gently remove seedlings from the tray and place them in the holes.
- Cover with soil and press gently around the base.
- Water thoroughly after transplanting.
Tip: Transplant in the early morning or late afternoon to reduce stress on young plants.
Step 5: Providing the Right Growing Conditions

Cabbage is a cool-weather crop but still needs at least 5–6 hours of sunlight daily.
Ideal growing conditions:
- Temperature: 55–75°F (13–24°C)
- Light: Full sun or partial shade in hot regions
- Water: Keep soil evenly moist — cabbage needs consistent moisture to form firm heads.
Avoid letting the soil dry out completely or become waterlogged. A layer of mulch or dry leaves on top of the soil helps retain moisture and regulate temperature.

Step 6: Fertilizing for Healthy Growth
Cabbage is a heavy feeder, and to produce those large, tight heads, it needs regular nutrition.
Fertilizer schedule:
- 2 weeks after transplanting: Apply a diluted organic liquid fertilizer (like seaweed extract or compost tea).
- Every 15–20 days: Feed with a balanced organic fertilizer or vegetable fertilizer high in nitrogen (for leafy growth).
- Once the cabbage starts forming heads, switch to a fertilizer rich in phosphorus and potassium to strengthen head formation.
Avoid over-fertilizing — it can lead to leafy growth without forming proper heads.
Step 7: Managing Pests and Diseases
Cabbage plants are prone to pests such as aphids, cabbage worms, flea beetles, and slugs.
Natural pest control tips:
- Inspect leaves regularly, especially the undersides.
- Hand-pick caterpillars and worms if you spot them.
- Use neem oil spray or a mild soap solution once a week.
- Encourage beneficial insects like ladybugs to control aphids naturally.
To prevent fungal diseases like root rot or powdery mildew, avoid overhead watering and make sure containers have good drainage.
Step 8: Caring for Your Cabbage Plants
Once your cabbage plants are established, they’ll need ongoing care.

Tips for strong, healthy plants:
- Water regularly: Maintain consistent moisture — uneven watering can cause heads to crack.
- Mulch: Apply mulch to keep the soil cool and moist.
- Pruning: Remove yellow or damaged outer leaves to encourage airflow.
- Support: If the plant becomes top-heavy, use small sticks to support the stem.
Step 9: Harvesting Cabbage
The best moment in the growing process is harvest time!
When to harvest:
- Red and green cabbage are usually ready 70–100 days after transplanting, depending on the variety.
- You’ll know it’s ready when the head feels firm and solid when gently squeezed.
How to harvest:
- Use a sharp knife to cut the head at the base, leaving a few outer leaves attached.
- Don’t pull out the entire plant — new smaller heads may form from the remaining stem.
- After harvesting, clean the cabbage heads and store them in a cool, dry place.
Cabbage can stay fresh in the refrigerator for up to two weeks if stored properly.
Bonus Tips for Better Yields
- Rotate crops: Avoid planting cabbage or other cruciferous vegetables (like broccoli or kale) in the same container each season.
- Companion planting: Grow cabbage with herbs like dill, mint, or rosemary — they repel pests naturally.
- Succession planting: Start new seeds every 3–4 weeks for a continuous supply.
- Use rainwater: If possible, use rainwater instead of tap water for better plant health.
Red vs. Green Cabbage: What’s the Difference?
While both varieties grow similarly, there are a few differences:
- Red cabbage tends to have a slightly longer growing period but is rich in antioxidants and vitamin C.
- Green cabbage grows a bit faster and is milder in flavor.
- Both can be grown side by side in containers — their vibrant colors make your garden look stunning!
Final Thoughts
Growing red and green cabbage from seed in plastic containers is an easy and satisfying way to enjoy fresh, organic produce at home. From sowing seeds to harvesting firm, crisp heads, every step brings you closer to sustainable living and healthier eating.

Whether you’re a beginner gardener or an urban grower, this method proves that space limitations don’t have to stop you from growing your own food. With just a few containers, nutrient-rich soil, and some care, you’ll soon be harvesting delicious homegrown cabbage — right from your balcony or backyard!
Leave A Comment