Growing pineapples at home doesn’t require a fancy garden or professional setup — you can easily grow them in waste containers! Yes, those old plastic bins, buckets, or even discarded paint tubs can be turned into perfect pineapple planters. This eco-friendly and budget-saving gardening method not only reduces waste but also lets you enjoy the joy of harvesting sweet, homegrown pineapples.
In this step-by-step guide, we’ll walk you through everything you need to know about growing pineapples in waste containers — from preparing your pineapple top to caring for your plant and finally harvesting your own tropical fruit.
Why Grow Pineapples in Waste Containers?
Pineapples are tropical plants that grow well in containers, making them perfect for urban gardeners and small-space growers. Unlike trees, they don’t need much space — just a sunny spot and well-drained soil.
Here are some reasons why growing pineapples in waste containers is a great idea:
- Recycling: You’re giving new life to old containers instead of sending them to the landfill.
- Space-saving: Ideal for balconies, patios, rooftops, or even small gardens.
- Low maintenance: Pineapple plants require minimal water and care once established.
- Beautiful and practical: They look attractive and produce delicious fruit.
By using waste containers, you’re combining sustainability with creativity — turning everyday items into productive planters.
Step 1: Choose and Prepare the Container
You can use almost any waste container as long as it’s deep and wide enough for the pineapple roots. Pineapple plants need space for their shallow root systems and a stable base for the fruit.
Best options include:
- Old plastic buckets
- Broken paint tubs
- Used detergent cans
- Unused storage bins
- Old cooking pots or tubs
Make sure the container is at least 10–12 inches deep and about 12 inches wide.
Preparing the container:
- Wash it thoroughly with soap and water to remove any chemicals or residues.
- Create drainage holes at the bottom using a drill or a heated metal rod. Good drainage is crucial to prevent root rot.
- Place a layer of small stones or broken pieces of clay pots at the base for better water flow.
Now your waste container is ready for planting!
Step 2: Prepare the Pineapple Crown
You don’t need seeds to grow pineapples — the top (or crown) of the fruit is all you need.
Here’s how to prepare it:
- Choose a fresh, ripe pineapple from the market.
- Hold the top leaves firmly and twist it off the fruit in one motion.
- Peel away a few of the lower leaves to expose about an inch of the stem.
- Let the crown dry for 2–3 days in a shaded area. This allows the cut end to heal and prevents rot when planted.
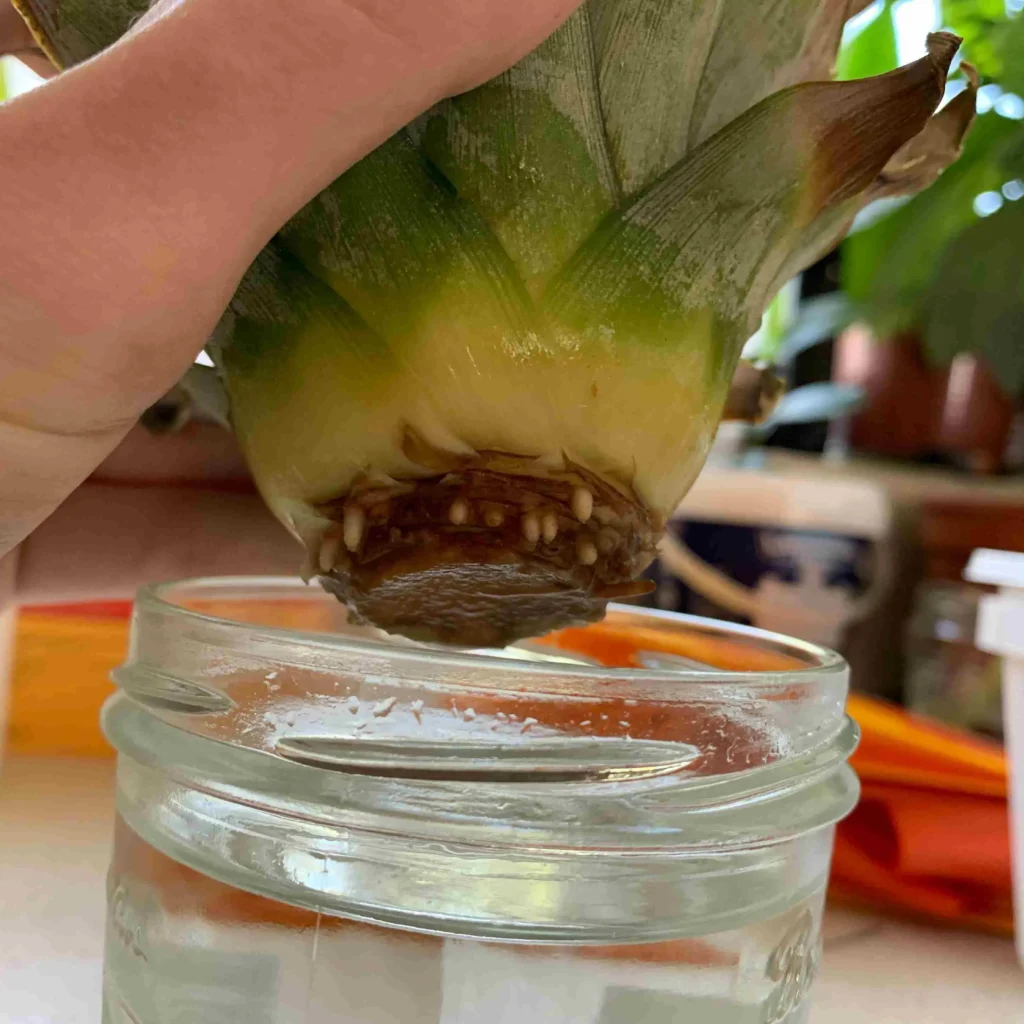
Some gardeners like to root the pineapple top in water before planting. If you want to try that:
- Place the base of the crown in a glass of water (only the stem, not the leaves).
- Change the water every 2 days.
- Within 7–10 days, you’ll notice tiny roots forming at the base.
Once you see visible roots, your pineapple top is ready to be planted in the container.
Step 3: Prepare the Soil Mix

Pineapples grow best in light, well-draining soil. Heavy, water-retentive soil can cause root rot.
Ideal potting mix:
- 40% garden soil
- 30% compost or organic manure
- 20% sand or cocopeat
- 10% perlite or rice husk for aeration
Mix these ingredients thoroughly before filling your container. If you have old soil from other pots, you can rejuvenate it by mixing in compost and sand.
Fill the container up to about 2 inches below the rim, leaving enough space for watering.
Step 4: Plant the Pineapple Crown
Now comes the exciting part — planting your pineapple!
Planting steps:
- Make a small hole in the center of the container about 2–3 inches deep.
- Place the dried or pre-rooted pineapple crown into the hole.
- Press the soil gently around the base to hold it upright.
- Water thoroughly until water drains from the bottom holes.
Place the container in a warm, sunny spot where it can get at least 6–8 hours of direct sunlight daily. Pineapples thrive in warm conditions and need plenty of light to grow strong and healthy.
Step 5: Watering and Sunlight Requirements
Pineapple plants are drought-tolerant and don’t like being overwatered. The key is to keep the soil slightly moist but never soggy.
Watering tips:
- In summer, water the plant 2–3 times a week.
- In cooler months, reduce watering to once a week.
- Always allow the top inch of soil to dry out before watering again.
Pineapples love warmth, so keep them in a sunny area. If you live in a colder region, bring the plant indoors during winter and place it near a bright window.
Step 6: Fertilizing Your Pineapple Plant
To encourage healthy growth, feed your pineapple plant every 4–6 weeks with an organic fertilizer. You can use compost, cow manure, or a balanced liquid fertilizer.
Organic options include:
- Compost tea
- Vermicompost
- Banana peel fertilizer
- Diluted fish emulsion
Pineapple leaves absorb nutrients directly, so it’s helpful to spray a diluted liquid fertilizer on the leaves as well.
Step 7: General Care and Maintenance
Here are some tips to keep your pineapple plant thriving:
- Sunlight: Place the container where it receives maximum sunlight. Morning and afternoon sun are ideal.
- Mulching: Add a thin layer of dry leaves or coconut husk around the base to retain moisture.
- Weeding: Remove weeds that compete for nutrients.
- Pest control: Watch out for mealybugs or aphids. Use neem oil spray or soap water once every two weeks to keep pests away.
- Pruning: If you notice dry or yellowing leaves, trim them off with clean scissors. This helps the plant focus on new growth.
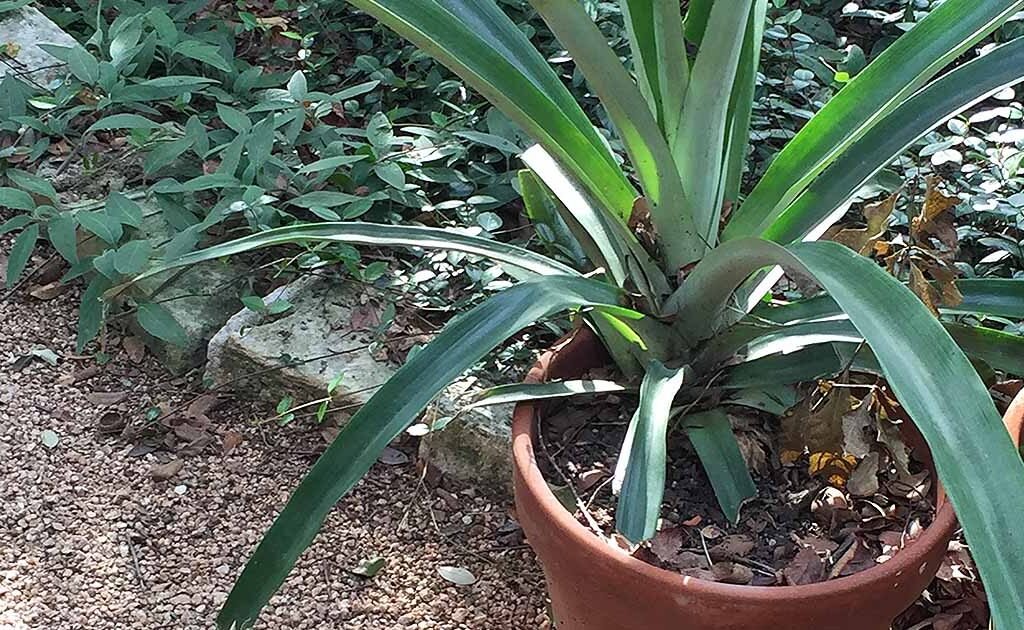
Step 8: The Growth Journey — From Leaves to Fruit
Growing pineapples is a slow but exciting process. The plant first focuses on growing a strong base and healthy leaves.
Here’s what to expect over time:
- 0–3 months: New roots form, and the plant begins to establish itself.
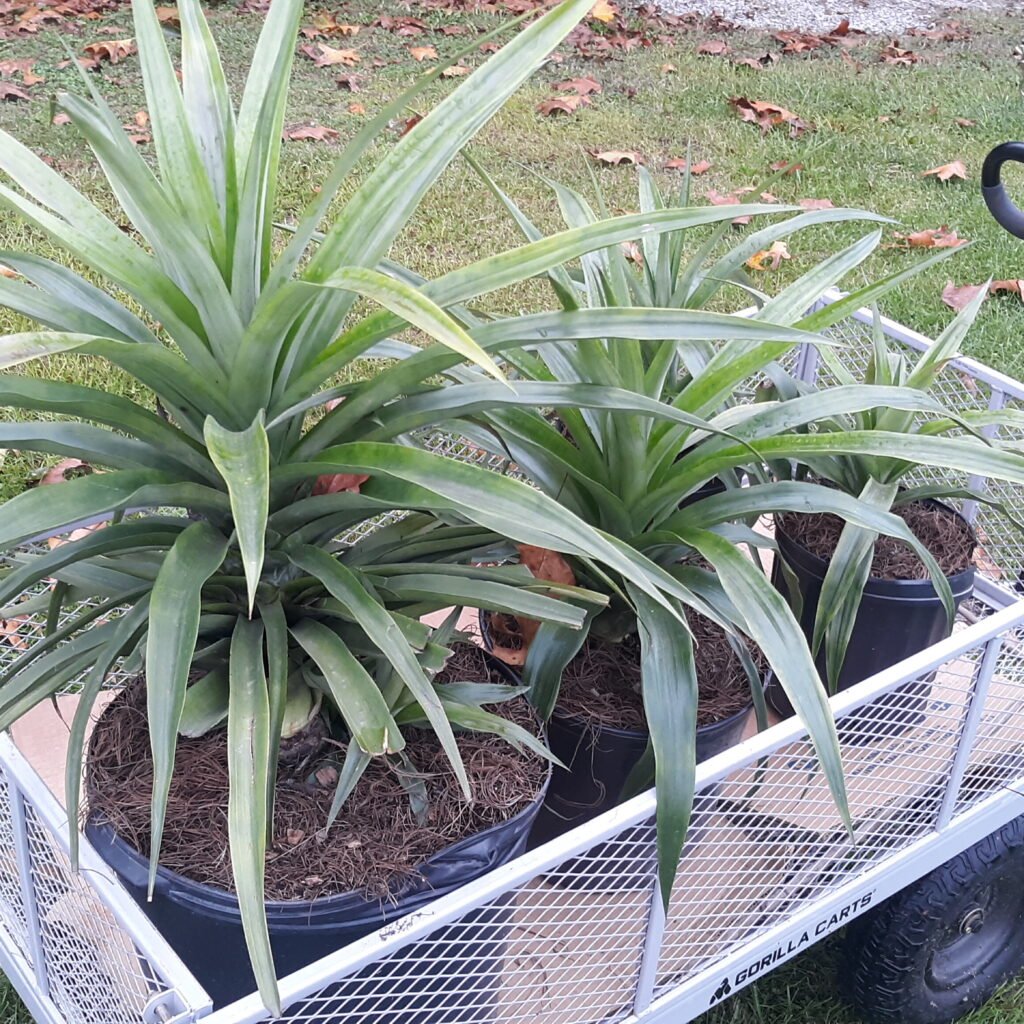
- 3–6 months: The center starts producing more leaves, and the plant becomes bushy.
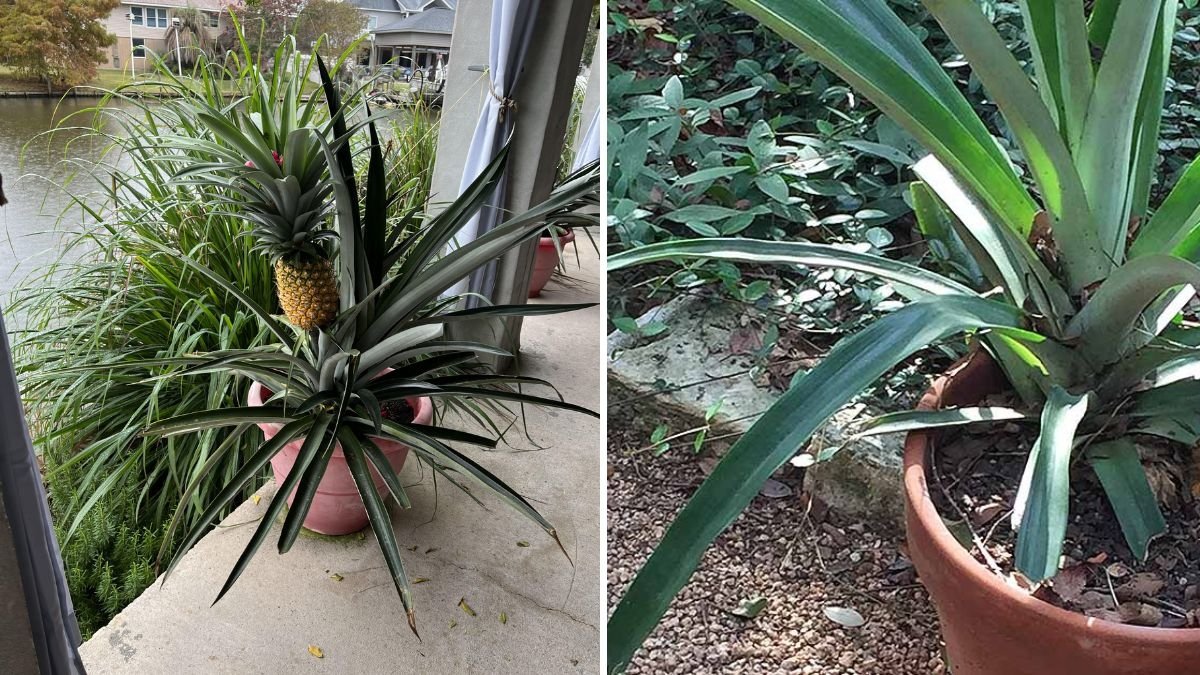
- 6–12 months: The pineapple plant matures and may grow up to 3 feet tall.
- 12–18 months: Under good conditions, the plant will produce a flower stalk that later turns into a fruit.
Be patient — pineapples grown from crowns usually take 18–24 months to bear fruit.
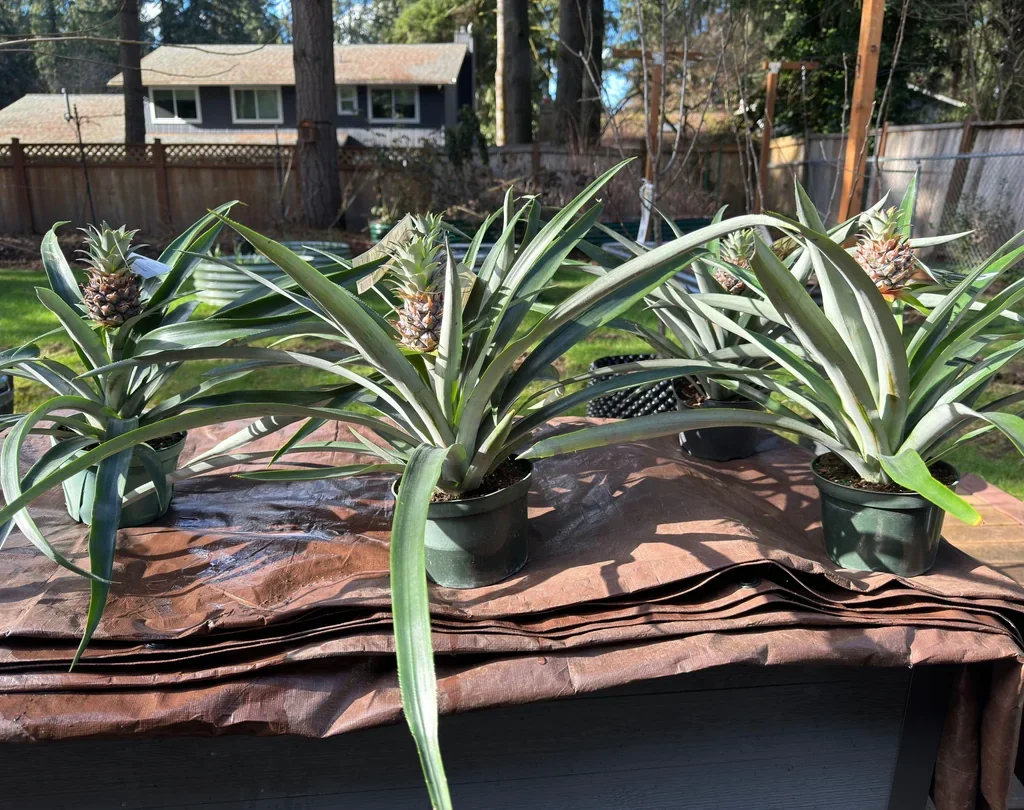
Step 9: Flowering and Fruiting Stage
The flowering stage is one of the most rewarding parts of growing pineapples. You’ll notice a red or pinkish flower emerging from the center of the plant, which gradually develops into a small fruit.
During this stage:
- Continue to provide plenty of sunlight.
- Feed the plant with potassium-rich fertilizer (like banana peel compost) to boost fruit size and sweetness.
- Keep watering consistent but moderate.
As the weeks go by, the small pineapple will grow larger and start turning golden yellow — a sign that it’s ripening.
Step 10: Harvesting Your Homegrown Pineapple
When the pineapple turns fully yellow and emits a sweet aroma, it’s ready for harvest! Use a sharp knife to cut the fruit from the base.
You can even use the new top of this pineapple to grow another plant — continuing the sustainable cycle.
Bonus tip: After harvesting, your main pineapple plant will produce small side shoots called “suckers” or “slips.” These can also be replanted to grow new pineapple plants, giving you multiple harvests from one parent plant.
Step 11: Common Problems and How to Fix Them
- Yellow leaves: Usually a sign of overwatering. Let the soil dry before watering again.
- No fruit: Insufficient sunlight or nutrition. Ensure at least 6 hours of sunlight daily and regular fertilizing.
- Slow growth: Can happen during winter. Move the plant indoors to a warm spot.
- Pests: Use neem oil or insecticidal soap to manage infestations naturally.
Step 12: Sustainability Benefits
Growing pineapples in waste containers not only saves money but also supports a sustainable lifestyle. You’re reducing plastic waste, improving air quality, and creating a mini tropical garden at home — all while enjoying the satisfaction of growing your own fruit.
You can even decorate or paint your waste containers to make them look beautiful and creative. It’s a fun project for families, kids, and anyone who loves eco-friendly gardening.
Final Thoughts
Growing pineapples in waste containers is a fantastic example of how creativity and sustainability can come together in gardening. You don’t need a big yard or expensive pots — just a used container, a bit of sunlight, and some patience.

From a simple pineapple top to a thriving plant that produces sweet, juicy fruit, the journey is incredibly fulfilling. Plus, you’ll be doing your part to reuse waste and live more sustainably.
So next time you finish eating a pineapple, don’t throw away that crown — plant it in an old container and start growing your own tropical paradise right at home!
Leave A Comment