Malabar spinach, scientifically known as Basella alba or Basella rubra, is a unique leafy green that thrives in hot and humid climates, making it an excellent alternative to traditional spinach. Unlike common spinach, which tends to bolt in high temperatures, Malabar spinach flourishes during summer and produces thick, succulent leaves that are perfect for stir-fries, soups, and salads. In this guide, we’ll explore everything you need to know to grow this heat-loving supergreen successfully at home.
What is Malabar Spinach?
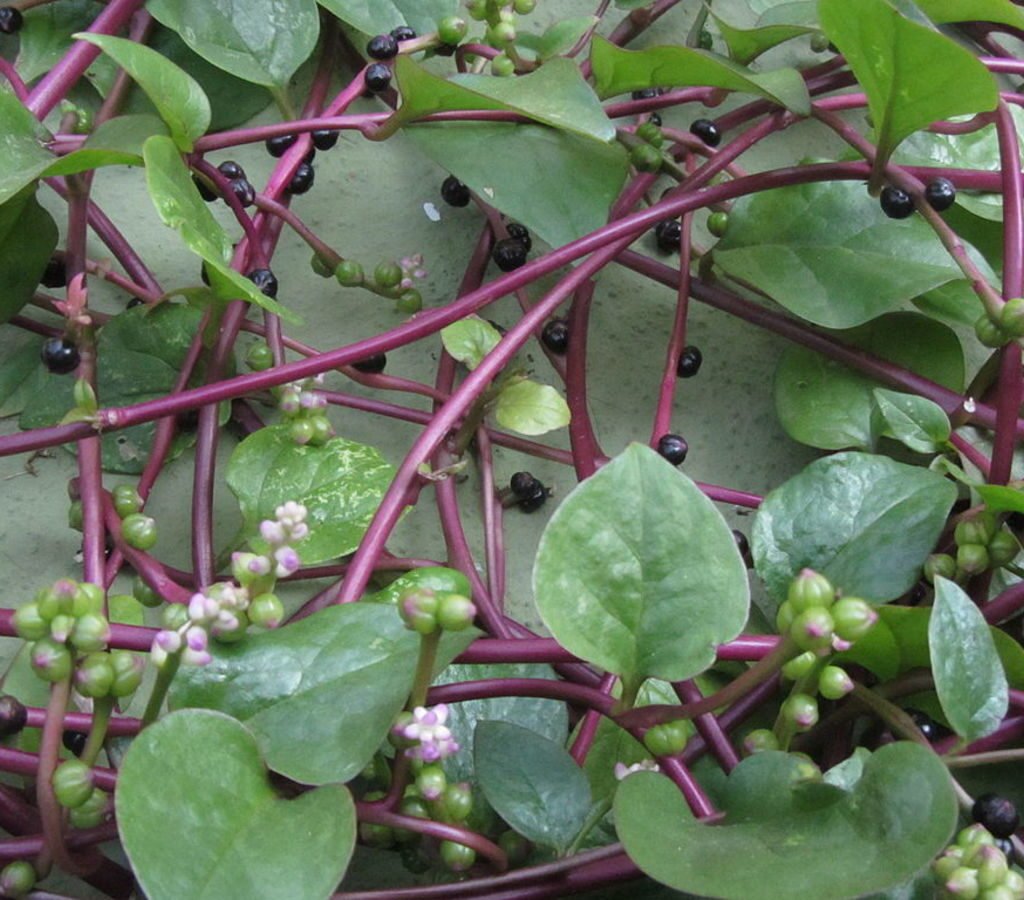
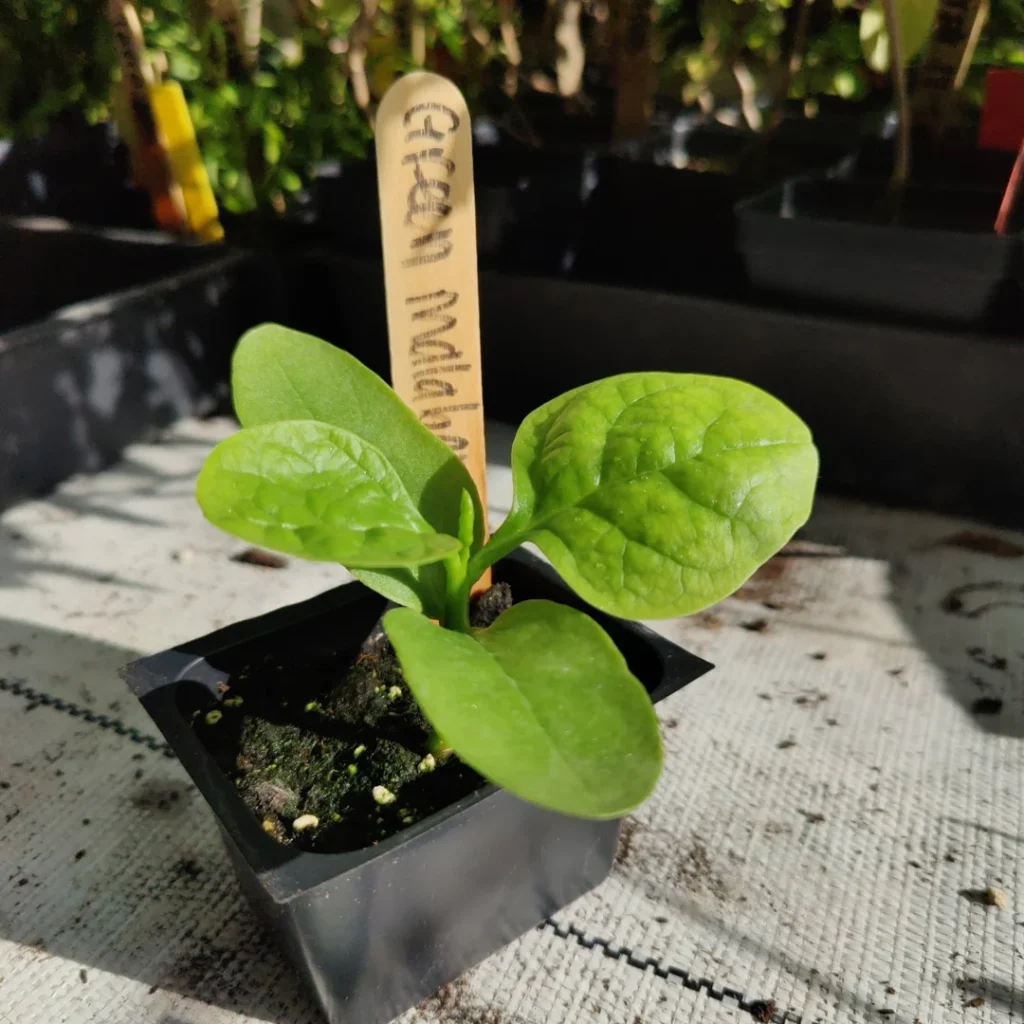
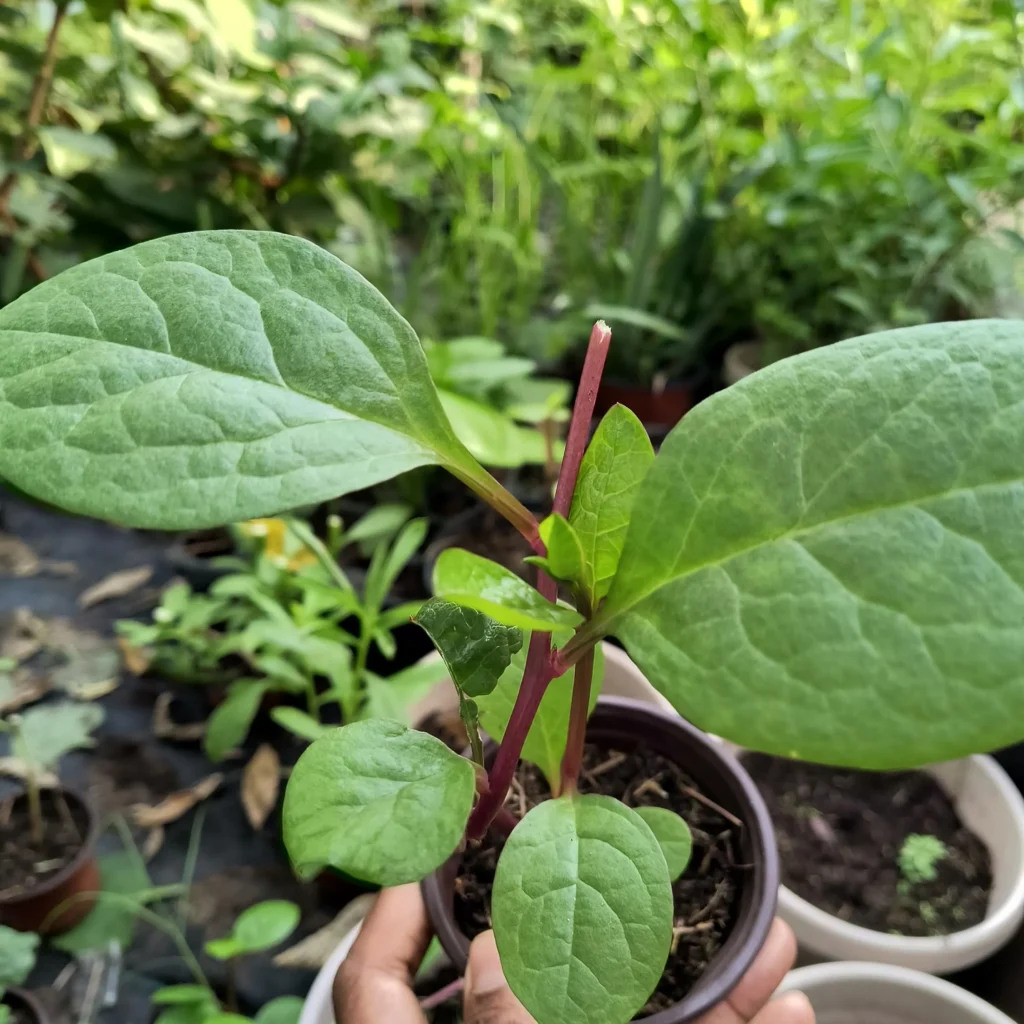
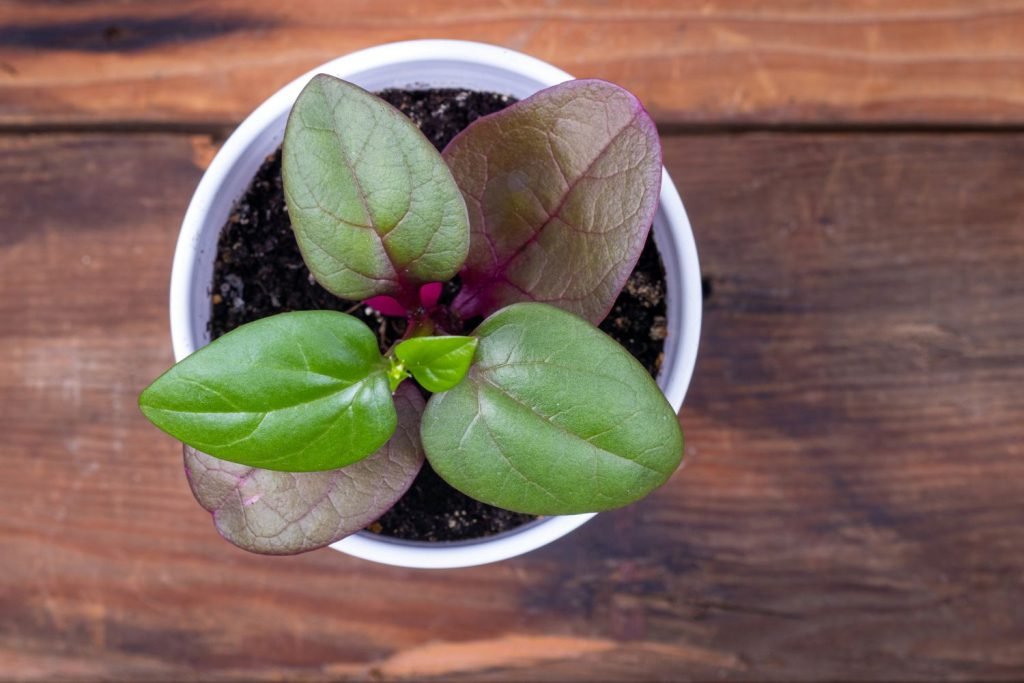
Malabar spinach is a fast-growing, vining plant native to tropical Asia and Africa. It is a climber that can grow several feet in a single season and produces thick, glossy, heart-shaped leaves. There are two main varieties:
- Green-stemmed Malabar spinach (Basella alba): Mild flavor, ideal for fresh salads and cooking.
- Red-stemmed Malabar spinach (Basella rubra): Slightly tangy taste and vibrant stems, which add color to dishes.
This leafy green is packed with nutrients, including vitamins A and C, iron, calcium, and antioxidants, making it a powerhouse for your diet. Its unique mucilaginous texture also makes it a great natural thickener for soups and stews.
Why Grow Malabar Spinach?
Growing Malabar spinach in your garden offers several advantages:
- Heat-tolerant: Unlike regular spinach, it thrives in hot summer conditions without bolting.
- Fast-growing: You can harvest leaves within 4–6 weeks of planting.
- Continuous harvest: Regular pruning encourages new growth, providing fresh greens all season.
- Low maintenance: Resistant to many common pests and diseases.
- Nutrient-rich: Adds iron, vitamins, and antioxidants to your diet.
It’s an ideal choice for home gardeners who struggle to grow traditional spinach during the warmer months.
Choosing the Right Variety
When selecting Malabar spinach seeds or cuttings, consider the following:
- Green-stemmed variety: Mild flavor, faster growth, tender leaves.
- Red-stemmed variety: Slightly stronger flavor, colorful stems, and visually appealing in dishes.
For beginners, the green-stemmed variety is easier to manage, while experienced gardeners may enjoy the visual appeal and taste of the red-stemmed type.
Materials Needed for Planting
Before planting, gather these essentials:
- Malabar spinach seeds or cuttings – Seeds germinate easily, but cuttings provide faster growth.
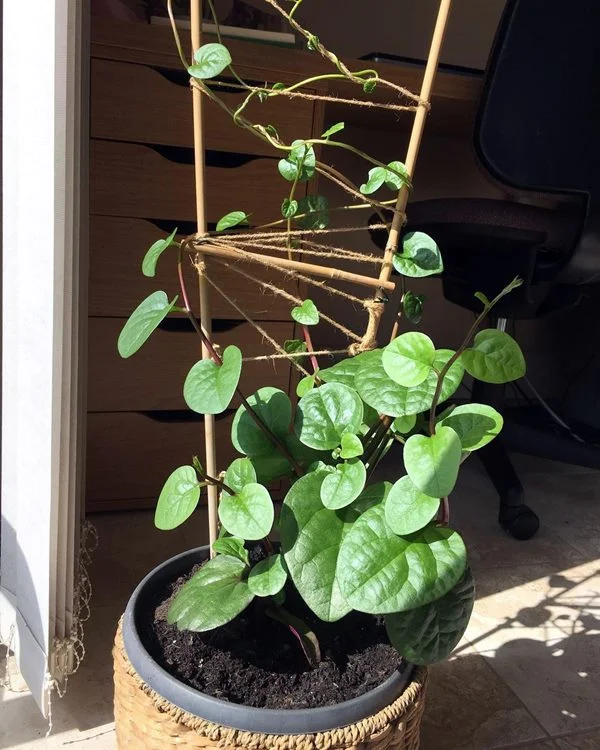
- Trellis or support – This vining plant needs support to climb.
- Containers or garden beds – Well-draining soil is key.
- Soil – Rich, loamy soil with organic matter.
- Fertilizer – Organic compost or liquid fertilizer for lush growth.
- Water source – Malabar spinach prefers consistent moisture.
Optional: Grow bags or hanging baskets for small spaces.
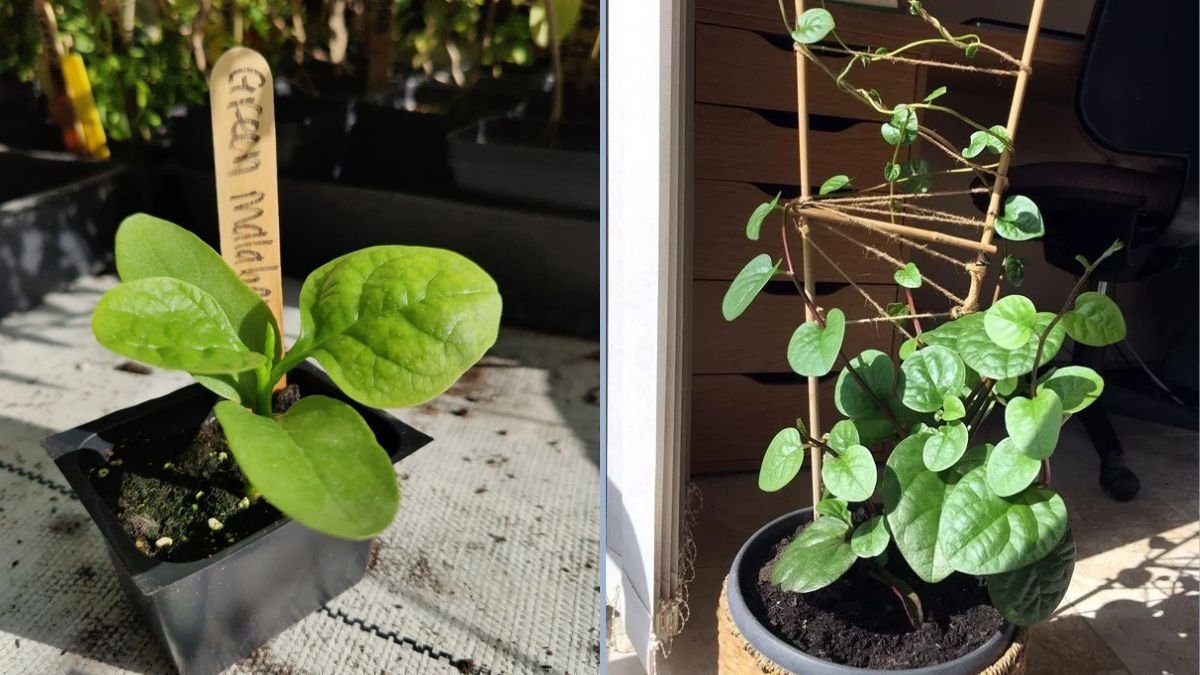
Step 1: Propagating Malabar Spinach
Malabar spinach can be propagated through seeds or cuttings.
From Seeds:
- Soak seeds in warm water overnight to speed up germination.
- Sow seeds about ½ inch deep in a seed tray or directly in the soil.
- Keep the soil consistently moist and in a warm location.
- Seeds germinate in 7–14 days, depending on temperature and humidity.
From Cuttings:
- Take a 6–8 inch cutting from a healthy Malabar spinach plant.
- Remove lower leaves and place the cutting in water or moist soil.
- Roots will develop in 1–2 weeks.
- Once roots are strong, transplant the cutting into your garden or container.
Cuttings are ideal for gardeners looking for a faster and guaranteed growth method.
Step 2: Preparing the Growing Area
Malabar spinach thrives in warm, sunny locations.

- Soil: Enriched with compost or organic matter for nutrient-rich growth.
- Containers: Ensure at least 8–12 inches depth for proper root development.
- Trellis or support: Since it’s a climber, provide a trellis, fence, or stakes to allow vertical growth.
- Sunlight: Full sun for at least 6–8 hours per day for optimal growth.
For small spaces, vertical gardening with Malabar spinach is a perfect solution, as it grows vigorously upwards instead of spreading horizontally.
Step 3: Planting Malabar Spinach
- Spacing: Plant seeds or cuttings 12–18 inches apart to avoid overcrowding.
- Depth: Sow seeds about ½ inch deep or plant cuttings with roots just below the soil surface.
- Watering: Keep the soil moist but not waterlogged.
Once planted, the vines will start climbing the trellis and producing tender leaves in just a few weeks.
Step 4: Watering and Fertilizing
Malabar spinach loves consistent moisture, especially during the hot summer months:
- Watering: Water 2–3 times a week or whenever the soil feels dry on the surface. Mulch around the base to retain moisture.
- Fertilizing: Apply organic compost or liquid fertilizer every 2–3 weeks for lush, healthy leaves.
Tip: Avoid excessive nitrogen fertilizers, which may encourage leaf growth but weaken stems.
Step 5: Maintaining Malabar Spinach
- Pruning: Regularly trim leaves to encourage new growth and prevent flowering.
- Support management: Guide vines on the trellis to avoid tangling.
- Pest control: Keep an eye out for aphids, caterpillars, and snails. Organic sprays or manual removal work well.
- Weeding: Remove weeds that compete for nutrients and water.
Step 6: Harvesting Malabar Spinach
Malabar spinach is fast-growing, and you can start harvesting 4–6 weeks after planting:
- Method: Cut the stems 2–3 inches above the base to encourage regrowth.
- Frequency: Harvest every 1–2 weeks for continuous production.
- Optimal size: Leaves are tender and best for cooking when 6–10 inches long.
Tip: Harvest early in the morning for maximum freshness and flavor.
Cooking and Enjoying Malabar Spinach
Malabar spinach is versatile in the kitchen:
- Stir-fries: Sauté leaves with garlic, chili, and soy sauce.
- Soups and stews: Use leaves as a thickening ingredient due to their natural mucilage.
- Salads: Young leaves are tender and mild-flavored for fresh salads.
- Smoothies: Blend leaves for nutrient-packed drinks.
Its slightly succulent texture makes it perfect for both raw and cooked dishes.

Tips for a Thriving Malabar Spinach Garden
- Vertical growth: Always provide strong support for climbing.
- Regular pruning: Prevents flowering and encourages continuous leaf production.
- Sunlight: Ensure full sun for optimal growth, especially in hot climates.
- Companion planting: Plant with herbs like basil or coriander to deter pests.
- Rotation: Rotate crops each season to prevent soil depletion and diseases.
Common Problems and Solutions
| Problem | Cause | Solution |
|---|---|---|
| Yellowing leaves | Overwatering or nutrient deficiency | Adjust watering and fertilize with compost |
| Bolting or flowering | Stress or high temperatures | Regularly prune vines to delay flowering |
| Pests (aphids, caterpillars) | Insects feeding on leaves | Use neem oil or manually remove pests |
| Weak vines | Lack of sunlight or support | Ensure full sun and proper trellis support |
Final Thoughts
Malabar spinach is a fantastic heat-loving alternative to traditional spinach. With its rapid growth, nutrient-rich leaves, and ability to thrive in hot weather, it’s perfect for gardeners in tropical or summer-prone regions. Whether you have a backyard, balcony, or container garden, growing Malabar spinach is easy, rewarding, and ensures a continuous supply of fresh, delicious greens.
By following this guide, you’ll be able to propagate, plant, maintain, and harvest Malabar spinach with ease. Remember, consistent watering, proper trellis support, and regular pruning are the keys to a successful garden full of vibrant, healthy leaves.
Start growing Malabar spinach today and enjoy the benefits of a heat-tolerant, nutrient-packed, and versatile leafy green in your meals all season long!
Leave A Comment