Will My 2-Year-Old Native American Pawpaw Tree Bear Fruit? A Complete Guide to Growing and Fruiting This Unique Native Fruit

Will My 2-Year-Old Native American Pawpaw Tree Bear Fruit? A Complete Guide to Growing and Fruiting This Unique Native Fruit

If you’ve planted a Native American Pawpaw tree (Asimina triloba) and are wondering when you’ll finally get to enjoy its creamy, tropical-flavored fruit, you’re not alone. In the YouTube video “Will I Get Fruit From My 2 YO Native American Pawpaw?”, the gardener takes us through an exciting journey of patience, growth, and discovery — all centered on one of North America’s most unique and underappreciated fruit trees.

The pawpaw is unlike any other native fruit. With flavors reminiscent of banana, mango, and vanilla custard, it’s no surprise that this wild treasure has been called “the American Custard Apple” or “the Banana of the North.” Yet, despite its delicious potential, growing pawpaws successfully — and getting them to fruit — can test even the most patient gardener.

So, will your 2-year-old pawpaw tree give you fruit this year? Let’s explore the fascinating world of pawpaws, from their history and growing needs to how long it really takes before you can enjoy your first harvest.


What Makes the Pawpaw So Special

The Pawpaw (Asimina triloba) is the largest edible fruit native to North America. Long before modern agriculture, Indigenous peoples and early settlers foraged pawpaws along riverbanks, forest edges, and fertile lowlands.

Today, it’s gaining renewed attention from gardeners and permaculture enthusiasts who value native, low-maintenance, and climate-resilient fruit trees. Pawpaws are unique because they belong to the custard apple family (Annonaceae) — the same tropical family as cherimoya and soursop — yet they grow happily in temperate climates.

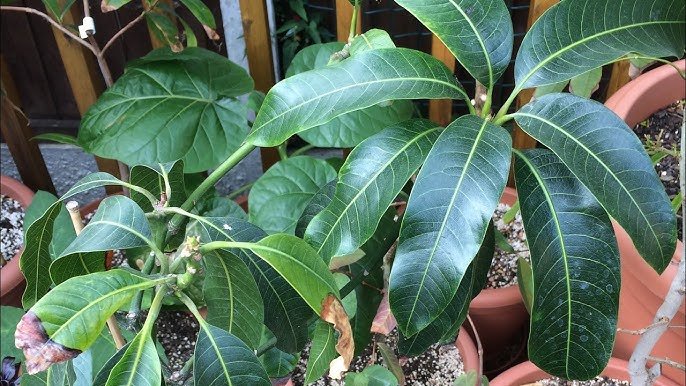
Their large, drooping leaves give them a tropical look, and their soft, custard-like fruit is packed with nutrients — including vitamin C, magnesium, and powerful antioxidants.


Understanding Pawpaw Growth Stages

Before you can expect fruit, it’s important to understand the growth stages of a pawpaw tree:

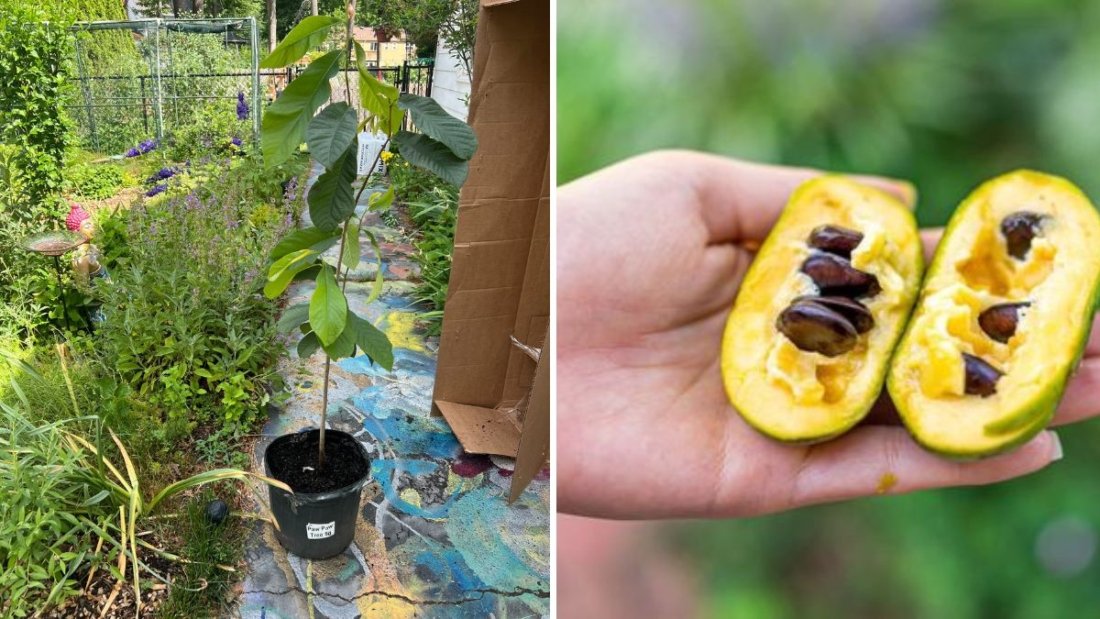
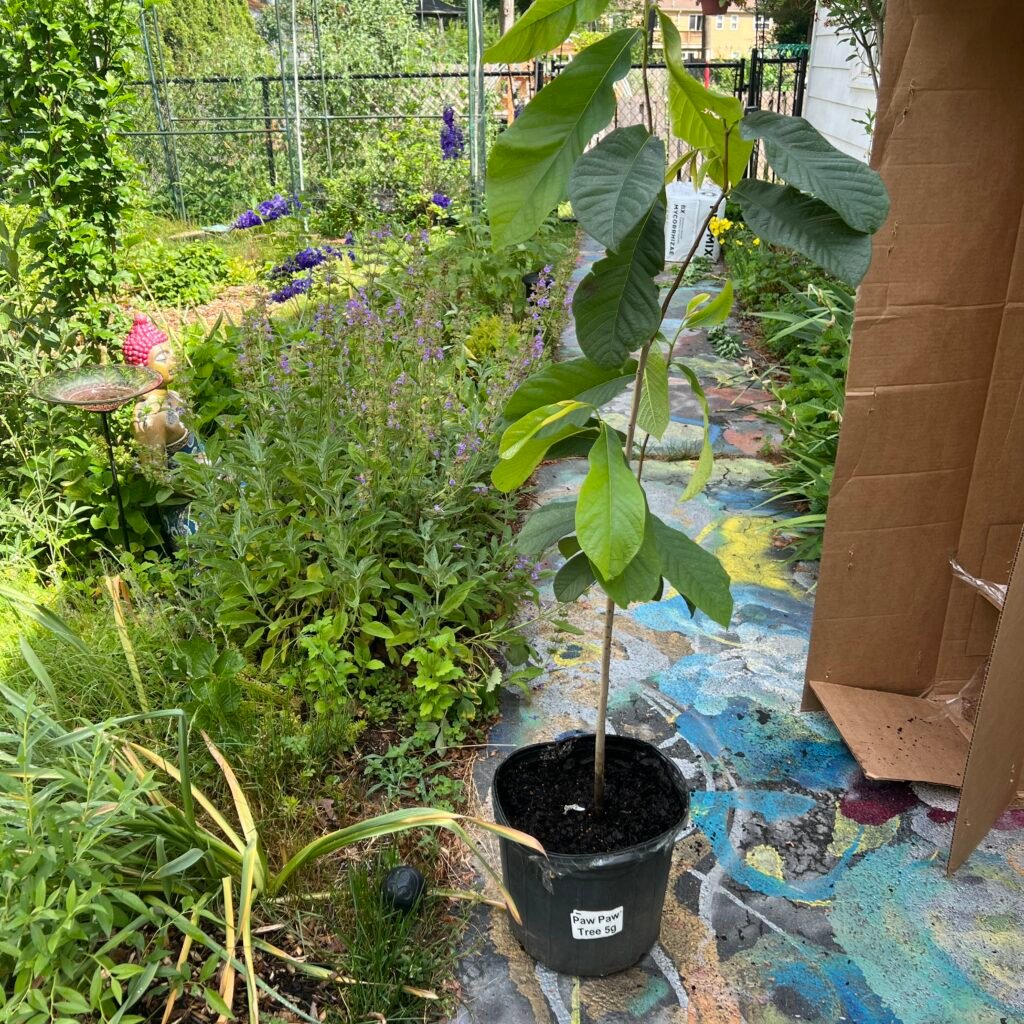
Year 1–2: Establishment Phase

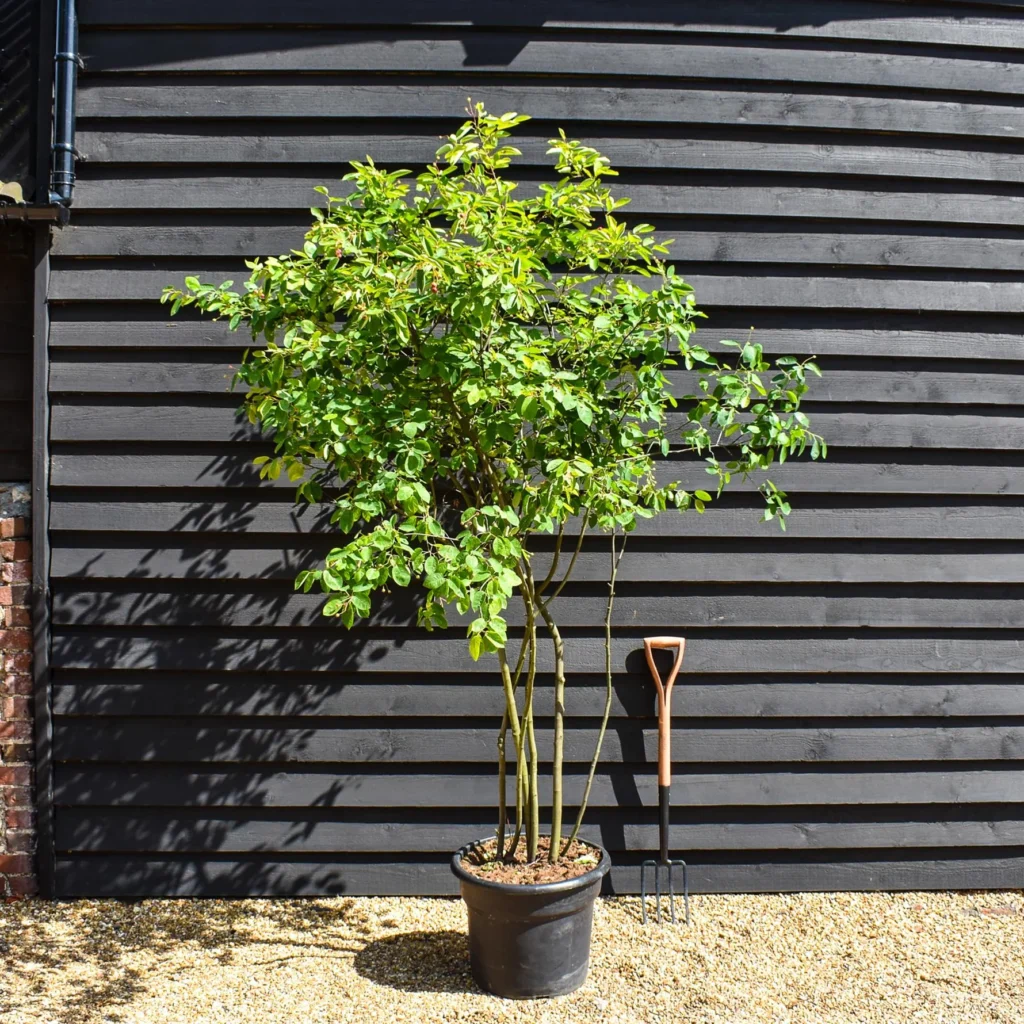
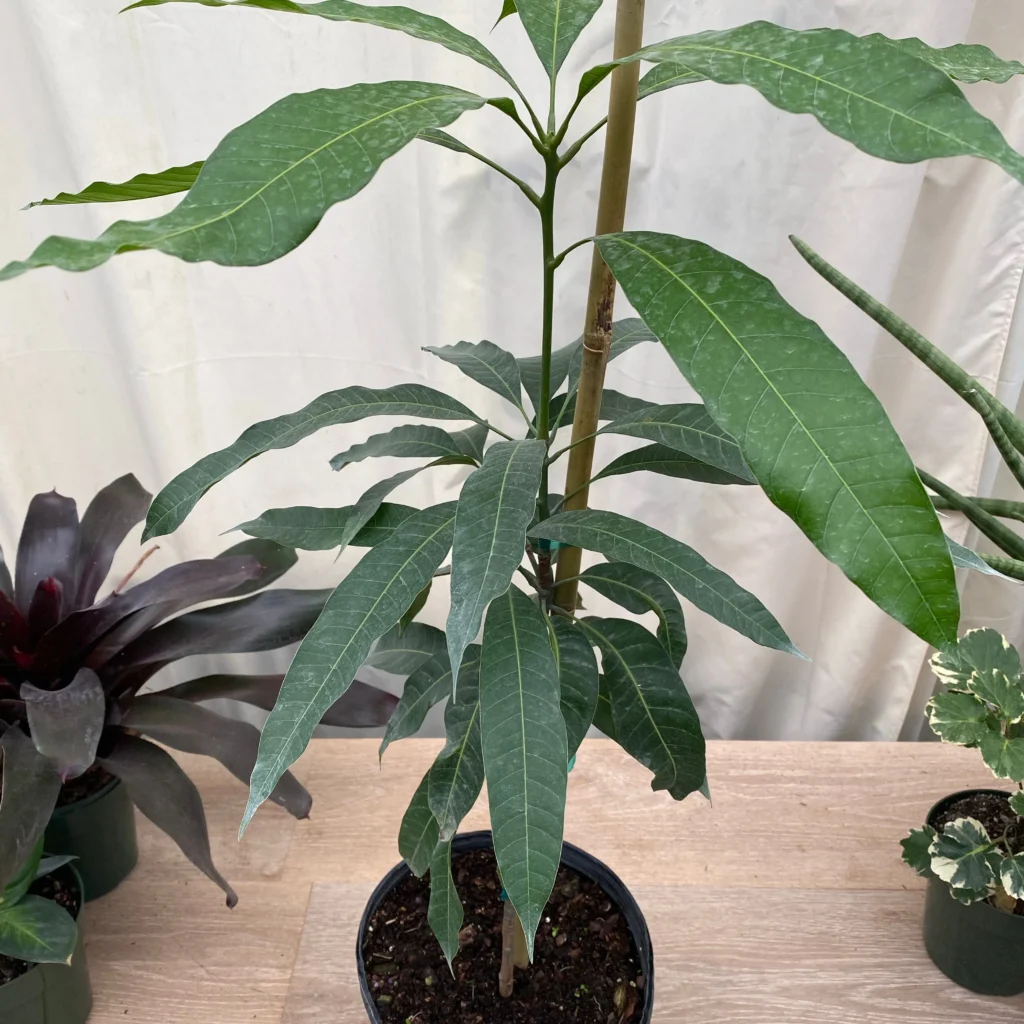
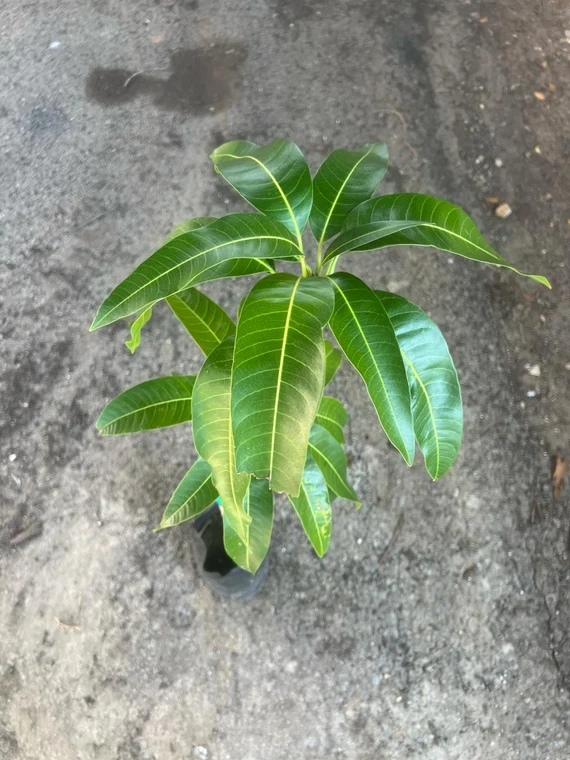
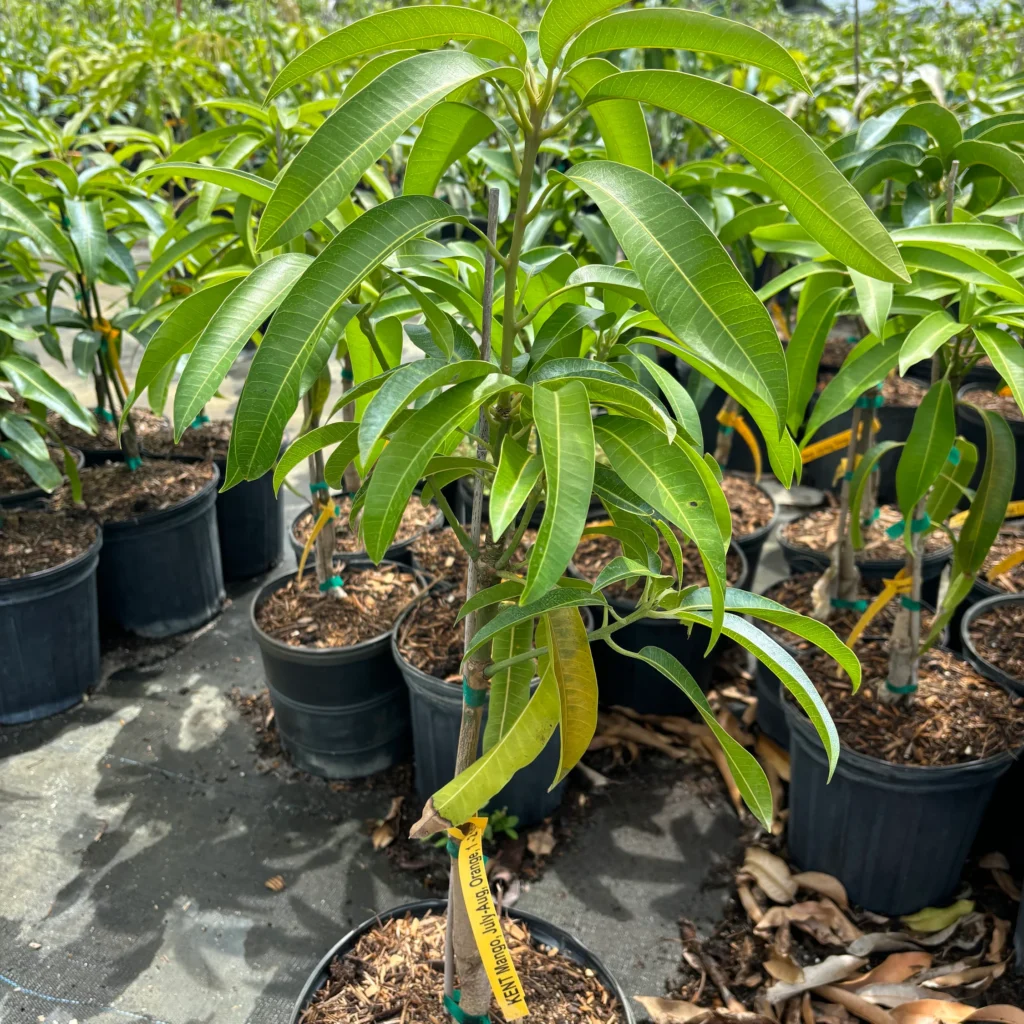
In the first two years, pawpaw trees focus almost entirely on developing their root systems. Their long taproot grows deep into the soil to anchor the tree and reach water and nutrients.
During this time, the above-ground growth may seem slow — just a few leaves and short shoots — but this foundation is critical.

At two years old, your tree is still in its juvenile phase, meaning it’s too young to produce flowers or fruit. Even if it’s healthy and well-cared for, you’ll need a bit more patience before you see blooms.

Year 3–4: Growth and Flower Development

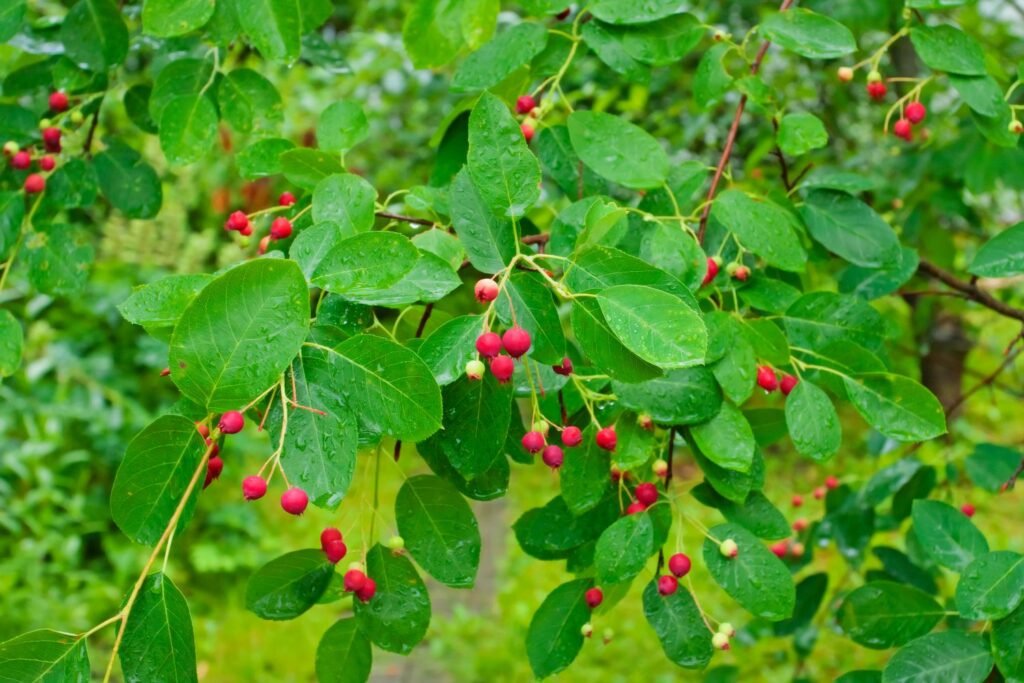
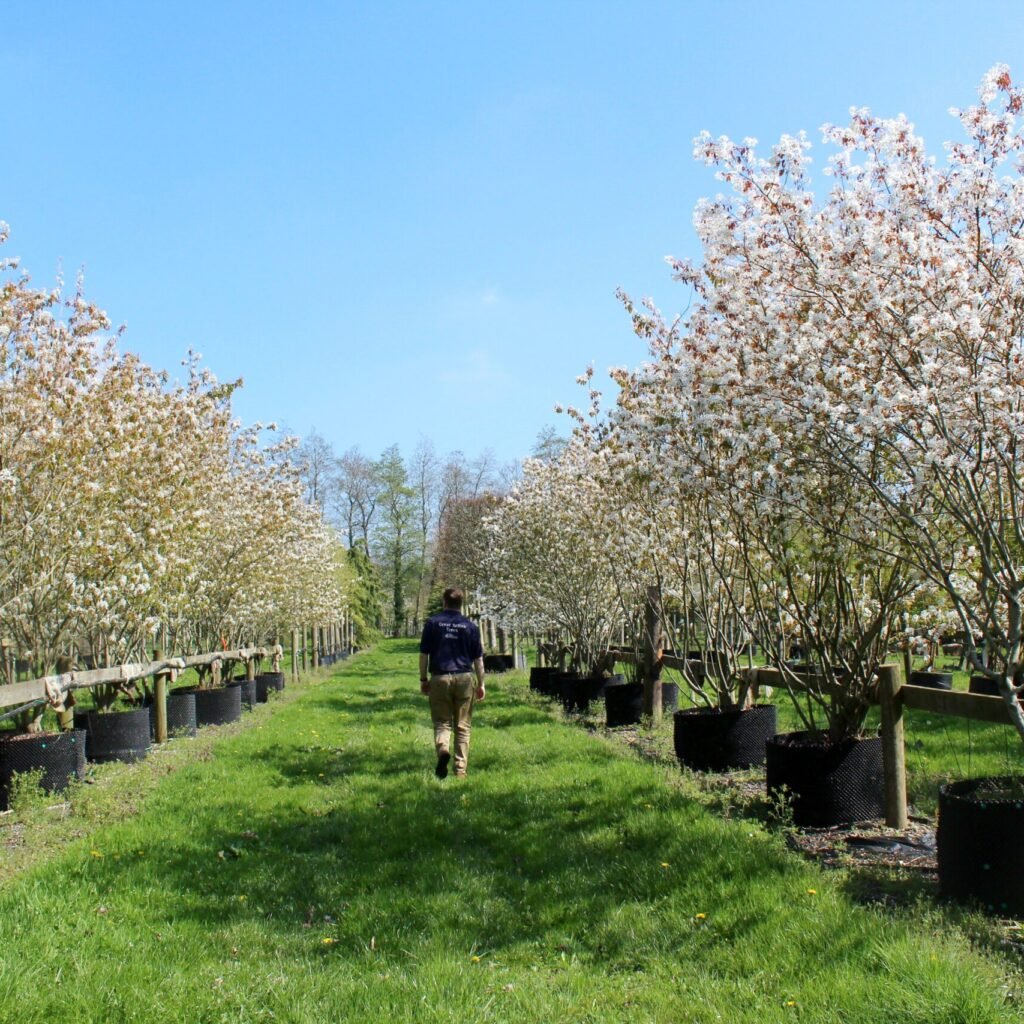
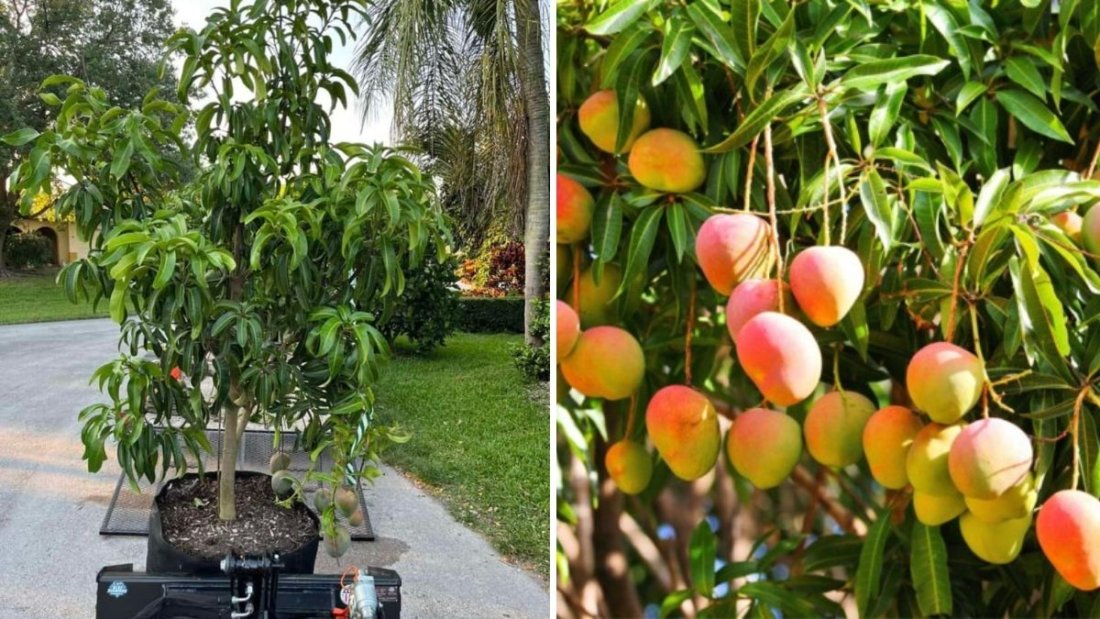
Between years 3 and 4, you’ll start noticing more vigorous leaf growth and possibly your first small maroon flowers appearing in spring. These flowers look exotic and hang like bells beneath the branches.

If conditions are right — adequate sunlight, good pollination, and mature growth — this is when your tree may start to bear its first fruit clusters.

Year 5–8: Full Production Phase

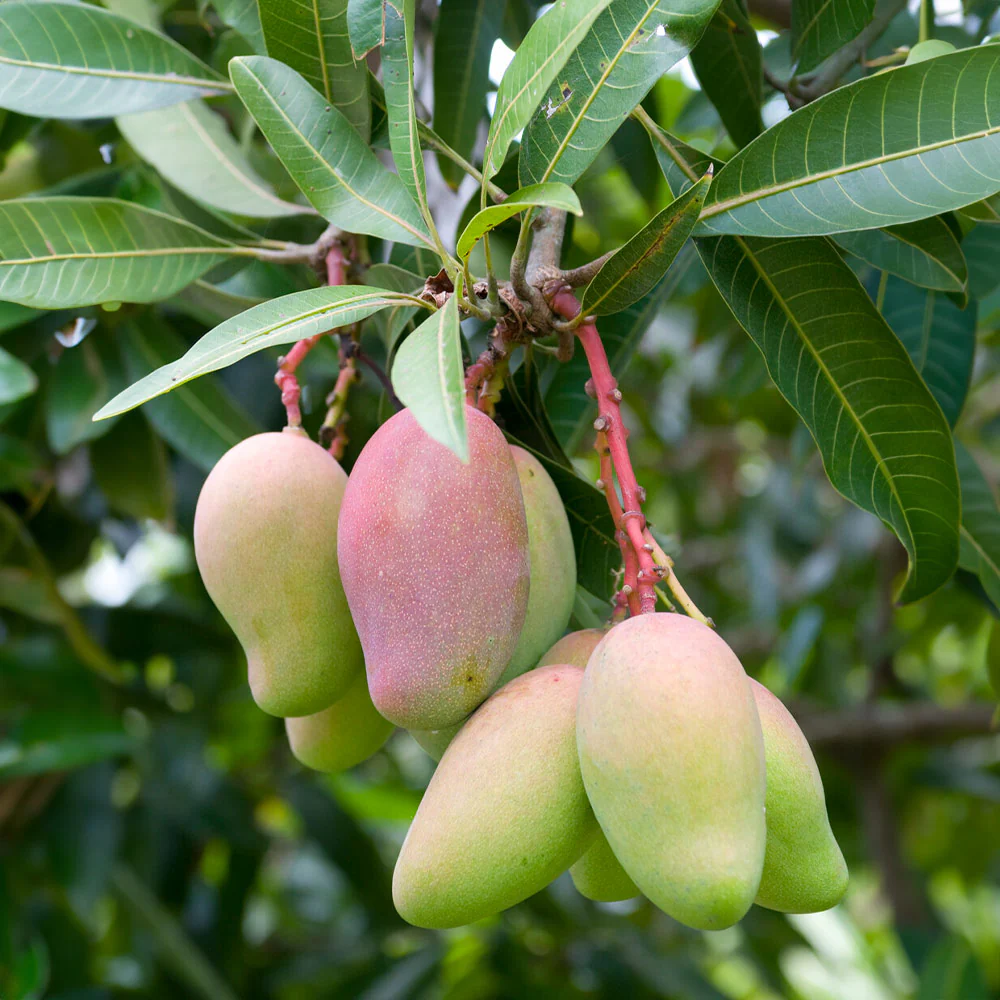
Once mature, pawpaw trees can produce up to 30–50 pounds of fruit per season, depending on variety and care. The fruit typically ripens in late summer to early fall, turning from green to yellowish-brown with a tropical aroma.

So, to answer the big question — your 2-year-old pawpaw tree likely won’t fruit yet, but it’s laying the crucial groundwork for strong, future harvests.


What Pawpaws Need to Thrive

While pawpaws are native and hardy, they do have specific growing requirements that make a big difference in fruit production.

1. Sunlight

In the wild, young pawpaws grow under the partial shade of taller trees. As they mature, they prefer full sun (6–8 hours daily) to produce abundant fruit.
If your 2-year-old pawpaw is still small, providing light shade helps prevent leaf burn — especially in hot climates.

2. Soil Conditions

Pawpaws thrive in rich, well-draining soil with plenty of organic matter. The soil should stay moist but never waterlogged, mimicking their natural habitat near riverbanks.

Adding compost or leaf mold each spring keeps the soil fertile and encourages steady growth.

3. Watering

Young pawpaws need consistent watering, especially in the first few years. Deep watering once a week encourages root growth. Mature trees can tolerate some drought, but they still perform best with regular moisture.

4. Pollination Partners

This is one of the most critical factors for fruiting success. Pawpaws are not self-pollinating — most varieties require two genetically different trees for proper cross-pollination.

Even if your single tree blooms early, it won’t set fruit without pollen from another compatible pawpaw nearby.

You can hand-pollinate using a small brush to transfer pollen between flowers if you have multiple trees or access to nearby plants.

5. Pollinators

Unlike most fruit trees that attract bees, pawpaw flowers are pollinated by flies and beetles, drawn to their slightly musky scent. To help, you can add compost piles or wildflower borders nearby to attract natural pollinators.


Common Challenges in Young Pawpaw Trees

Growing pawpaws can be rewarding, but gardeners often face a few common challenges, especially with young plants:

1. Slow Growth

Pawpaws are slow to start because of their deep taproot development. Don’t be discouraged by minimal above-ground growth in the first two years — this is normal.

2. Transplant Shock

Pawpaws dislike having their roots disturbed. If you started your tree from a nursery pot or seedling, ensure you handle it gently during transplanting.

3. Sun Stress

Young trees can suffer from sun scorch in their first summer. Providing temporary shade cloth or planting near taller companion plants helps them adapt.

4. Cold Damage

While mature pawpaws are cold-hardy down to USDA Zone 5 (and sometimes Zone 4), young trees may need protection from frost. Mulch around the base and use row covers in early spring if needed.


How to Encourage Fruiting in the Coming Years

If your 2-year-old pawpaw is healthy, you’re well on your way to success. Here are some steps to help ensure abundant fruiting when the time comes:

1. Plant a Second Variety

If you only have one pawpaw, consider adding a second genetically distinct cultivar. Popular options include ‘Sunflower,’ ‘Shenandoah,’ ‘Prolific,’ and ‘Allegheny.’

Cross-pollination dramatically increases fruit yield and size.

2. Feed the Soil

Top-dress your tree each spring with compost or well-rotted manure. Avoid high-nitrogen fertilizers, which encourage leafy growth at the expense of flowers.

3. Prune Lightly

Minimal pruning helps shape the tree and improves airflow, but avoid heavy cutting, as pawpaws naturally grow in an upright, spreading form.

4. Encourage Pollinators

Add native wildflowers, compost piles, or even rotting fruit nearby to attract flies and beetles — the pawpaw’s natural pollinators.

5. Be Patient

Remember: good things take time. A well-cared-for pawpaw tree rewards patience with decades of fruit production, once it matures.


The Flavor and Joy of Pawpaw Fruit

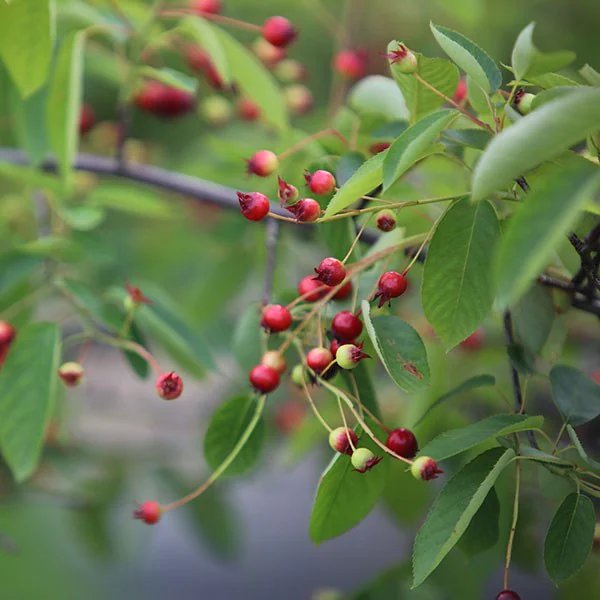
When your tree finally does bear fruit — likely between year 4 and 6 — you’ll understand why so many gardeners fall in love with this native gem.

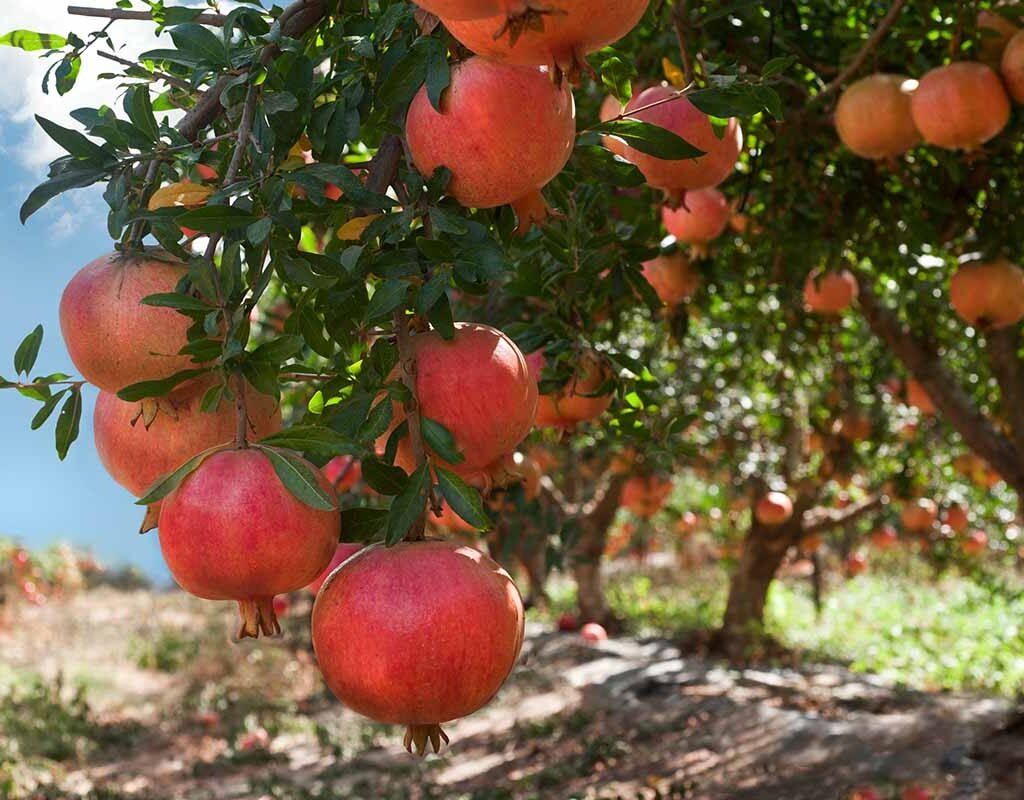
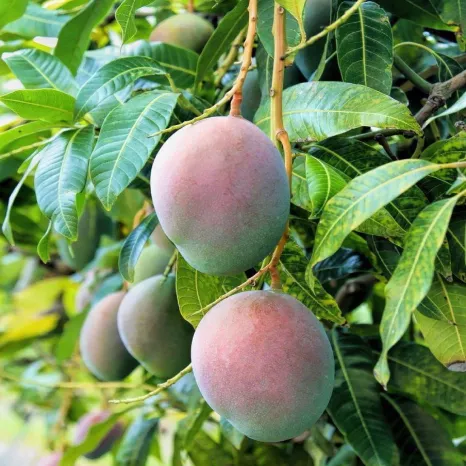
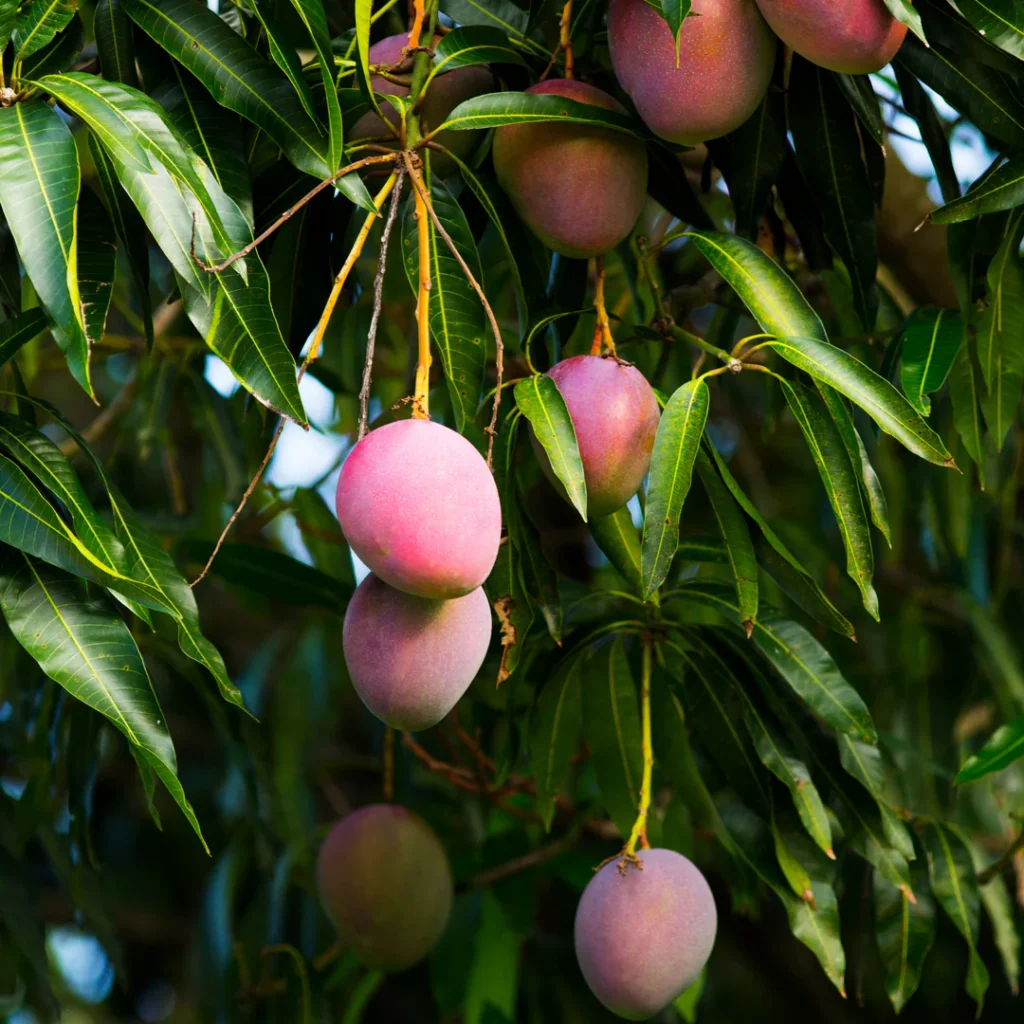
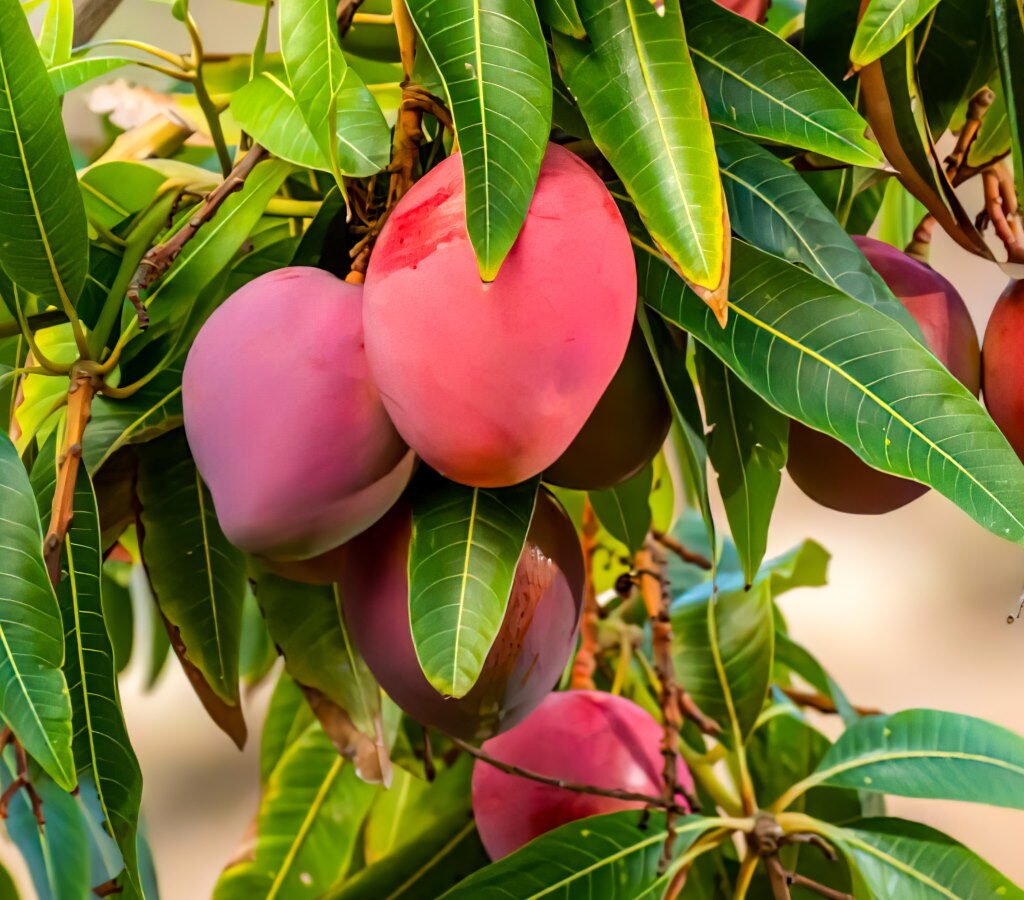
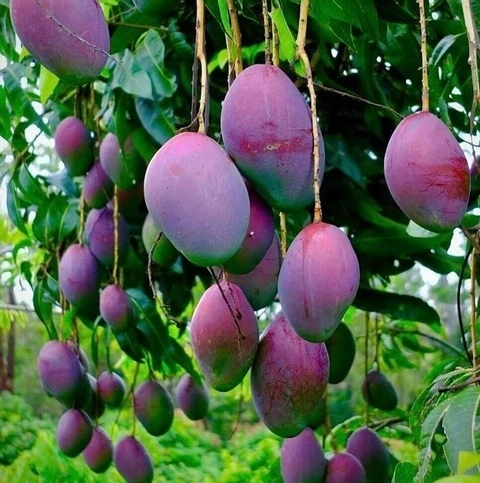
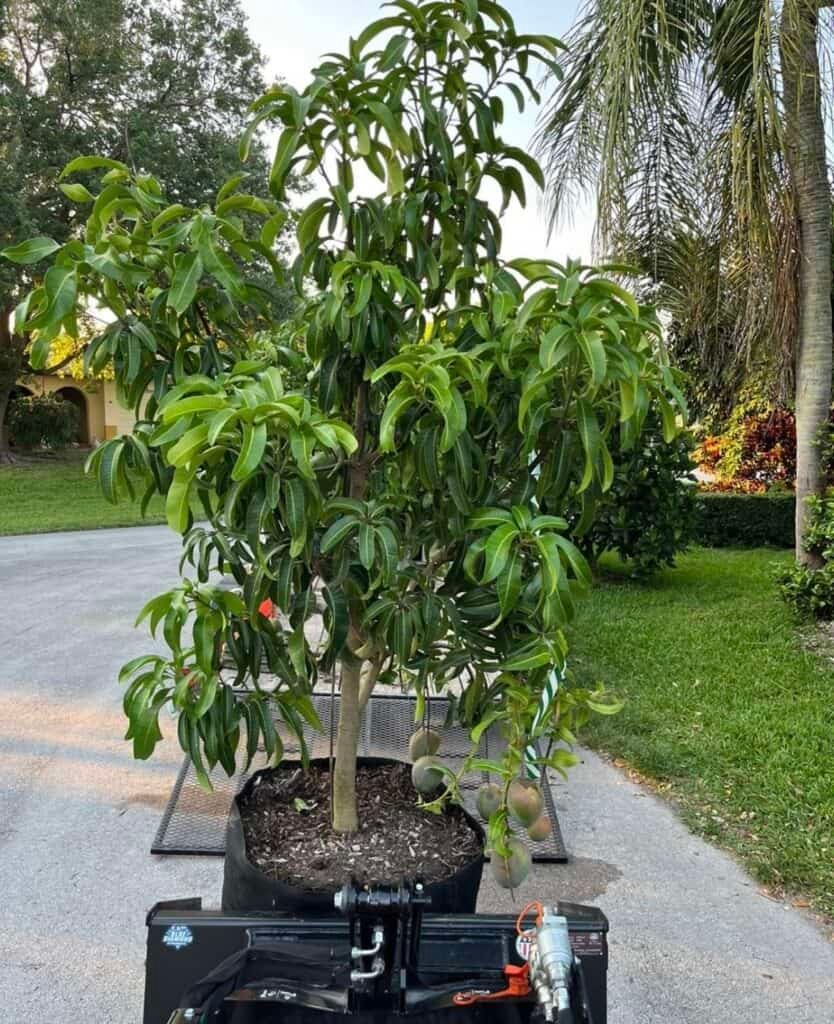
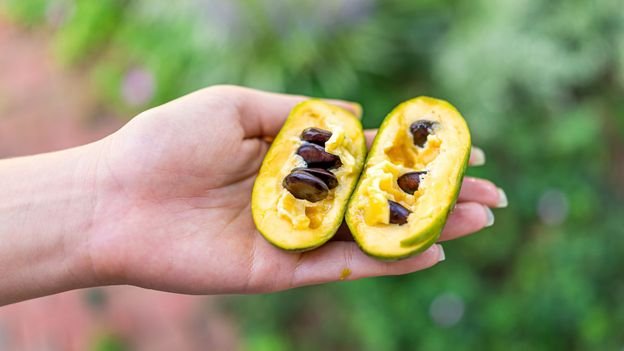
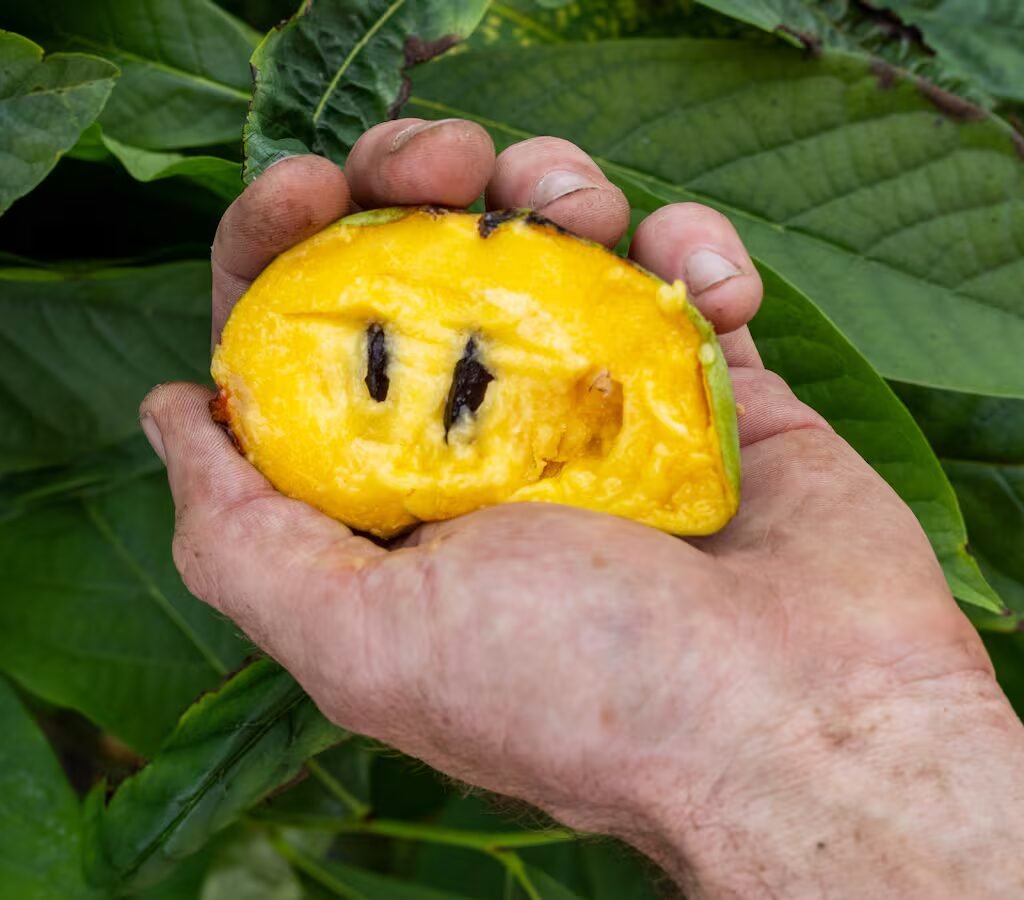
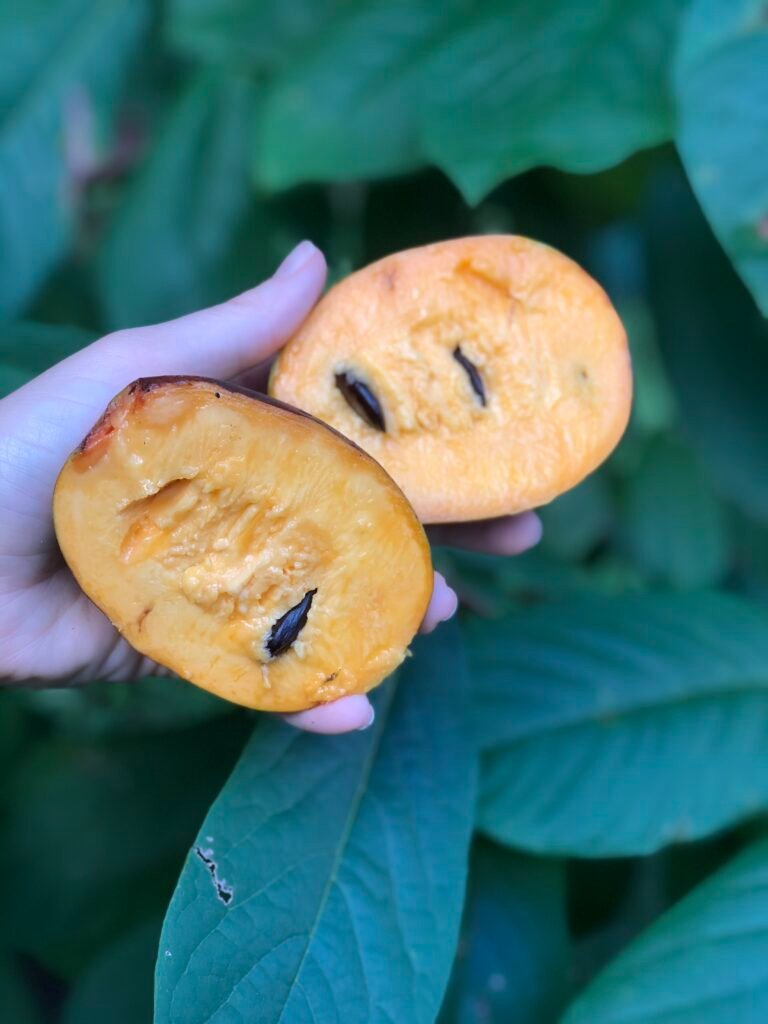
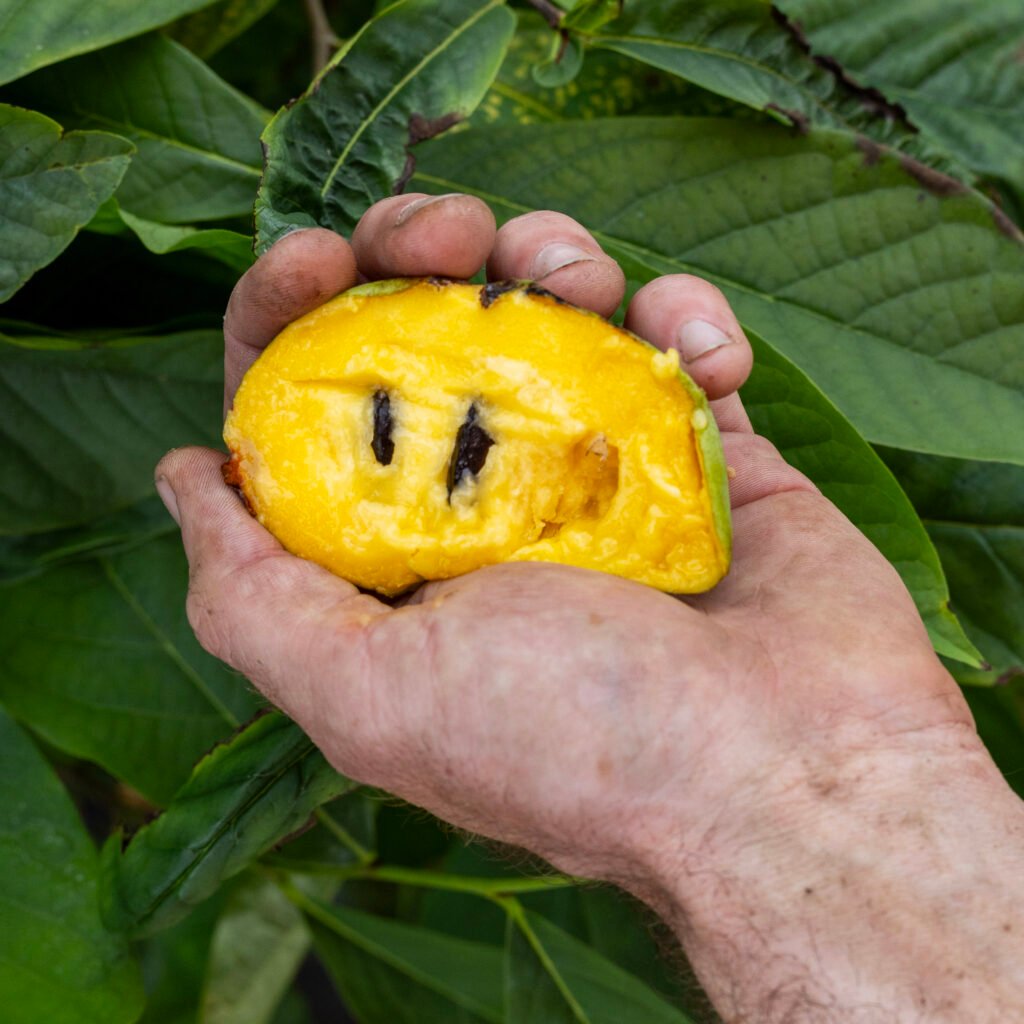
The fruits grow in clusters, resembling small mangoes or green potatoes. Inside, the soft yellow pulp has a custard-like texture and a sweet, tropical aroma. Many describe the flavor as a blend of banana, pineapple, and vanilla pudding.

Pawpaw fruit can be eaten fresh or used in recipes like:

  • Pawpaw ice cream or custard
  • Smoothies and milkshakes
  • Muffins, pies, and quick breads
  • Pawpaw jam or puree for freezing

Fresh fruit spoils quickly, so refrigerate or process them soon after picking.


Conclusion: Patience Pays Off with the Pawpaw

So — will your 2-year-old Native American Pawpaw tree give you fruit this year? Probably not just yet. But what it’s doing now — establishing strong roots, adapting to its environment, and preparing for future growth — is essential groundwork for many fruitful years ahead.

In 2–3 more seasons, with the right care, sunlight, and pollination, you’ll start to see those deep maroon flowers bloom — the first sign that your patience is about to pay off.

The pawpaw teaches us one of gardening’s greatest lessons: true abundance takes time. And when that first golden fruit ripens in your backyard, rich with flavor and history, it’ll be well worth the wait.


Exploring the Chokecherry (Prunus virginiana): A Hidden Gem in Permaculture Gardens – Insights from Ninja Gardening Episode 14

Exploring the Chokecherry (Prunus virginiana): A Hidden Gem in Permaculture Gardens – Insights from Ninja Gardening Episode 14

In Ninja Gardening – Episode 14, we’re taken on an enlightening permaculture walk to explore one of North America’s most underrated native plants — the Chokecherry (Prunus virginiana). While its name might sound intimidating, this hardy shrub or small tree is a true ecological treasure, offering both beauty and function to the landscape. From supporting pollinators and wildlife to providing fruits rich in nutrients and flavor, the chokecherry is a must-have for anyone interested in regenerative gardening and sustainable design.

Let’s dive into the fascinating world of the chokecherry, understand its ecological importance, and learn how you can grow and use this incredible plant in your own permaculture-inspired garden.


The Chokecherry: A Native North American Marvel

Chokecherry (Prunus virginiana) is native to a wide range of regions across North America — from Canada to the northern and central United States. It typically grows as a multi-stemmed shrub or small tree, reaching heights between 6 to 20 feet, depending on the growing conditions.

The plant produces clusters of small white flowers in spring, followed by deep red to dark purple berries by late summer. Despite their astringent taste when raw (hence the name “chokecherry”), the berries become deliciously sweet once cooked or processed into syrups, jams, jellies, or wines.

In permaculture systems, the chokecherry is valued not only for its fruit but also for its role in supporting biodiversity, improving soil health, and enhancing ecological balance.


Why Chokecherry Belongs in Every Permaculture Garden

1. An Abundance of Fruit for Humans and Wildlife

Chokecherry produces heavy crops of small, tart berries that are packed with vitamins A and C, antioxidants, and minerals. While humans can enjoy them in processed forms, the fruits are also a vital food source for birds, mammals, and pollinators.

Wildlife such as robins, waxwings, and grosbeaks feed on the ripe berries, while deer, rabbits, and moose may browse the leaves and young shoots. This makes chokecherry an excellent wildlife-friendly plant that naturally integrates into food forests and hedgerows.

2. A Pollinator Paradise

In spring, the fragrant clusters of white blossoms attract bees, butterflies, and other beneficial insects. These pollinators play a crucial role in maintaining biodiversity and ensuring healthy fruit production across the landscape.

By planting chokecherry, you’re not just growing a fruiting shrub — you’re creating a thriving pollinator habitat that supports the entire local ecosystem.

3. Adaptable and Hardy in Harsh Climates

One of the standout qualities of Prunus virginiana is its ability to thrive in a wide range of conditions. It tolerates both cold northern climates and dry prairie regions, making it an excellent choice for challenging environments like those found in Alaska, the Great Plains, and parts of Canada.

Chokecherry prefers well-draining soil and full sun, but it can adapt to partial shade and even poor or rocky soil. Once established, it requires minimal maintenance — a perfect fit for low-input, sustainable gardens.

4. Soil and Erosion Control

Chokecherry’s strong, fibrous root system helps stabilize soil and prevent erosion on slopes and disturbed lands. This makes it an excellent choice for reclamation projects, windbreaks, and natural hedges.

In permaculture design, chokecherry is often used to form the mid-layer of a food forest, supporting larger canopy trees and protecting smaller understory plants from wind and erosion.

5. Medicinal and Traditional Uses

Indigenous peoples of North America have long recognized the medicinal value of chokecherry. Various parts of the plant — especially the bark and berries — were used in teas, tonics, and remedies for coughs, colds, fevers, and digestive issues.

Today, herbalists still use chokecherry bark extract as a natural cough suppressant and antioxidant tonic. The fruit, when processed properly, provides a powerful nutritional boost that strengthens the immune system.


How to Grow and Care for Chokecherry

Growing Prunus virginiana is relatively simple and rewarding, especially for gardeners who value native species and natural landscapes.

Planting

  • Site selection: Choose a sunny or partially shaded area with well-drained soil.
  • Spacing: Space plants about 6–10 feet apart if creating a hedge or wildlife border.
  • Propagation: Chokecherry can be grown from seed, cuttings, or suckers. Seeds require cold stratification for a few months before germination.

Watering

Keep the soil moist during the first year, but once established, chokecherry is highly drought-tolerant. Overwatering should be avoided to prevent root rot.

Pruning

Prune the shrub in late winter or early spring to maintain shape and remove dead or diseased wood. Chokecherry can form dense thickets through suckering, which can be controlled by selective pruning.

Pest and Disease Management

Chokecherry can occasionally face issues like tent caterpillars or black knot fungus, but these are manageable through pruning and proper plant spacing to encourage airflow.

Companion Planting

Chokecherry pairs beautifully with other native berry-producing plants like serviceberry (Amelanchier), elderberry (Sambucus), and currant (Ribes). Together, they form a biodiverse and productive landscape layer that supports pollinators and wildlife.


Harvesting and Using Chokecherries

By late summer, the berries turn from red to deep purple or nearly black — a sign that they’re ready to harvest. While raw berries can be astringent, they become deliciously rich and sweet when cooked.

Popular Uses of Chokecherries:

  • Jams and jellies: Traditional recipes blend chokecherry juice with sugar and lemon to make flavorful preserves.
  • Syrups and sauces: Chokecherry syrup pairs beautifully with pancakes, yogurt, or ice cream.
  • Wine and liqueur: Fermented chokecherry wines have a deep color and tart complexity similar to elderberry wines.
  • Medicinal tonics: Herbalists use dried bark and berries for cough syrups and digestive bitters.

Be sure to remove the seeds before processing, as they contain small amounts of compounds that can release cyanide when crushed. Cooking or boiling the berries neutralizes this safely.


Chokecherry in Permaculture Design

In Ninja Gardening Episode 14, the permaculture walk highlights how chokecherry fits perfectly into ecological landscape design. It serves multiple purposes:

  • Food source for people and wildlife
  • Habitat and shelter for beneficial insects
  • Windbreak and soil stabilizer
  • Aesthetic value with beautiful spring flowers and colorful fall foliage

In permaculture, every plant should have more than one function, and chokecherry excels in this regard. It’s not just ornamental or edible — it’s a keystone species that supports the entire garden ecosystem.


Conclusion: Rediscovering a Forgotten Native Treasure

The Chokecherry (Prunus virginiana) is far more than its name suggests. It’s a resilient, beautiful, and ecologically vital plant that belongs in every sustainable or permaculture landscape.

Whether you’re cultivating a small homestead garden, a large food forest, or simply a wildlife-friendly backyard, chokecherry offers beauty, biodiversity, and bounty all in one package.

As shown in Ninja Gardening – Episode 14, reconnecting with native plants like chokecherry helps us restore balance to our gardens and ecosystems — reminding us that true abundance often grows wild, just beyond the edge of the forest.

Juneberry (Amelanchier lamarckii): The Beautiful, Edible Shrub Every Gardener Should Grow

Juneberry (Amelanchier lamarckii): The Beautiful, Edible Shrub Every Gardener Should Grow

If you’re looking for a plant that’s as ornamental as it is delicious, look no further than the Juneberry, scientifically known as Amelanchier lamarckii. Sometimes called Serviceberry, Shadbush, or Saskatoon, this beautiful deciduous shrub or small tree offers a stunning four-season display — from its early spring blossoms to its rich autumn foliage and sweet, blueberry-like fruit.

Inspired by the YouTube video “Juneberry or Amelanchier lamarckii”, this blog explores everything you need to know about this remarkable plant: how to identify it, why it deserves a place in your garden, how to grow it successfully, and how to make the most of its nutritious fruit.


What Is a Juneberry?

The Juneberry (Amelanchier lamarckii) is a multi-stemmed shrub or small tree native to North America but now widely cultivated in Europe for its beauty and fruit. It belongs to the Rosaceae family, which also includes apples, cherries, and roses.

The name Juneberry comes from the timing of its fruit ripening — typically in June. The berries resemble blueberries in size and color but have a distinct, rich flavor that combines hints of apple, almond, and cherry.

Also known as Amelanchier canadensis or Amelanchier alnifolia in different regions, this plant has become increasingly popular as both an edible landscape shrub and a wildlife-friendly garden addition.


The All-Season Beauty of Amelanchier lamarckii

Juneberries aren’t just functional — they’re breathtaking throughout the year:

  • Spring: Early in the season, before most trees leaf out, the shrub bursts into masses of delicate white star-shaped flowers. These blossoms often appear just as the shad fish swim upstream to spawn, which is why the plant is also called Shadbush.
  • Summer: By late spring to early summer, the plant bears clusters of purple to blue-black berries that look similar to blueberries. They’re sweet, juicy, and perfect for fresh eating or cooking.
  • Autumn: The foliage transforms into vibrant shades of orange, red, and gold, rivaling the best maples in fall color.
  • Winter: Its smooth gray bark and graceful structure add subtle elegance to the garden even when bare.

With this combination of ornamental and edible value, Amelanchier lamarckii is a must-have for gardeners who appreciate plants that perform beautifully year-round.


Why You Should Grow Juneberries

The Juneberry is one of those plants that checks nearly every box on a gardener’s wishlist. Here’s why:

  1. Edible and Delicious Fruit:
    The berries are rich in flavor, similar to a mix between blueberry and almond. They’re perfect for pies, jams, syrups, smoothies, or simply eaten fresh from the bush.
  2. Nutrient-Packed Superfood:
    Juneberries are full of antioxidants, fiber, iron, and vitamin C, making them as healthy as they are tasty.
  3. Wildlife Magnet:
    The flowers attract bees and pollinators, while the berries are loved by birds, especially robins, thrushes, and cedar waxwings.
  4. Low-Maintenance Beauty:
    This hardy shrub thrives with minimal care, adapting to a variety of soils and climates.
  5. Four-Season Interest:
    From blossoms to berries to fall foliage, the Juneberry provides color and texture in every season.
  6. Cold-Hardy:
    It’s well-suited to cold climates (USDA zones 3–8), making it ideal for gardeners in northern regions.

Ideal Growing Conditions

To get the most from your Juneberry, it’s important to plant it in the right environment.

Sunlight:

  • Prefers full sun to partial shade.
  • Produces the best fruit yield in full sunlight.

Soil:

  • Grows well in well-drained, loamy soil but tolerates clay and sandy conditions.
  • Slightly acidic to neutral pH (around 6.0–7.0) is ideal.

Watering:

  • Needs consistent moisture, especially when young.
  • Once established, it’s moderately drought-tolerant but appreciates occasional deep watering during dry spells.

Temperature:

  • Hardy down to -30°F (-34°C).
  • Handles both cold winters and warm summers with ease.

Planting and Establishing Juneberries

When to Plant:

  • The best times to plant are early spring or fall, when temperatures are mild.

Planting Steps:

  1. Choose a sunny or lightly shaded location.
  2. Dig a hole twice as wide and as deep as the root ball.
  3. Loosen the soil at the bottom and mix in compost.
  4. Place the plant in the hole, ensuring the root collar is level with the soil surface.
  5. Backfill with soil, firm gently, and water thoroughly.
  6. Mulch around the base to retain moisture and suppress weeds.

Spacing:
If planting multiple shrubs, leave 6–8 feet between each plant to allow room for growth and airflow.


Caring for Juneberry Shrubs

Watering:
Keep soil consistently moist, particularly in the first year. Once established, water deeply once every 1–2 weeks during dry periods.

Mulching:
Apply a 2–3 inch layer of organic mulch (like wood chips or compost) around the base to retain moisture and regulate soil temperature.

Fertilizing:
Feed lightly in spring with an organic, slow-release fertilizer or compost. Avoid over-fertilizing, as excessive nitrogen encourages leafy growth at the expense of fruit production.

Pruning:
Prune in late winter or early spring to remove any dead or crossing branches. Mature shrubs can also be thinned every few years to encourage better air circulation and fruiting.


Pollination and Fruit Production

Most Amelanchier lamarckii plants are self-fertile, meaning they can produce fruit on their own. However, planting two or more shrubs increases cross-pollination, resulting in heavier yields and better-quality berries.

The flowers attract a wide range of bees and other pollinators, making Juneberry an excellent addition to wildlife-friendly gardens and permaculture landscapes.


Common Pests and Diseases

Juneberries are relatively trouble-free but can occasionally face:

  • Birds: The biggest “pest” is often hungry birds! Use netting if you want to harvest the berries for yourself.
  • Aphids: Manage with insecticidal soap or neem oil.
  • Powdery Mildew: Improve air circulation and avoid overhead watering.
  • Rust and Leaf Spot: Keep the area around the shrub clean of fallen leaves and prune out infected stems.

Healthy, well-maintained shrubs usually recover quickly from minor problems.


Harvesting Juneberries

The berries typically ripen in June to early July, depending on the climate. You’ll know they’re ready when they turn deep purple or bluish-black and are slightly soft to the touch.

How to Harvest:

  • Pick clusters by hand or gently shake them into a basket.
  • Avoid picking too early — underripe berries can be tart.
  • Wash thoroughly before eating or processing.

Once harvested, the berries can be eaten fresh, frozen, or turned into a variety of delicious recipes.


Culinary and Medicinal Uses

1. Fresh Eating
Juneberries taste like a blend of blueberry and apple with a hint of almond. They’re delicious eaten straight from the shrub, sprinkled on cereal, or added to salads.

2. Cooking and Baking
Try using Juneberries in:

  • Pies and tarts
  • Muffins and scones
  • Jams, jellies, and preserves
  • Smoothies and yogurt bowls

3. Beverages
The berries can also be made into juices, wines, or syrups, offering a rich, fruity flavor perfect for both sweet and savory recipes.

4. Health Benefits
Juneberries are rich in antioxidants, vitamins, and minerals that support heart health, digestion, and immune function. Indigenous peoples have long used these berries for both food and medicine, valuing them for their high nutritional content.


Companion Planting Ideas

Juneberries blend well with a variety of other plants in the landscape. Consider pairing them with:

  • Lavender or Sage: For fragrance and pollinator attraction.
  • Elderberries or Currants: For a diverse fruit garden.
  • Hostas or Ferns: For shady understory planting beneath larger shrubs.
  • Ornamental grasses: For texture contrast.

These companions not only look great together but also help create a thriving mini-ecosystem in your garden.


Seasonal Care Routine

Spring:

  • Feed with compost or organic fertilizer.
  • Prune for shape and remove dead wood.
  • Watch for early pests like aphids.

Summer:

  • Water regularly and harvest berries.
  • Protect from birds if needed.

Fall:

  • Enjoy the brilliant foliage.
  • Add mulch to prepare for winter.

Winter:

  • Minimal care needed; prune if necessary.
  • Admire its graceful structure against the snow.

Landscaping Uses

Because of its size and versatility, Amelanchier lamarckii can fit beautifully into many garden designs:

  • Specimen Tree: Perfect as a focal point in front yards or mixed borders.
  • Hedgerow Planting: Adds edible value to natural hedges.
  • Pollinator Garden: Early flowers support bees when few other plants are blooming.
  • Wildlife Garden: Provides food and shelter for birds and insects.

Whether you’re designing a cottage garden, native landscape, or modern urban yard, the Juneberry brings elegance and productivity in equal measure.


Final Thoughts

The Juneberry (Amelanchier lamarckii) is truly a gardener’s dream — a plant that feeds the eyes, the body, and the ecosystem. Its early blossoms announce spring, its summer berries nourish both people and wildlife, and its fiery autumn colors bring the growing season to a brilliant close.

Easy to grow, adaptable, and endlessly rewarding, this plant proves that you don’t have to choose between beauty and usefulness. Whether you’re looking to enhance your edible garden, support pollinators, or simply enjoy something extraordinary in your yard, the Juneberry delivers.

So, this year, consider planting a Juneberry shrub — and enjoy the cycle of flowers, fruit, and fall color that makes this species one of the most charming additions to any landscape.

Blue Elderberries: Nature’s Wild Superfruit and How to Grow, Harvest, and Use Them

Blue Elderberries: Nature’s Wild Superfruit and How to Grow, Harvest, and Use Them

Among the most fascinating wild berries of North America, Blue Elderberries (Sambucus nigra ssp. cerulea) stand out for their beauty, hardiness, and health benefits. Often found thriving in the foothills and mountain regions of the western United States, these berries are both ornamental and deeply functional — a rare combination that delights foragers, herbalists, and gardeners alike.

Inspired by the YouTube video “Blue Elderberries,” this post explores the charm and utility of these native shrubs — how they grow, how to identify them, how to cultivate them in your own garden, and how to turn their fruit into delicious and healing foods. If you love native plants, pollinator gardens, or natural remedies, the Blue Elderberry deserves a prominent place in your landscape.


What Are Blue Elderberries?

The Blue Elderberry, also known as Mexican Elderberry or Western Elderberry, is a deciduous shrub or small tree belonging to the Adoxaceae family. It is a close relative of the well-known European black elderberry (Sambucus nigra) and the American elderberry (Sambucus canadensis).

What sets this variety apart is its striking powdery blue fruit — clusters of tiny berries that appear in late summer and early fall, giving the plant its distinctive name. The berries themselves have a dark purple flesh beneath their blue bloom, and they’re prized for their nutritional and medicinal properties.

Native to western North America, Blue Elderberries can be found growing wild from British Columbia through California and into northern Mexico, typically at elevations between 1,000 and 9,000 feet. They often grow along streams, hillsides, and forest edges, thriving in the sunshine and resilient against drought once established.


The Unique Beauty of the Blue Elderberry

One of the reasons gardeners love this plant is its ornamental charm. Blue Elderberry isn’t just useful — it’s visually stunning:

  • Foliage: Bright green, pinnate leaves that add lush texture to the landscape.
  • Flowers: In spring and early summer, the shrub bursts into clusters of creamy white blossoms that attract bees and butterflies.
  • Berries: By late summer, these blossoms mature into dense clusters of small blue berries, coated in a soft, waxy bloom that makes them appear almost frosted.

In full sun, a mature Blue Elderberry can grow 10 to 20 feet tall, forming a multi-stemmed, spreading shrub that provides shade, habitat, and striking visual appeal.


Blue Elderberry vs. Black Elderberry

At first glance, you might confuse the Blue Elderberry with its European or American relatives, but there are clear differences:

FeatureBlue ElderberryBlack Elderberry
Scientific NameSambucus nigra ssp. ceruleaSambucus nigra / Sambucus canadensis
Fruit ColorDusty blue with a waxy bloomDeep purple-black
Native RangeWestern North AmericaEastern North America & Europe
Growth HabitMore tree-like, up to 20 ftShrubby, up to 10 ft
FlavorTart and mildly sweetStrong, earthy, slightly bitter
Climate ToleranceHot, dry summersMoist, temperate climates

Both are valuable for wildlife and humans alike, but Blue Elderberry shines in regions that are too dry or sunny for black elderberries to thrive.


Growing Blue Elderberries in Your Garden

If you live in the western or southwestern United States, growing Blue Elderberries at home is both rewarding and surprisingly easy.

1. Choosing the Right Location
Blue Elderberries love sunshine and can tolerate partial shade but produce best in full sun. Choose a site with good air circulation and space to spread — they can grow quite large.

2. Soil Requirements
They’re adaptable to most soils but prefer well-drained, loamy soil. Avoid overly compacted or waterlogged areas. While they can handle alkaline conditions, adding compost or mulch helps improve soil fertility and moisture retention.

3. Watering Needs
These plants are drought-tolerant once established, but regular watering during the first couple of years helps ensure strong root growth. After that, they need only occasional deep watering in dry periods.

4. Planting Tips

  • Plant in early spring or fall for best results.
  • Space plants 8–10 feet apart if growing multiple shrubs.
  • Mulch around the base to suppress weeds and retain soil moisture.

5. Pruning
Prune in late winter to early spring to remove old wood and encourage new growth. Blue Elderberries produce their fruit on new wood, so regular pruning leads to better yields and a more compact shape.


Companion Plants for Blue Elderberry

Blue Elderberries pair beautifully with other native or pollinator-friendly species. Consider combining them with:

  • Yarrow (Achillea millefolium) for contrast and drought tolerance.
  • California Lilac (Ceanothus) for a stunning native display.
  • Lavender or sage for aromatic, bee-friendly borders.
  • Native grasses for a naturalized, meadow-like look.

This combination creates a garden that’s not only beautiful but also supports pollinators, birds, and beneficial insects.


Pollinators and Wildlife Benefits

Few plants are as ecologically valuable as Blue Elderberries.

  • Pollinators: The fragrant white flowers draw bees, butterflies, and other beneficial insects.
  • Birds: When berries ripen, they attract songbirds like robins, cedar waxwings, and bluebirds.
  • Wildlife Habitat: Dense branches provide nesting cover for small birds and shelter for insects.

If your goal is to create a wildlife-friendly garden, Blue Elderberry should be high on your list.


Harvesting Blue Elderberries

Timing: Harvest typically occurs between July and September, depending on your region. Wait until berries are deep blue and easily detach from the stem.

How to Harvest:

  • Use scissors or pruning shears to cut entire clusters.
  • Avoid eating raw berries — while they’re not as toxic as some other elderberries, it’s safest to cook them first.
  • Wear gloves if you have sensitive skin, as the juice can cause mild irritation.

Once harvested, you can freeze the berries, dry them, or cook them immediately.


Culinary and Medicinal Uses

For centuries, elderberries have been treasured for both their taste and health properties. Blue Elderberries are no exception.

1. Culinary Uses
Cooked Blue Elderberries can be used to make:

  • Elderberry syrup – a classic immune-boosting tonic.
  • Jams and jellies – rich, tart, and full of antioxidants.
  • Wine and cordials – traditional in many regions.
  • Baked goods – mixed into pies, muffins, or sauces.

Their flavor is tangy with mild sweetness, similar to black elderberries but slightly fruitier when cooked.

2. Medicinal Uses
Elderberries have long been used in herbal medicine to support the immune system and fight colds and flu. The berries are high in vitamin C, anthocyanins, and antioxidants, which help reduce inflammation and support overall wellness.

Traditional uses include:

  • Elderberry tea for soothing sore throats.
  • Syrups and tinctures to strengthen immunity.
  • Topical applications for skin health (in salves or creams).

⚠️ Note: Always cook Blue Elderberries before eating. Raw berries and leaves contain compounds that can cause nausea or mild toxicity if consumed in large quantities.


Seasonal Care

Spring:

  • Fertilize lightly with compost.
  • Prune dead or weak stems.
  • Watch for early aphids or powdery mildew.

Summer:

  • Water regularly during dry spells.
  • Enjoy the floral display and pollinator activity.
  • Harvest berries when ripe.

Fall:

  • Collect any remaining fruit.
  • Mulch around the base for winter protection.

Winter:

  • Allow the plant to go dormant.
  • Perform rejuvenation pruning if necessary.

Pests and Diseases

Blue Elderberries are remarkably hardy but can occasionally face:

  • Aphids: Treat with insecticidal soap or neem oil.
  • Powdery Mildew: Improve air circulation and avoid overhead watering.
  • Borers: Keep plants healthy and remove affected stems if necessary.

Generally, elderberries bounce back quickly from minor pest damage, especially when well cared for.


Environmental and Cultural Importance

The Blue Elderberry holds an important place in Native American culture. Many indigenous peoples used its flowers, berries, and wood for food, medicine, and crafts. The hollow stems were fashioned into musical instruments or tools, while the berries were a source of nutritious food and dye.

In modern times, planting native species like the Blue Elderberry helps restore local ecosystems, support biodiversity, and preserve cultural heritage.


Final Thoughts

The Blue Elderberry is far more than just a pretty native shrub — it’s a living connection to nature’s cycles of growth, nourishment, and healing. With its vibrant flowers, powdery blue fruit, and ability to attract pollinators and birds, it’s a powerhouse plant that brings life and vitality to your garden.

Whether you’re drawn by its ornamental charm, its rich heritage, or its practical benefits, cultivating Blue Elderberries is a rewarding experience. They’re resilient, adaptable, and beneficial to both people and wildlife — truly a gift from nature’s own pantry.

So, if you’re looking for a way to blend beauty, utility, and ecology in your garden, plant a Blue Elderberry. Watch it flourish — and enjoy the sight of those brilliant blue berries glowing under the summer sun, a reminder of the natural abundance all around us.

Black Lace Elderberry in Full Glory: The Ultimate Guide to Growing, Caring for, and Enjoying This Stunning Ornamental Shrub

Black Lace Elderberry in Full Glory: The Ultimate Guide to Growing, Caring for, and Enjoying This Stunning Ornamental Shrub

Few garden plants combine elegance, resilience, and versatility as beautifully as the Black Lace Elderberry (Sambucus nigra ‘Black Lace’). With its striking, dark purple-black foliage and soft pink blooms, this ornamental shrub is a true showstopper—earning its reputation as one of the most dramatic and rewarding plants for home gardens.

Inspired by the YouTube video “Black Lace Elderberry in Full Glory!”, this article dives deep into everything you need to know about this remarkable plant: from its captivating appearance and easy care routine to its practical uses in the garden and kitchen. Whether you’re an experienced gardener or just starting out, the Black Lace Elderberry will elevate your landscape with color, texture, and year-round interest.


What Is the Black Lace Elderberry?

The Black Lace Elderberry is a deciduous shrub that belongs to the viburnum family (Adoxaceae). It’s a cultivar of the European elderberry (Sambucus nigra), bred for its unique ornamental foliage and showy flowers.

Unlike its wild relatives, which are known primarily for their medicinal and culinary berries, Black Lace Elderberry is cherished for its deeply cut, almost fern-like leaves that resemble the foliage of Japanese maple trees. The color—an intense purplish-black—contrasts spectacularly with the large clusters of soft pink flowers that appear in early summer.

At maturity, this shrub typically reaches 6 to 8 feet tall and wide, forming a dense, bushy habit perfect for hedges, mixed borders, or as a striking standalone specimen in the garden.


Why Gardeners Love the Black Lace Elderberry

This plant’s popularity has soared in recent years—and for good reason. Here are a few reasons why it’s become a landscape favorite:

  1. Unmatched Ornamental Beauty:
    The finely cut, dark foliage provides dramatic contrast against green plants and bright flowers, making it a centerpiece in any garden.
  2. Showy Flowers and Edible Fruit:
    The fragrant pink flowers bloom in large, flat clusters in late spring to early summer, followed by dark purple-black berries that attract birds and pollinators—and can even be used in cooking or elderberry syrup.
  3. Easy to Grow and Low Maintenance:
    It’s hardy, adaptable, and tolerant of a wide range of soil types and climates. Once established, it requires minimal care.
  4. Cold-Hardy and Versatile:
    Suitable for USDA Zones 4–7, Black Lace Elderberry thrives in both cool and temperate regions.
  5. Deer-Resistant and Pollinator-Friendly:
    The plant naturally resists browsing animals and draws beneficial insects like bees and butterflies.

When you see a mature Black Lace Elderberry in “full glory,” you understand why it’s named so—it looks like a living piece of art, combining the grace of fine foliage with the vibrancy of blooming color.


Ideal Growing Conditions

To keep your Black Lace Elderberry looking its best, it’s important to provide the right growing environment.

Sunlight:

  • Prefers full sun to partial shade.
  • Full sun brings out the richest foliage color. In too much shade, leaves may turn greener and lose their deep black tone.

Soil:

  • Adapts to most soil types, including clay, loam, and sandy soils.
  • Prefers moist, well-drained soil rich in organic matter.
  • Slightly acidic to neutral pH (5.5–7.0) is ideal.

Water:

  • Regular watering helps maintain lush foliage, especially during dry spells.
  • Once established, it’s moderately drought-tolerant but performs best with consistent moisture.

Temperature:

  • Hardy to -30°F, this plant handles cold winters well.
  • In hot climates, provide afternoon shade to protect from heat stress.

Planting Black Lace Elderberry

1. Choosing the Right Spot:
Pick a location where your shrub can shine—somewhere it can grow freely without being crowded by taller plants. It makes an excellent background plant in perennial borders or a striking focal point in front yards.

2. Soil Preparation:
Amend the soil with compost or well-rotted manure to improve fertility and structure. If your soil is heavy clay, mix in sand or perlite to improve drainage.

3. Planting Steps:

  • Dig a hole twice as wide as the root ball and just as deep.
  • Remove the shrub from its container, loosen the roots gently, and place it in the hole.
  • Backfill with soil, firming it gently around the roots.
  • Water thoroughly and mulch around the base to conserve moisture.

4. Spacing:
If planting multiple shrubs for a hedge, space them about 6 to 8 feet apart to allow for mature growth and air circulation.


Watering and Feeding

While the Black Lace Elderberry is not overly demanding, proper watering and nutrition help it reach its full potential.

  • Watering Schedule: Keep soil consistently moist, especially during the first growing season. Once established, water weekly during dry periods.
  • Mulching: Apply a 2–3 inch layer of mulch around the base to regulate temperature and retain moisture.
  • Feeding: Fertilize in early spring with an all-purpose, slow-release fertilizer or compost. Avoid high-nitrogen fertilizers, as they promote leafy growth over flowers and berries.

Pruning and Maintenance

Pruning helps shape your elderberry and encourages vigorous growth and flowering.

When to Prune:

  • Best done in late winter or early spring before new growth begins.

How to Prune:

  1. Remove any dead, weak, or crossing branches.
  2. Thin out older canes to encourage new shoots.
  3. For a smaller shrub, cut back by one-third each year.
  4. To rejuvenate an overgrown plant, cut it down to 12 inches from the ground—it will regrow vigorously the following season.

Tip: If you want berries, avoid cutting off all the flowering stems—flowers appear on the previous year’s growth.


Companion Planting Ideas

The dramatic dark foliage of the Black Lace Elderberry looks stunning when paired with plants that contrast in color and texture.

Great Companions Include:

  • Hostas or silver-foliage plants for contrast.
  • Golden-leaved shrubs like Spirea ‘Goldflame’.
  • Bright perennials such as coneflowers, daisies, or daylilies.
  • Grasses like Miscanthus or Fountain Grass for soft movement and texture.

This shrub also pairs beautifully with other ornamental elderberries, such as ‘Black Beauty’ or ‘Lemony Lace’, to create a dynamic, colorful hedge.


Pests and Problems

The Black Lace Elderberry is relatively trouble-free, but a few issues can occasionally arise.

  1. Aphids: Can cluster on young shoots—wash off with a spray of water or apply neem oil.
  2. Powdery Mildew: Avoid overhead watering and ensure good air circulation.
  3. Borers or Leaf Miners: Rare but can be managed by pruning out affected branches.
  4. Birds: While they love the berries, you can protect ripening clusters with lightweight bird netting.

Overall, this is a hardy and resilient plant that bounces back quickly from minor pest damage.


Flowers and Berries: Beauty with Benefits

In late spring to early summer, the Black Lace Elderberry bursts into large clusters of pale pink flowers that look like delicate lacework against the dark leaves. These flowers are not only beautiful but also fragrant and edible—you can use them to make elderflower cordial or flavor desserts.

By late summer, the flowers give way to deep purple-black berries, which are loved by birds and can also be harvested for making elderberry syrup, wine, or jam.

⚠️ Note: Raw berries and other parts of the plant can be mildly toxic if eaten uncooked. Always cook or process elderberries before consuming.


Seasonal Care

Spring:

  • Apply compost and prune dead or weak wood.
  • Check for pests and feed lightly with balanced fertilizer.

Summer:

  • Water regularly during dry spells.
  • Enjoy blooms and begin harvesting flowers for culinary use.

Fall:

  • Harvest ripe berries for preserves or syrup.
  • Allow foliage to display its rich autumn color before it drops.

Winter:

  • Mulch around the base to protect roots in cold regions.
  • Prune during dormancy for shape and health.

Landscaping Uses

The Black Lace Elderberry is incredibly versatile and fits a variety of garden settings:

  • Accent Plant: As a focal point in front yards or mixed borders.
  • Hedge or Screen: Plant multiple shrubs for a colorful privacy hedge.
  • Wildlife Garden: Provides nectar for pollinators and berries for birds.
  • Container Planting: Can thrive in large pots for patios or decks.

Its adaptability and dramatic appearance make it one of the most dynamic shrubs you can add to your landscape.


Final Thoughts

When you see a Black Lace Elderberry in full glory, it’s easy to understand its appeal. From its dark, lacy foliage to its pink floral clusters and rich fall color, this plant offers a rare blend of elegance and toughness. It’s low-maintenance, cold-hardy, and rewarding in every season—a true gem for gardeners who value both beauty and practicality.

Whether you grow it for its ornamental charm, wildlife value, or homemade syrups and wines, the Black Lace Elderberry will transform your garden into a sophisticated, nature-filled retreat.

So, if you’re looking to add a plant that delivers drama, diversity, and year-round allure, look no further than the Black Lace Elderberry—a shrub that truly lives up to its name and reputation when seen in full glory.

Growing Angel Red Pomegranate: A Complete Guide to Planting, Caring, and Harvesting This Juicy Fruit

Growing Angel Red Pomegranate: A Complete Guide to Planting, Caring, and Harvesting This Juicy Fruit

Pomegranates are among the most rewarding fruit trees to grow at home, offering not just delicious fruit but also a stunning ornamental appeal. Among the many varieties available, Angel Red Pomegranate stands out for its exceptional sweetness, soft seeds, and deep crimson color. It’s one of the juiciest and easiest-to-grow pomegranate varieties, making it perfect for home gardeners and orchard enthusiasts alike.

If you’ve ever dreamed of harvesting vibrant red pomegranates right from your backyard, this guide—based on insights from “Gardening Fruit Trees – Angel Red Pomegranate | Gardening Ideas”—will walk you through every step of the process, from planting to harvest.


What Makes Angel Red Pomegranate Special

The Angel Red Pomegranate (Punica granatum ‘Angel Red’) is a relatively new variety known for its soft edible seeds, high juice content, and brilliant red color. It ripens earlier than many other types, typically from late summer through early fall.

Here are a few reasons gardeners love it:

  • Soft Seeds: Unlike traditional pomegranates with hard seeds, Angel Red seeds are tender and easy to chew.
  • Vivid Color: The deep red skin and equally rich arils make it visually stunning and market-friendly.
  • Heavy Production: This tree is known for being highly productive, producing an abundance of large fruit even in its early years.
  • Adaptable Growth: It can thrive in a variety of climates and soils, especially in warm, dry regions.

Ideal Conditions for Growing Angel Red Pomegranate

Pomegranates are naturally suited to Mediterranean climates—warm summers and cool winters. However, the Angel Red variety is adaptable and can perform well in different settings with the right care.

1. Climate Requirements:

  • Best suited for USDA Zones 7–10.
  • Requires full sunlight—at least 6–8 hours daily.
  • Can tolerate heat and drought, but young plants benefit from regular watering.

2. Soil Preparation:

  • Prefers well-draining soil, slightly loamy or sandy.
  • Avoid heavy clay soils that retain too much moisture.
  • Maintain a soil pH between 5.5 and 7.2.
  • Enrich the soil with compost or aged manure before planting.

3. Location Selection:
Choose a sunny and airy spot, ideally protected from harsh winds. If space is limited, Angel Red pomegranates also grow well in large containers—perfect for patio gardens.


How to Plant Angel Red Pomegranate

Step 1: Choose the Right Plant
Start with a healthy young tree or cutting from a reliable nursery. If planting from a nursery-grown sapling, ensure the roots are not bound tightly.

Step 2: Dig the Hole

  • Dig a hole twice as wide as the root ball and just as deep.
  • Loosen the soil at the bottom to help the roots establish easily.

Step 3: Planting

  • Place the sapling in the hole and fill it with the original soil mixed with compost.
  • Press the soil firmly around the roots to eliminate air pockets.
  • Water thoroughly after planting.

Step 4: Mulching
Apply a 2–3 inch layer of organic mulch around the base to retain moisture and suppress weeds. Keep the mulch a few inches away from the trunk to prevent rot.


Watering and Feeding Schedule

While pomegranates are drought-tolerant once mature, consistent watering is vital for young trees and for high-quality fruit production.

Watering Tips:

  • During the first year, water deeply once or twice a week.
  • Reduce watering in winter when the tree goes dormant.
  • As fruits begin to form, ensure steady watering to prevent splitting.

Fertilization:
Feed your tree with a balanced fertilizer (10-10-10) or organic compost during the early spring and mid-summer. Avoid over-fertilizing, as too much nitrogen can lead to excessive leafy growth and fewer fruits.


Pruning and Maintenance

Proper pruning keeps your Angel Red pomegranate tree healthy, promotes air circulation, and encourages better fruiting.

When to Prune:

  • Best done during late winter or early spring, before new growth begins.

How to Prune:

  • Remove dead, damaged, or crossing branches.
  • Keep 3–6 strong stems as the main framework of the tree.
  • Thin out suckers that grow from the base or along the trunk.
  • Maintain an open canopy to let sunlight reach the inner branches.

Tip: Angel Red can also be trained as a multi-stemmed shrub or single-trunk tree, depending on your garden’s aesthetic.


Flowering and Fruit Set

Angel Red pomegranates typically start flowering in late spring to early summer. The bright orange-red blooms are not just beautiful—they’re also a magnet for pollinators like bees.

Pollination Tips:

  • Although self-pollinating, cross-pollination can improve yield and fruit size.
  • Encourage pollinators by planting bee-friendly flowers nearby.

After successful pollination, the flowers develop into glossy red fruits that ripen over the next 4–5 months.


Harvesting Angel Red Pomegranates

The reward for your patience comes in late summer to early fall, when the fruits are ready for harvest.

Signs of Ripeness:

  • The skin color deepens to a rich red hue.
  • The fruit feels heavy for its size.
  • Tapping it produces a metallic sound.

Cut the fruit with pruning shears instead of pulling it to avoid damaging the branch.

Storage:
Pomegranates can be stored at room temperature for about a week or refrigerated for up to two months. The arils can also be frozen for later use.


Common Problems and Solutions

1. Fruit Splitting:
Caused by irregular watering. Keep the soil consistently moist during the fruiting stage.

2. Pest Issues:
Watch for aphids, whiteflies, and mealybugs. Use organic neem oil sprays or insecticidal soap if necessary.

3. Fungal Diseases:
Ensure good air circulation around the plant and avoid overwatering. Prune regularly to reduce humidity buildup.

4. Leaf Yellowing:
Usually due to poor drainage or nutrient deficiency. Adjust watering habits and feed with a balanced fertilizer.


Growing in Containers

Don’t have a large garden space? No problem—Angel Red pomegranates thrive beautifully in pots!

Container Tips:

  • Choose a 20–25 gallon container with drainage holes.
  • Use a well-draining potting mix with perlite or sand.
  • Water more frequently than ground-planted trees, as containers dry faster.
  • Repot every 2–3 years to refresh the soil and promote root health.

Container-grown pomegranates can even be moved indoors during harsh winters, making them a versatile choice for all gardeners.


Uses and Health Benefits

Pomegranates are often called “superfruits” for their abundance of antioxidants, vitamins, and minerals.

Nutritional Highlights:

  • Rich in Vitamin C, potassium, and fiber.
  • Packed with polyphenols and anthocyanins that promote heart health.
  • Supports immunity, digestion, and skin health.

Enjoy the arils fresh, sprinkle them on salads, or extract the juice for a refreshing, tangy drink. Angel Red’s soft seeds make it a perfect choice for juicing and culinary use.


Final Thoughts

The Angel Red Pomegranate is a true gem for home gardeners—beautiful, productive, and delicious. With minimal care and the right growing conditions, it can reward you with an abundance of juicy red fruits year after year. Whether you’re planting it in your backyard or a patio container, this vibrant fruit tree adds both beauty and bounty to any space.

So, roll up your sleeves, prepare your soil, and bring a touch of Mediterranean elegance to your garden with the Angel Red Pomegranate—a fruit that’s as delightful to grow as it is to eat.

How to Grow ‘Wonderful’ Pomegranates: 5-Year Growth Journey and Expert Tree Care Guide for a Bountiful Harvest

How to Grow ‘Wonderful’ Pomegranates: 5-Year Growth Journey and Expert Tree Care Guide for a Bountiful Harvest

Pomegranates have long symbolized abundance, vitality, and longevity — and growing your own at home brings all those qualities right into your garden. Among all varieties, the ‘Wonderful’ pomegranate stands out as the most popular and productive, loved for its sweet-tart flavor, jewel-like seeds, and beautiful ruby-red hue.

Inspired by the YouTube video “5 Year Pomegranates – How To Grow Wonderful Pomegranates & Pomegranate Tree Care,” this in-depth guide will walk you through everything you need to know about growing and caring for ‘Wonderful’ pomegranate trees — from planting and pruning to fertilizing and harvesting. We’ll also take a closer look at what happens over a five-year growth timeline, so you can understand what to expect each season and how to keep your tree thriving year after year.


1. Meet the ‘Wonderful’ Pomegranate: The King of Varieties

The ‘Wonderful’ pomegranate (Punica granatum ‘Wonderful’) is by far the most cultivated and commercially successful variety in the United States and beyond. Originally introduced to California in the late 1800s, it quickly became a favorite due to its vigorous growth, reliable yields, and large, flavorful fruit.

Key characteristics:

  • Fruit size: Large, averaging 4–5 inches in diameter.
  • Skin color: Deep red to burgundy when ripe.
  • Arils (seeds): Juicy, ruby-red, sweet-tart, and rich in antioxidants.
  • Flavor: Balanced sweetness with a pleasant tang — perfect for fresh eating, juicing, or cooking.

‘Wonderful’ pomegranates thrive in warm, dry climates and are ideal for regions like California, Arizona, Texas, and Mediterranean-like environments. However, with the right care, they can also be grown successfully in containers or cooler climates with protection.


2. The 5-Year Growth Journey: From Seedling to Fruit-Bearing Tree

Growing pomegranates requires patience, but the rewards are worth it. Let’s look at what typically happens over the first five years of your ‘Wonderful’ pomegranate’s life.

Year 1: Establishment

  • The first year is all about root development.
  • Focus on keeping the young plant well-watered and protected from strong winds or frost.
  • Avoid over-fertilizing — the goal is to help it establish a strong root system rather than push for fast growth.

Year 2: Structural Growth

  • The tree begins to develop multiple shoots from the base.
  • Choose 3–5 strong stems to form the main framework (if you prefer a bush form) or train it to a single trunk for a tree shape.
  • Light pruning helps shape the plant and encourages branching.

Year 3: First Flowers and Fruits

  • Expect your first blossoms in spring.
  • Some flowers may develop into small fruits, but most will drop — this is normal.
  • Continue watering regularly and applying balanced fertilizer during the growing season.

Year 4: Fruit Set and Maturity

  • The tree becomes more established and starts producing a reliable crop of fruits.
  • You’ll notice more uniform flowering and fruiting cycles.
  • Pruning after harvest helps maintain size and improve next year’s productivity.

Year 5: Full Production

  • By the fifth year, your ‘Wonderful’ pomegranate reaches full maturity and can yield 50–100 fruits per season, depending on climate and care.
  • The tree’s canopy becomes dense, and fruits ripen beautifully from late summer through fall.

3. Ideal Growing Conditions for ‘Wonderful’ Pomegranates

To ensure success, it’s crucial to understand what pomegranates love most.

Climate

  • Sunlight: Full sun — at least 6–8 hours daily.
  • Temperature: Best growth between 25°C–35°C (77°F–95°F). Mature trees can tolerate short dips to -9°C (15°F) but prefer warmth.
  • Humidity: Low to moderate. Too much humidity can cause fungal issues.

Soil

  • Type: Well-drained sandy loam or loamy soil.
  • pH: Slightly acidic to neutral (6.0–7.5).
  • Pomegranates tolerate poor soils better than many fruit trees but cannot handle soggy roots.

Location

Plant your tree in a sunny, open area protected from cold winds. If you live in a cooler climate, consider growing your pomegranate in a large container so you can move it indoors or into a greenhouse during winter.


4. How to Plant ‘Wonderful’ Pomegranate Trees

  1. Choose the right time:
    Plant in spring or early fall, avoiding frost periods.
  2. Prepare the soil:
    Dig a hole twice as wide and the same depth as the root ball. Mix compost or well-rotted manure into the soil.
  3. Planting:
    Place the tree at the same depth it grew in the nursery pot. Backfill gently, firm the soil, and water thoroughly.
  4. Mulch:
    Apply a 2–3 inch layer of organic mulch (such as bark or compost) around the base, leaving space near the trunk to prevent rot.

5. Watering and Irrigation Tips

While pomegranates are drought-tolerant once established, consistent watering is key for high-quality fruit.

  • Young trees: Water deeply once or twice a week during dry spells.
  • Mature trees: Water every 7–10 days during the growing season.
  • Avoid overwatering: Excess moisture can lead to root rot and fruit cracking.
  • Tip: Drip irrigation works best — it delivers steady moisture without wetting the foliage.

During fruit development (summer), maintain even soil moisture to prevent fruits from splitting.


6. Fertilizing for Strong Growth and Sweet Fruit

Feed your ‘Wonderful’ pomegranate tree moderately — too much nitrogen encourages leafy growth at the expense of fruit.

  • Young trees (1–2 years): Apply a balanced fertilizer (10-10-10) twice a year — early spring and mid-summer.
  • Mature trees: Use a low-nitrogen, high-potassium fertilizer (5-10-10) before flowering to promote fruiting.

Organic options like compost, bone meal, or seaweed extract can also improve soil fertility naturally.


7. Pruning for Productivity and Shape

Pruning is essential for both health and fruit production.

When to Prune:

  • Best done in late winter or early spring, before new growth begins.

How to Prune:

  1. Remove dead, damaged, or crossing branches.
  2. Thin out crowded stems to improve air circulation.
  3. Cut back long shoots to encourage branching and fruiting spurs.
  4. For a tree form, maintain one strong trunk and remove suckers from the base.

Proper pruning helps control size, increases sunlight penetration, and promotes consistent fruiting.


8. Pollination and Fruit Development

‘Wonderful’ pomegranates are self-pollinating, but they produce more fruit when bees and pollinators are active.

To encourage better fruit set:

  • Grow pollinator-friendly plants nearby (like lavender or basil).
  • Avoid spraying pesticides during flowering.

After pollination, fruits take about 5–7 months to mature, typically ripening in September–October in most climates.


9. Common Problems and Solutions

ProblemCauseSolution
Fruit crackingIrregular watering or humidity swingsMaintain consistent soil moisture and mulch base
Leaf yellowingOverwatering or nutrient deficiencyCheck drainage, apply balanced fertilizer
Pest attacks (aphids, whiteflies)Warm, humid weatherSpray neem oil or insecticidal soap
Fungal diseases (leaf spot, blight)Poor airflow, wet foliagePrune regularly and apply organic fungicide
Poor fruitingToo much nitrogen or shadeReduce fertilizer and ensure full sunlight

With attentive care, most of these problems can be avoided or easily corrected.


10. Harvesting Your Pomegranates

Pomegranates don’t ripen after picking, so harvest at the right stage.

Signs of ripeness:

  • Deep red or burgundy skin color.
  • Slight flattening of the sides (no longer round).
  • Metallic “ping” sound when tapped.
  • Fruit easily detaches when twisted gently.

Cut fruits from the branch using pruning shears, leaving a short stem attached. Handle carefully — their skin can bruise.

Store harvested pomegranates in a cool, dry place; they can last up to two months in refrigeration.


11. Enjoying the Fruits of Your Labor

Freshly harvested ‘Wonderful’ pomegranates can be enjoyed in countless ways:

  • Eat fresh: Enjoy the juicy arils on their own.
  • Juice: Blend and strain for a refreshing antioxidant-rich drink.
  • Cooking: Add to salads, sauces, and desserts.
  • Preserve: Make jams, jellies, or even homemade pomegranate molasses.

The health benefits are equally impressive — packed with vitamin C, potassium, fiber, and antioxidants, pomegranates are considered a superfruit that supports heart health and reduces inflammation.


12. Winter Care and Long-Term Maintenance

In colder regions, pomegranate trees benefit from winter protection:

  • Container plants: Move indoors or to a greenhouse before frost.
  • In-ground trees: Wrap the base with burlap or frost cloth and mulch heavily around the roots.

Pomegranates have a natural lifespan of 20–30 years and can remain productive for decades with consistent pruning, watering, and pest control.


13. Why ‘Wonderful’ Is Still the Best Choice

Despite the introduction of new hybrids, the ‘Wonderful’ variety remains a favorite for both home gardeners and commercial growers — and for good reason:

  • Consistent high yields.
  • Exceptional fruit quality.
  • Tolerant of heat, drought, and poor soils.
  • Stunning ornamental appearance with vibrant flowers and glossy foliage.

The 5-year journey to a mature tree requires patience, but by the time your first full harvest arrives, you’ll have a beautiful, fruit-laden tree that rewards your dedication with every crimson seed.


Final Thoughts

Growing a ‘Wonderful’ pomegranate tree is more than just gardening — it’s cultivating a legacy of health, beauty, and abundance. Over five years, your tree transforms from a young sapling into a flourishing producer that can fill your garden with flowers in spring and heavy, glowing fruits in autumn.

With proper care — sunlight, well-drained soil, balanced feeding, and pruning — your ‘Wonderful’ pomegranate will reward you season after season with rich flavor, vibrant color, and a touch of Mediterranean magic right at home.


Discovering the Haden Mango: The Original Florida Mango That Shaped the Tropical Fruit Industry

Discovering the Haden Mango: The Original Florida Mango That Shaped the Tropical Fruit Industry

When people think of mangoes in Florida, one name stands out above all others — the Haden mango. This iconic fruit is more than just a sweet tropical treat; it’s the foundation of Florida’s mango industry and the ancestor of many modern varieties loved around the world today.

Inspired by the video “Truly Tropical Mango Varieties – ‘Haden’,” this post dives deep into the fascinating story, growing habits, and unique qualities of the Haden mango. We’ll explore why it remains one of the most celebrated cultivars in Florida and how you can grow this vibrant variety in your own tropical or subtropical garden.


1. The Story Behind the Haden Mango: Florida’s First Famous Variety

The Haden mango has an incredible history that dates back to the early 1900s. It all began in Coconut Grove, Florida, when Captain John J. Haden and his wife, Florence Haden, planted a seed from a Mulgoba mango tree in 1902.

A few years later, the resulting tree produced a crop of beautiful, red-blushed, golden fruit that took local growers by surprise. The fruit was aromatic, sweet, and far more visually appealing than any mango then grown in the U.S.

Word spread quickly — and by 1910, the Haden mango became the cornerstone of Florida’s mango industry. It’s often called the “mother of Florida mangoes,” because many popular modern cultivars — including Tommy Atkins, Kent, Keitt, and Glenn — are descendants of Haden.


2. Appearance and Flavor Profile: The Classic Mango Look and Taste

The Haden mango is a medium-to-large fruit, usually weighing between 500 to 700 grams (1–1.5 pounds). Its skin is striking — a golden yellow base with a deep crimson-red blush and specks of green or yellow. This vivid coloration made it one of the first mangoes that caught both farmers’ and consumers’ eyes.

When cut open, the flesh is rich orange, juicy, and fiberless near the seed, though it can have some slight stringiness compared to newer hybrids.

The flavor is the true star:

  • Sweet with a mild tang, offering a classic mango taste.
  • Highly aromatic, with tropical floral notes and a smooth finish.
  • Low acidity, making it enjoyable fresh, in smoothies, or as dessert fruit.

Many mango enthusiasts describe the Haden as having the perfect balance of sweetness and tropical complexity, a benchmark for traditional mango flavor.


3. Growing Conditions: What the Haden Mango Tree Needs to Thrive

The Haden mango tree grows vigorously and can become quite large if not pruned. Mature trees can reach 30–40 feet tall with a broad, rounded canopy and dense foliage — ideal for providing shade and producing abundant fruit.

Climate Requirements

  • Temperature: Thrives best in tropical and subtropical climates. It prefers warm, frost-free conditions and does not tolerate freezing temperatures.
  • Sunlight: Requires full sun exposure for maximum fruiting and color development.
  • Rainfall: Prefers a dry period before flowering but consistent moisture during fruit formation.

Soil

Haden mango trees grow best in well-draining sandy or loamy soil with a slightly acidic to neutral pH (6.0–7.5). Avoid waterlogged areas, as mango roots are sensitive to standing water.


4. Flowering and Fruiting Season

In Florida, Haden mango trees typically flower from January to March, with fruits ripening between May and July.

The tree produces large clusters of small yellowish flowers, which attract bees and other pollinators. Once pollinated, the fruits develop over the next 3–4 months.

By early summer, the tree’s branches hang heavy with colorful fruit — often ripening unevenly, which means you can enjoy a harvest spread over several weeks.


5. Caring for a Haden Mango Tree: Tips for Healthy Growth

a) Watering

While young trees need regular watering, mature Haden mango trees are drought-tolerant. Water deeply once every 7–10 days during the growing season. Reduce watering in winter to encourage flowering.

b) Fertilization

Feed your mango tree with a balanced fertilizer (10-10-10) when young. As it matures, switch to a low-nitrogen, high-potassium fertilizer (5-10-10) to support fruit development.

Apply fertilizer three times a year:

  1. Early spring (pre-flowering)
  2. Mid-summer (fruiting period)
  3. Late fall (before dormancy)

c) Pruning

Haden mango trees tend to grow large, so annual pruning is essential to maintain shape and accessibility. Prune immediately after harvest to:

  • Remove dead or crossing branches.
  • Maintain an open canopy for better airflow.
  • Keep the tree under 12–15 feet tall for easier harvesting.

6. Common Challenges with Haden Mango Trees

While beautiful and productive, Haden mango trees are not without issues. Over time, growers discovered a few challenges with this classic variety.

a) Disease Susceptibility

Haden mangoes can be prone to anthracnose and powdery mildew, especially in humid environments. These fungal diseases affect flowers, leaves, and fruits, causing black spots or fruit drop.

Prevention tips:

  • Ensure good air circulation by pruning regularly.
  • Apply copper-based fungicides during the flowering season.
  • Avoid overhead watering that leaves foliage wet overnight.

b) Alternate Bearing

Haden mango trees are known for alternating heavy and light crops every other year. This natural cycle can be mitigated by maintaining consistent feeding, pruning, and pest management routines.

c) Fruit Fiber and Ripening

While many people love the traditional flavor of Haden mangoes, some modern consumers find them slightly fibrous compared to newer varieties like Kent or Nam Doc Mai. Additionally, Haden fruit ripens quickly and doesn’t store as long, so they’re best consumed fresh.


7. How to Grow Haden Mangoes in Containers

If you live outside tropical regions — such as in California, Texas, or even the Mediterranean — you can still enjoy growing a Haden mango in a pot.

Here’s how:

  • Use a 20–25 gallon container with excellent drainage.
  • Choose a dwarf rootstock or grafted sapling for manageable size.
  • Keep the tree in full sunlight (6–8 hours daily).
  • Move indoors or to a greenhouse if temperatures drop below 10°C (50°F).
  • Fertilize monthly during the growing season and reduce watering during winter dormancy.

Container-grown mango trees typically produce fewer fruits, but the quality remains superb.


8. Harvesting and Ripening the Haden Mango

Harvesting mangoes at the right time ensures the best flavor. For Haden mangoes:

  • Fruits are ready when their skin turns bright yellow with red blush, and the shoulders fill out.
  • The fruit should give slightly under gentle pressure and emit a sweet, fruity aroma near the stem.

After picking, allow them to ripen at room temperature for 3–5 days. Once ripe, store them in the refrigerator to prolong freshness for another week.


9. Taste Test: Why Gardeners Still Love the Haden Mango

Despite newer cultivars with improved disease resistance and longer shelf life, the Haden mango continues to win hearts. It represents the authentic tropical flavor that started it all.

Many Florida gardeners grow Haden mango trees not just for their fruit, but also for sentimental and historical reasons. The trees are beautiful, productive, and embody the state’s tropical heritage.

When fully ripe, the fruit’s sweet, aromatic, and slightly tangy flavor makes it perfect for:

  • Fresh eating
  • Mango salsa or chutney
  • Smoothies and tropical desserts
  • Homemade jams and sauces

10. Comparing Haden with Other Mango Varieties

FeatureHadenKentKeittTommy Atkins
SeasonEarly–mid (May–July)Mid–late (June–August)Late (August–October)Mid (June–August)
FlavorSweet & tangy, aromaticSweet, low acidMildly sweetMild, fibrous
TextureSlightly fibrousSmooth, juicyFirm, low fiberFirm, fibrous
ColorRed-blushed yellowGreen-yellowGreen with blushRed-orange
Shelf LifeShortLongVery longLong

This comparison shows why the Haden mango remains a flavor benchmark even as new hybrids dominate commercial markets.


11. Propagating Haden Mango Trees

While it’s possible to grow mango trees from seed, note that Haden mangoes are monoembryonic, meaning their seeds won’t produce true-to-type offspring.

To grow a true Haden mango:

  • Purchase a grafted plant from a reputable nursery.
  • Use a polyembryonic rootstock like Turpentine for strength and disease resistance.
  • If experimenting with seeds, expect variation — sometimes you might get lucky and produce a unique, delicious hybrid!

12. Why Haden Mangoes Matter Today

The Haden mango is not just a fruit — it’s a piece of agricultural history. It transformed mango cultivation in the Western Hemisphere, bringing tropical flavor and color to the U.S. market and inspiring decades of breeding innovation.

In an age where commercial mangoes are bred for transport durability, the Haden remains a symbol of authentic, tree-ripened flavor. Gardeners and tropical fruit enthusiasts continue to grow it for its nostalgic charm, rich taste, and beauty.


Final Thoughts

The Haden mango is the perfect blend of heritage and flavor. It paved the way for Florida’s mango industry and continues to hold its place as one of the most cherished tropical fruits.

If you live in a warm climate — or can provide greenhouse protection — growing a Haden mango tree offers not just delicious fruit but also a living link to Florida’s tropical history.

From its radiant skin to its sweet, aromatic flesh, every bite of a Haden mango tells the story of passion, discovery, and the beauty of tropical gardening.


Growing Keitt Mango Trees in the UK: Late Spring Update, Grafting Challenges, and Expert Tips for Success

Growing Keitt Mango Trees in the UK: Late Spring Update, Grafting Challenges, and Expert Tips for Success

Growing tropical fruit trees in a temperate climate like the UK might sound ambitious, but for passionate gardeners, it’s a rewarding challenge that combines patience, curiosity, and skill. Among tropical fruits, mangoes (Mangifera indica) hold a special place — their lush green canopies, fragrant flowers, and golden fruit symbolize the essence of the tropics.

In this post, inspired by the video “Mango ‘Keitt’ Growing UK Late Spring Update – Poor Graft Quality in My Opinion,” we’ll explore what it’s like to grow the Keitt mango variety in the UK, the difficulties of graft quality, and how to nurture this late-season mango to thrive in cooler climates. Whether you’re an experimental gardener, greenhouse grower, or container fruit enthusiast, this detailed guide will walk you through key lessons and techniques for success.


1. Meet the Keitt Mango: A Late-Season Delight

The Keitt mango is one of the most beloved varieties for both home gardeners and commercial growers. Originally developed in Florida, this cultivar is prized for its large fruit, minimal fiber, sweet flavor, and juicy texture.

Unlike early varieties such as Tommy Atkins or Haden, the Keitt mango is a late-season producer, typically ripening between August and October. This means its flowers and fruit appear later in the year, which can be both a blessing and a challenge in climates like the UK, where the growing season is shorter and cooler.

Keitt mangoes are easily recognizable by their green skin with a faint pink blush when ripe. The flesh is vibrant orange, rich in sweetness, and smooth — making it perfect for fresh eating, smoothies, or desserts.


2. Can You Really Grow Mangoes in the UK?

The short answer: Yes, you can — with the right methods and conditions.

Mangoes are tropical trees that naturally thrive in warm, humid climates with year-round sunshine. The UK, with its mild summers and cool winters, presents several challenges — low temperatures, limited sunlight, and high humidity. However, thanks to greenhouse cultivation, indoor growing, and container gardening techniques, mango enthusiasts have successfully grown mango trees across southern England and Wales.

The key to success lies in:

  • Microclimate management: Using greenhouses, polytunnels, or conservatories.
  • Soil and potting control: Ensuring perfect drainage and warmth for roots.
  • Variety selection: Choosing late, resilient types like Keitt that adapt well to protected environments.

3. The Spring Growth Stage: Signs of Life

By late spring, mango trees in the UK start showing visible signs of renewed growth after their dormant winter phase. The Keitt mango, in particular, produces vibrant new leaves in shades of red and bronze that later mature to deep green.

For gardeners monitoring their mango trees, this stage is both exciting and critical. It’s when you can assess:

  • Overall tree health after winter.
  • Graft success or weakness.
  • New shoots and potential flower panicles.

In the featured video, the gardener observes his Keitt mango during late spring, noting mixed progress — healthy foliage emerging, but concerns about poor graft quality affecting the plant’s structure and growth potential.


4. Understanding Grafting in Mango Trees

Most mango trees available commercially are grafted, meaning a scion (fruiting variety) is joined to a rootstock (hardy base plant). This method ensures consistency in fruit type and faster fruiting — often within 2–4 years, compared to 6–8 years from seed.

However, graft quality matters immensely, especially in cooler climates like the UK where plants face environmental stress.

Poor grafting can result in:

  • Weak unions that may snap or split as the tree grows.
  • Uneven growth where the scion struggles to establish dominance.
  • Limited nutrient flow between rootstock and scion.
  • Increased vulnerability to disease or rot at the graft junction.

In the video, the grower highlights visible flaws — uneven alignment and scarring around the graft area — that could impact the tree’s long-term health.


5. Identifying Poor Graft Quality

If you’re growing a mango tree, it’s essential to check the graft point carefully.

Signs of poor grafting include:

  • A bulging or uneven joint between the rootstock and scion.
  • Visible cracks or peeling bark at the graft area.
  • Weak growth above the graft despite healthy rootstock.
  • Discoloration or callus formation that looks dry and flaky.

High-quality grafts, on the other hand, should appear smooth, sealed, and well-healed, with continuous bark alignment and no significant narrowing or bulging.

If you’ve received a poorly grafted tree, don’t panic — you can still help it thrive with careful staking, pruning, and supportive growing conditions (more on that below).


6. Caring for Your Keitt Mango in Late Spring

As temperatures warm up, your Keitt mango enters an active growth phase. This is the time to nurture it carefully so it can prepare for flowering and fruiting later in the year.

a) Sunlight

Mango trees need at least 8–10 hours of sunlight daily. In the UK, this means keeping them in a south-facing greenhouse, sunroom, or patio during the spring and summer months. If natural light is insufficient, use a full-spectrum grow light to supplement daylight.

b) Watering

Keep the soil slightly moist but not soggy. Overwatering can cause root rot, especially in cooler weather. Ensure your pot has drainage holes and consider using a well-draining mix — 50% compost, 30% coarse sand, 20% perlite works well.

c) Feeding

Apply a balanced fertilizer (10-10-10) once every 3–4 weeks during active growth. As the season progresses, switch to a high-potassium fertilizer (like 5-10-10) to promote flowering and fruiting.

d) Pruning

Remove weak shoots or crossing branches to improve airflow and direct energy to healthy growth. This is especially important for trees with weak grafts, as it reduces unnecessary strain on the trunk.


7. Strengthening a Poor Graft Union

If your Keitt mango has a visibly weak graft, you can take steps to support it:

  • Stake the tree using soft ties to stabilize it against wind or movement.
  • Avoid heavy top growth — prune upper branches to balance the structure.
  • Seal exposed grafts with grafting wax or pruning sealant to prevent infection.
  • Encourage callus formation by maintaining steady moisture and warmth.

With time, proper support, and healthy growing conditions, even a weak graft can strengthen naturally as the bark thickens.


8. Temperature and Climate Control in the UK

One of the biggest challenges in growing mangoes in the UK is temperature management. Mango trees thrive best between 25°C–35°C (77°F–95°F) but can tolerate short dips to 10°C (50°F) if protected.

Here’s how to maintain ideal conditions:

  • Use a heated greenhouse or conservatory for year-round growth.
  • During warm days, ventilate to prevent humidity buildup.
  • In late spring, move the plant outdoors for natural sunlight — but bring it in when nighttime temperatures drop below 12°C (54°F).
  • Avoid placing the plant near cold drafts or metal surfaces that conduct cold.

For consistent warmth, you can even use soil heating mats or insulated planters to keep root temperatures stable.


9. The Keitt Mango Bloom and Fruit Cycle

Once your Keitt mango is well-established, you can expect blooms to appear in late spring or early summer, depending on conditions.

The flowers form in large clusters known as panicles, attracting bees and other pollinators. In a greenhouse, where pollinators may be limited, you can hand-pollinate using a small paintbrush to transfer pollen between flowers.

Fruit development takes around 4–6 months after flowering. Since Keitt is a late-season variety, the fruits often ripen as late as October, which can be tricky in the UK — making greenhouse protection essential to achieve proper ripening.


10. Common Problems and How to Fix Them

Growing mangoes in the UK comes with some unique challenges:

ProblemCauseSolution
Leaf yellowingOverwatering or cold rootsReduce watering, use heating mats
Slow growthLow light or cool tempsIncrease sunlight exposure or add grow lights
Graft weaknessPoor graft unionStake, prune lightly, and protect from wind
No floweringExcess nitrogen or low potassiumSwitch to bloom fertilizer (5-10-10)
Powdery mildew or moldHigh humidityImprove ventilation and use neem oil spray

11. The Joy of Growing Tropical Fruit in Temperate Climates

There’s something deeply rewarding about nurturing a mango tree in the UK. Watching your Keitt mango push new spring growth, strengthen its graft, and eventually flower and fruit is a remarkable achievement — proof that dedication and creativity can overcome climate limitations.

While it may never rival a tropical orchard, a healthy mango tree in a British greenhouse is a statement of gardening skill, patience, and curiosity.


12. Final Thoughts

The journey of growing a Keitt mango tree in the UK is one of persistence, observation, and care. As highlighted in the video “Mango ‘Keitt’ Growing UK Late Spring Update – Poor Graft Quality in My Opinion,” even imperfect grafts and less-than-ideal conditions can lead to success with the right attention.

By understanding the grafting process, optimizing your environment, and supporting your tree through its seasonal cycles, you can enjoy the sight of vibrant foliage, fragrant blooms, and — if you’re lucky — the taste of your very own homegrown mangoes.

Whether your mango tree grows in a conservatory, greenhouse, or sunny balcony, it’s a living reminder that with care and creativity, even tropical dreams can thrive in the heart of a temperate garden.


Kent Mango Blooming Season: How to Nurture and Enjoy This Lush Tropical Fruit Tree

Kent Mango Blooming Season: How to Nurture and Enjoy This Lush Tropical Fruit Tree

There’s something magical about the sight of a mango tree bursting into bloom — clusters of tiny, fragrant flowers promising a season of sweet, golden fruit ahead. Among the many mango varieties cherished by home gardeners, the Kent mango stands out for its exceptional flavor, smooth texture, and generous harvests.

Inspired by the video “Kent Mango Blooming!”, this post dives deep into what makes this tropical fruit tree so special and how you can nurture it from flowering to fruiting. Whether you’re an experienced mango grower or new to tropical gardening, this guide will help you understand the Kent mango’s blooming process, seasonal care needs, and how to ensure a successful harvest.


1. Meet the Kent Mango: A Sweet Taste of the Tropics

The Kent mango is one of the most popular mango varieties in the world — originally developed in Florida in the 1940s. It’s known for its rich, sweet flavor, minimal fiber, and succulent, buttery texture.

Kent mangoes are typically large, oval-shaped, and have a smooth greenish-yellow skin with a slight red blush when ripe. The flesh inside is golden and silky, making it a favorite for fresh eating, smoothies, and desserts.

But what truly makes the Kent mango special is its late-season bloom and fruiting, extending the mango harvest period when other varieties have finished producing.


2. The Magic of Mango Blooming

The blooming of a Kent mango tree marks the start of an exciting cycle in the tropical fruit garden. The appearance of flower clusters — or panicles — signals that your tree is ready to produce another round of delicious fruit.

Each panicle can carry hundreds of tiny, star-shaped flowers, ranging from cream to pale yellow. These blooms release a subtle, sweet fragrance that attracts bees, flies, and other pollinators.

While not all flowers will turn into fruit, healthy trees typically produce enough blooms to ensure a good harvest. Watching your Kent mango tree bloom is like witnessing nature’s promise of abundance — it’s the first step in a beautiful journey from flower to fruit.


3. When Do Kent Mango Trees Bloom?

Kent mango trees are late bloomers, generally flowering between January and March in tropical regions like South Florida, and sometimes a little later in subtropical or indoor conditions.

The timing depends on several factors:

  • Climate: Warm temperatures and dry conditions stimulate flowering.
  • Age of the tree: Mature trees (3–5 years old) bloom more consistently.
  • Watering pattern: A short dry spell before flowering encourages bloom production.
  • Pruning timing: Trees pruned in early fall may produce fewer flowers if they haven’t recovered by blooming season.

Once the buds appear, they usually take 3–4 weeks to develop into full blooms. Under the right conditions, you’ll soon see your mango tree covered in hundreds of delicate blossoms swaying in the sunlight.


4. The Role of Pollination

Pollination is crucial to ensuring your mango flowers turn into fruit. Kent mangoes, like most varieties, rely on insects such as bees and flies for cross-pollination.

If you’re growing mangoes indoors or in areas with fewer natural pollinators, consider these tips:

  • Plant bee-attracting flowers nearby (like marigolds or basil).
  • Avoid pesticide use during blooming — it can harm pollinators.
  • You can even try hand-pollination using a small brush to transfer pollen between flowers.

Healthy pollination results in small green fruits developing at the base of the flower clusters — a promising sign that your mango season is on its way!


5. Caring for a Blooming Kent Mango Tree

During the flowering phase, your mango tree needs specific care to ensure strong bloom development and successful fruit set.

a) Watering

Reduce watering slightly during early bloom to encourage the tree to focus on flower and fruit formation. Once fruits start forming, resume a moderate watering schedule — about once a week, or when the soil feels dry an inch below the surface.

b) Fertilization

Avoid heavy fertilizing during bloom. Instead, apply a low-nitrogen, high-potassium fertilizer to strengthen the flowers and improve fruit quality. Overfeeding nitrogen can trigger vegetative growth (leaves) instead of flowers and fruits.

c) Pest Management

Mango flowers can attract pests like thrips, aphids, and mealybugs. Monitor your tree regularly and treat infestations with neem oil or insecticidal soap.

d) Wind Protection

Flower clusters are delicate and easily damaged by strong winds. If possible, provide a windbreak or temporary support to protect your blooming mango tree.


6. From Flower to Fruit: The Next Stage

After successful pollination, the small green fruits begin to appear. These baby mangoes will gradually grow larger over the next several months.

For Kent mangoes, the fruit development period usually lasts 4–5 months. During this time, it’s important to keep the tree healthy and well-fed.

Here’s how to support your tree post-bloom:

  • Water regularly to maintain soil moisture.
  • Fertilize lightly every 6–8 weeks with a balanced organic fertilizer.
  • Thin the fruits if clusters are too dense; this helps remaining mangoes grow larger and prevents branch breakage.

7. Recognizing Healthy Blooms and Fruit Set

Not every bloom will produce fruit — and that’s perfectly normal. On average, only about 1–3% of mango flowers develop into mature fruit.

Healthy flowers should be:

  • Pale yellow to cream in color.
  • Free from black spots or mold.
  • Firm and fresh-looking (not wilted).

If you notice browning or fungal issues, prune away the affected panicles and apply a fungicide like copper spray to protect the rest of the tree.

When the flowers fall, tiny green mangoes will start to form in their place — an exciting sign that harvest season is on the horizon.


8. The Beauty of Kent Mango Flowers

Beyond their role in fruit production, Kent mango flowers have their own beauty. When in full bloom, a mature mango tree looks like a massive bouquet, shimmering with hundreds of delicate blossoms.

The blooms attract a symphony of buzzing pollinators, creating a mini ecosystem in your garden. This not only benefits your mango tree but also supports other nearby plants that rely on pollinators.

For tropical gardeners, mango blooming season is a sensory experience — filled with fragrance, movement, and the anticipation of fruit to come.


9. Preparing for Fruit Harvest

Once the flowering season passes and the fruit sets in, your job shifts from protecting flowers to nurturing young mangoes.

Kent mangoes generally ripen between June and August, depending on local climate conditions. During this phase:

  • Maintain regular watering but avoid waterlogging.
  • Apply potassium-rich fertilizer every month to boost fruit sweetness.
  • Watch for pests like fruit flies or scale insects — use traps or neem oil as needed.

When ripe, Kent mangoes turn greenish-yellow with a soft blush, and their flesh becomes fragrant and slightly tender to touch.


10. Common Blooming Issues and How to Fix Them

Even healthy mango trees sometimes face challenges during blooming. Here are common issues and remedies:

  • No blooms: This could be due to excessive nitrogen fertilizer or overwatering. Reduce both and allow a brief dry period before flowering season.
  • Flower drop: Usually caused by temperature fluctuations or nutrient imbalance. Apply potassium and maintain steady watering.
  • Pest damage: Regular neem oil sprays can deter thrips and aphids.
  • Fungal diseases: Use copper fungicides if you notice black spots or mildew on flowers.

A consistent care routine can help your Kent mango tree bounce back quickly and produce strong blooms year after year.


11. Pruning After Blooming

Once flowering and fruiting are complete, light pruning helps rejuvenate your mango tree. Remove dead branches and lightly trim the canopy to improve airflow and sunlight penetration.

Avoid heavy pruning right before the next blooming cycle — this can delay or reduce flower production.


12. The Reward of a Blooming Kent Mango Tree

Watching your Kent mango tree bloom and eventually produce luscious, golden fruits is one of the most fulfilling experiences for any gardener. The cycle from bud to blossom to fruit embodies the beauty of tropical gardening — patience, care, and the joy of nature’s rewards.

Each spring, when your tree bursts into bloom, it reminds you of the rhythm of life and growth. Those tiny flowers are not just blossoms — they’re the promise of summer sweetness hanging in the warm air.


Final Thoughts

The Kent mango blooming season is a celebration of tropical abundance. With its graceful flowers, sweet aroma, and promise of a flavorful harvest, this tree brings beauty and bounty to any garden.

By understanding the blooming cycle, providing proper care, and supporting pollination, you can ensure your Kent mango tree thrives year after year — filling your home with fragrance, shade, and delicious fruit.

So, when your Kent mango starts blooming, take a moment to appreciate the wonder of it all — you’re not just growing fruit; you’re nurturing a living work of art that gives back generously with every season.