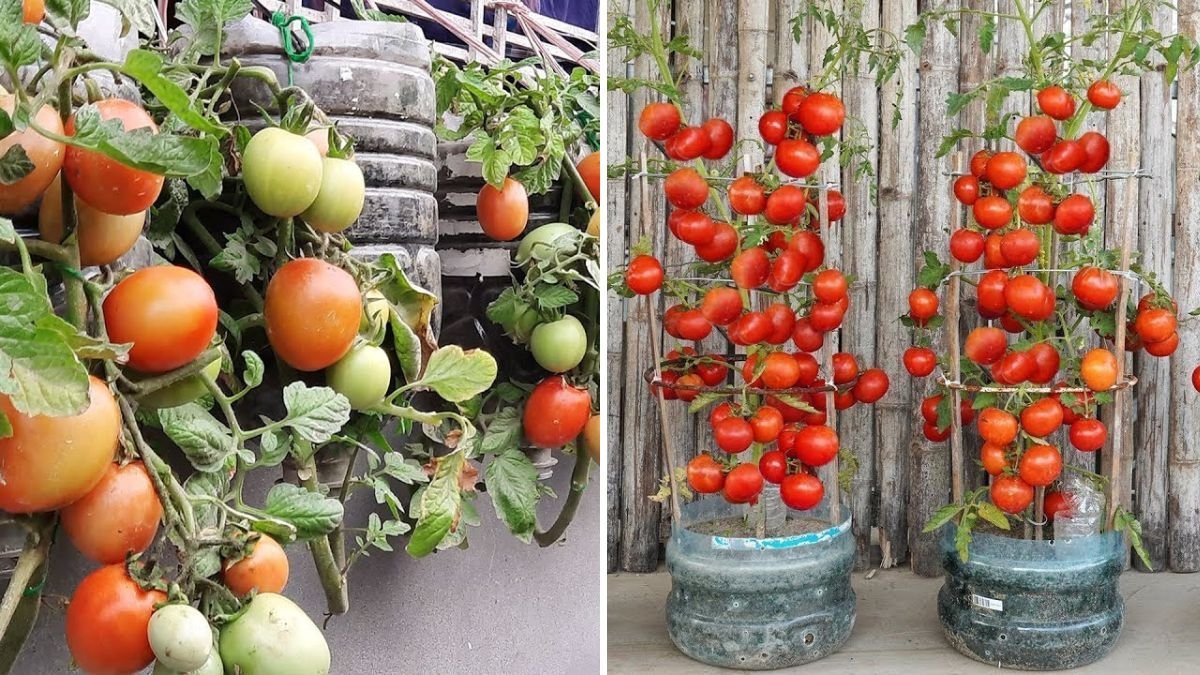
If you love fresh, juicy tomatoes but don’t have a large garden, it’s time to revolutionize your gardening! Growing tomatoes in plastic bottle planters is a simple, space-saving, and eco-friendly way to enjoy homegrown produce. This method allows anyone — from beginners to seasoned gardeners — to cultivate tomatoes without a traditional garden bed.
Plastic bottle planters are not only inexpensive and recyclable but also incredibly effective. With just a few simple steps, you can grow healthy, productive tomato plants right on your balcony, patio, or kitchen window. In this guide, we’ll explore everything you need to know to grow tomatoes in plastic bottle planters — from preparing the bottles and seeds to care, harvesting, and maximizing your yield.
Why Grow Tomatoes in Plastic Bottle Planters?
Plastic bottle planters are a creative and practical solution for urban gardening or small spaces. Here’s why they’re perfect for growing tomatoes:
- Eco-Friendly: Repurposing plastic bottles reduces waste and promotes sustainable gardening.
- Space-Saving: Vertical or hanging planters save floor space and allow you to grow tomatoes anywhere.
- Beginner-Friendly: Easy to set up and manage, making them ideal for first-time gardeners.
- Cost-Effective: Bottles are free or cheap, and you can use simple soil and compost to grow your plants.
- Control Over Growth: Containers make it easier to monitor water, nutrients, and pests.
Whether you live in an apartment or want to supplement your garden, plastic bottle planters are a game-changer for growing tomatoes.
Step 1: Choosing Tomato Varieties
The first step to a successful tomato harvest is selecting the right variety. Depending on your space and preference, you can choose from:
- Roma Tomatoes: Ideal for sauces and canning; they are firm and elongated.
- Cherry Tomatoes: Small, sweet, and perfect for snacking.
- Beefsteak Tomatoes: Large and meaty; great for sandwiches and salads.
- Yellow or Orange Varieties: Attractive, flavorful, and beginner-friendly.
For vertical or hanging bottle gardening, compact or determinate varieties are easier to manage and produce abundant fruits in a small space.

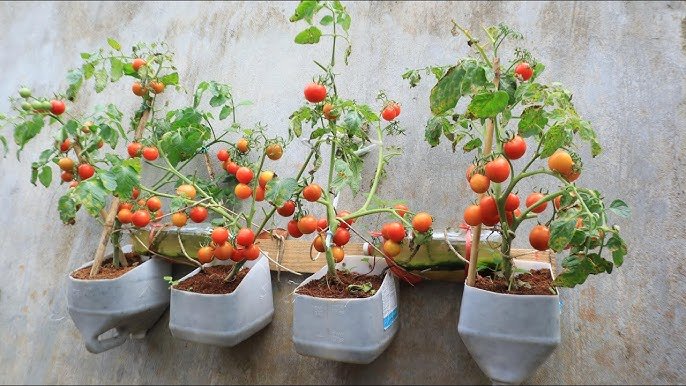
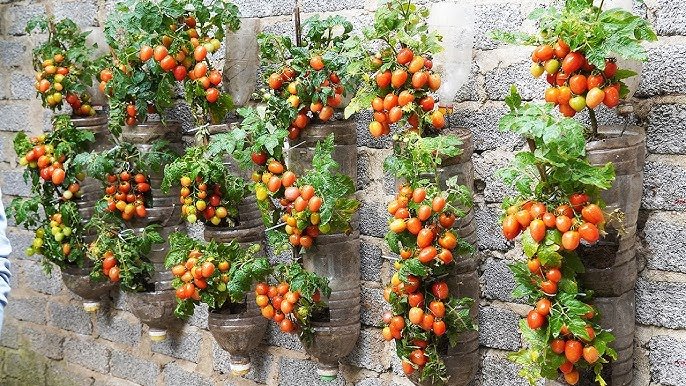
Step 2: Preparing Plastic Bottle Planters
Repurposing plastic bottles for tomato plants is simple and effective. Here’s how to prepare them:
Materials Needed:
- 2–3 liter plastic bottles (cleaned and labeled if necessary)
- Scissors or craft knife
- Twine, rope, or wire for hanging (optional)
- Saucer or tray for drainage
Steps to Prepare the Bottles:
- Cut a rectangular window along one side of the bottle to hold soil and allow plant growth.
- Poke several small holes at the bottom for proper drainage.
- If you plan to hang the bottles, make holes at the top and thread twine or wire through securely.
- Optionally, poke a small hole on the side for easy watering.
Once prepared, the bottles are ready to be filled with soil and seeds or seedlings.
Step 3: Preparing the Soil
Tomatoes require nutrient-rich, well-draining soil to thrive. Using regular garden soil may cause compaction and hinder growth.
Ideal soil mix for plastic bottle planters:
- 1 part high-quality potting soil
- 1 part compost or organic matter
- 1 part perlite or coco peat for aeration and drainage
You can also mix in organic fertilizer or worm castings to give your plants a nutrient boost. Ensure the soil pH is between 6.0 and 6.8 for optimal tomato growth.
Step 4: Starting Tomato Seeds
You can grow tomatoes from seeds or use nursery seedlings. Starting from seeds is rewarding and cost-effective.
Seed-starting steps:
- Fill a seed tray or small pot with seed-starting mix.
- Plant 2–3 seeds per cup, about ¼ inch deep, and cover lightly with soil.
- Water gently to keep the soil moist, not soggy.
- Place in a warm, sunny spot (70–85°F) or under a grow light.
Within 7–14 days, seeds should sprout. When seedlings develop 3–4 true leaves, they are ready to be transplanted into your prepared plastic bottle planters.
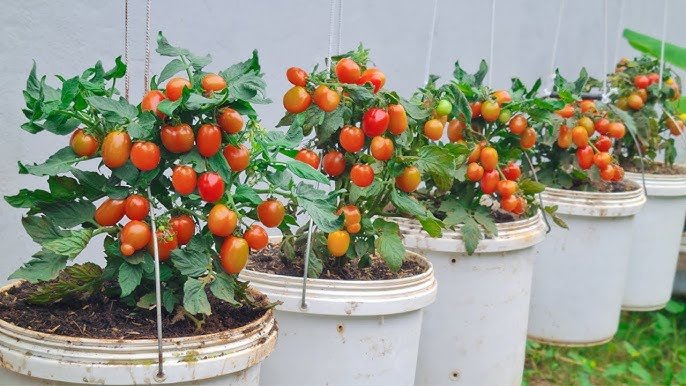
Step 5: Transplanting Seedlings into Bottle Planters
Once seedlings are ready:
- Fill the bottle planter with prepared soil, leaving some space at the top.
- Gently remove seedlings from the tray, taking care not to damage the roots.
- Plant them deep, burying part of the stem — this encourages additional root growth along the buried section.
- Water lightly to settle the soil around the roots.
If using hanging bottles, make sure the plant has enough vertical space for growth. Compact varieties work best for vertical setups.

Step 6: Sunlight and Temperature
Tomatoes are sun-loving plants and need plenty of light for healthy growth:
- Sunlight: 6–8 hours of direct sunlight daily.
- Temperature: Optimal growth occurs at 70–85°F during the day and not below 55°F at night.
If growing indoors or in a shaded balcony, consider LED grow lights for 12–14 hours a day. Rotate bottles occasionally to ensure all parts of the plant receive even sunlight.
Step 7: Watering and Maintaining Moisture
Container-grown tomatoes require consistent watering since the soil in bottles dries out faster than ground soil.
Watering tips:
- Check soil daily; water when the top inch feels dry.
- Water at the base to avoid wetting leaves, which can cause fungal diseases.
- Use a side hole or a small funnel for precise watering.
- Mulch the soil surface with straw, coconut husk, or dry leaves to retain moisture.
Proper watering ensures your plants stay healthy and produce juicy, flavorful tomatoes.
Step 8: Fertilizing for Healthy Growth
Tomatoes in containers rely on soil nutrients for growth and fruiting.

Fertilization schedule:
- Early growth: Use a balanced liquid fertilizer every 2–3 weeks.
- Flowering and fruiting: Switch to a fertilizer high in phosphorus and potassium to encourage fruit production.
- Organic alternatives: Compost tea, fish emulsion, or diluted cow manure work well.
Avoid excessive nitrogen fertilizer, which promotes leafy growth but limits fruit development.
Step 9: Supporting Your Tomato Plants
Even in plastic bottles, tomato plants benefit from support as they grow and produce heavy fruits.
- Insert a bamboo stick, wooden skewer, or small stake into the soil.
- Tie the main stem gently using soft cloth strips or garden ties.
- Prune side shoots that are not producing flowers to focus energy on fruit-bearing stems.
Proper support ensures your plant grows upright, reduces the risk of breaking, and improves airflow around leaves and fruit.
Step 10: Flowering and Pollination
Tomatoes produce small yellow flowers before fruiting. Pollination is essential for fruit development.
- Outdoor plants are naturally pollinated by wind and bees.
- Indoor plants may need hand-pollination — gently shake the flowers or use a soft brush to transfer pollen.
- Tiny green tomatoes will start forming a few weeks after flowers appear.
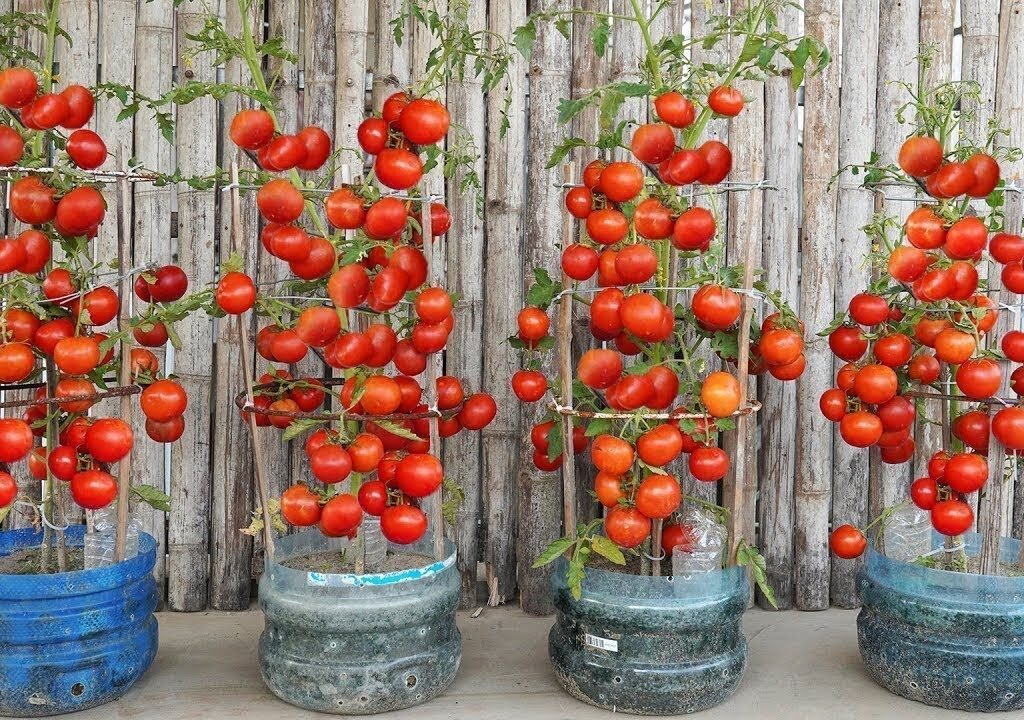
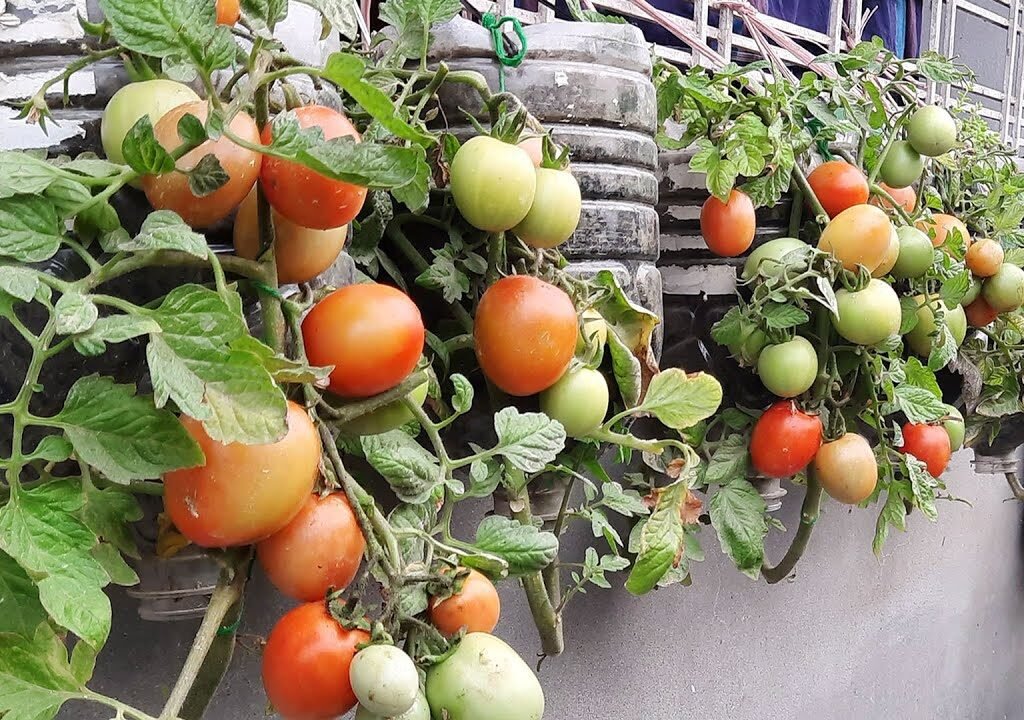
Step 11: Harvesting Tomatoes
Plastic bottle planters make harvesting easy and fun:

- Roma and other varieties typically mature in 70–90 days after transplanting.
- Pick fruits when they are fully colored (red, yellow, or orange depending on the variety) and firm but slightly soft to touch.
- Use scissors or garden shears to avoid damaging the plant.
- Regular harvesting encourages continuous fruit production.
One well-maintained plant in a bottle planter can produce dozens of tomatoes, enough for salads, sauces, or snacking.
Step 12: Tips for Maximizing Yield
- Rotate bottles for even sunlight exposure.
- Monitor for pests like aphids, whiteflies, or spider mites.
- Remove yellow or damaged leaves to improve airflow and reduce disease.
- Feed consistently during flowering and fruiting for higher yields.
- Save seeds from the best fruits to grow the next season.
With a little care and attention, even beginners can enjoy a bountiful harvest in plastic bottle planters.
Conclusion
Growing tomatoes in plastic bottle planters is a revolutionary way to garden, especially for those with limited space. This method is simple, cost-effective, and environmentally friendly. By repurposing bottles, providing sunlight, water, and nutrients, and supporting your plants, you can enjoy fresh, homegrown tomatoes right at your doorstep.
Whether you’re growing Roma, cherry, or beefsteak varieties, plastic bottle planters offer a creative and efficient way to cultivate healthy, productive plants. Start with a few bottles, follow these steps, and watch your tomato plants flourish — bringing fresh, flavorful tomatoes to your kitchen without a traditional garden.
Leave A Comment