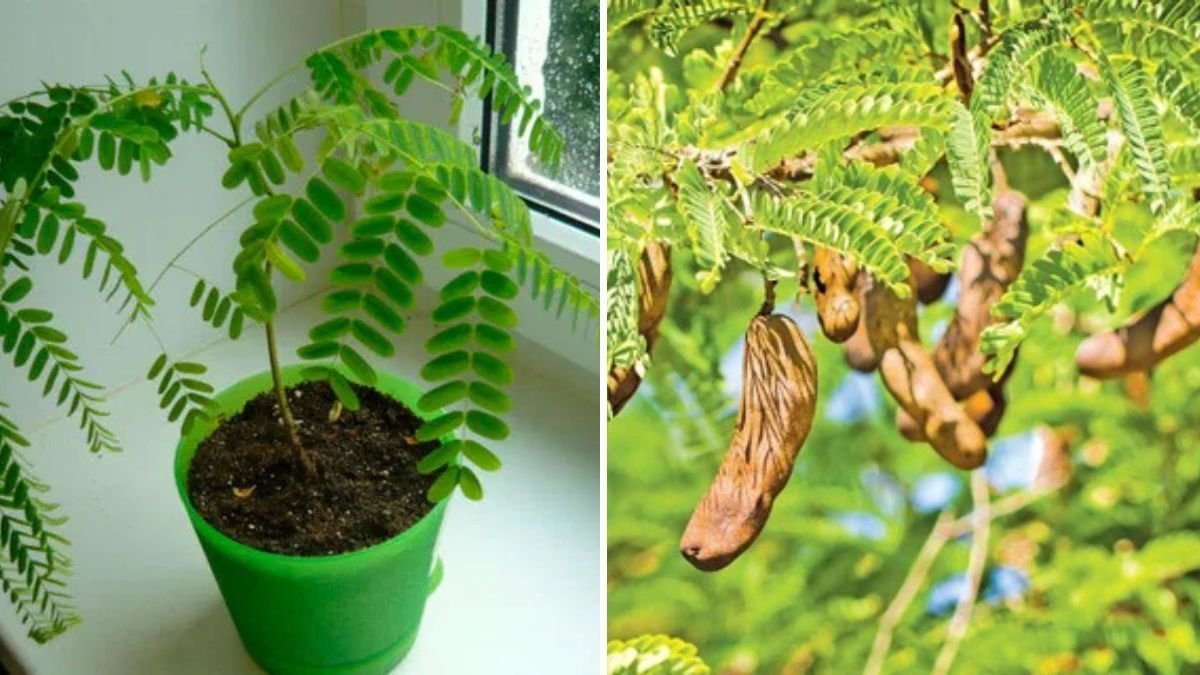
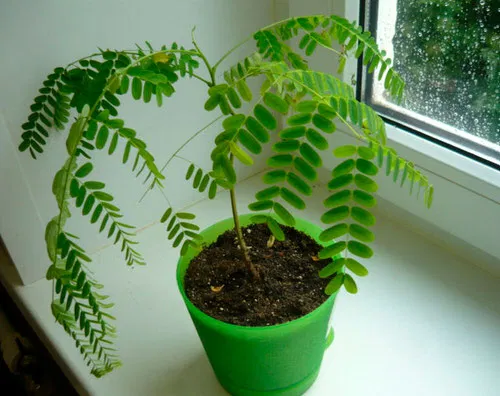
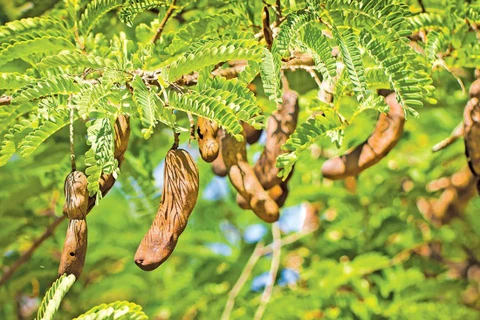
The tamarind tree (Tamarindus indica) is a tropical gem known for its tangy-sweet pods and beautiful, feathery foliage. Native to Africa and widely cultivated in India and Southeast Asia, this hardy tree has been a part of traditional cuisine, medicine, and gardening for centuries. While tamarind trees typically grow large in open ground, it is entirely possible to grow tamarind from seeds in containers—and even keep them thriving in pots with proper care.
In this detailed guide, we’ll explore the growth progress of tamarind seedlings during their first month and provide step-by-step instructions on how to successfully transplant them from containers into pots for healthy long-term growth.
1. Understanding the Tamarind Plant
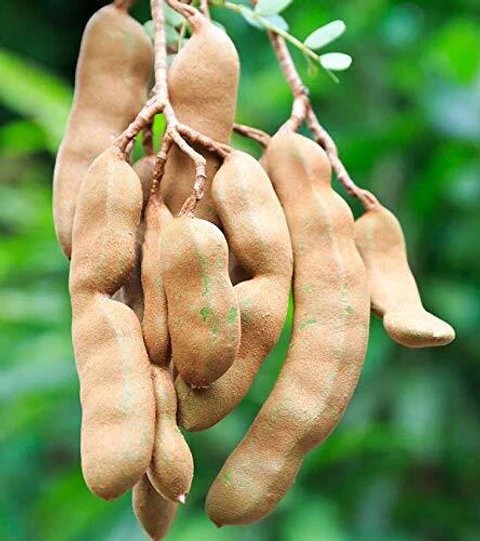
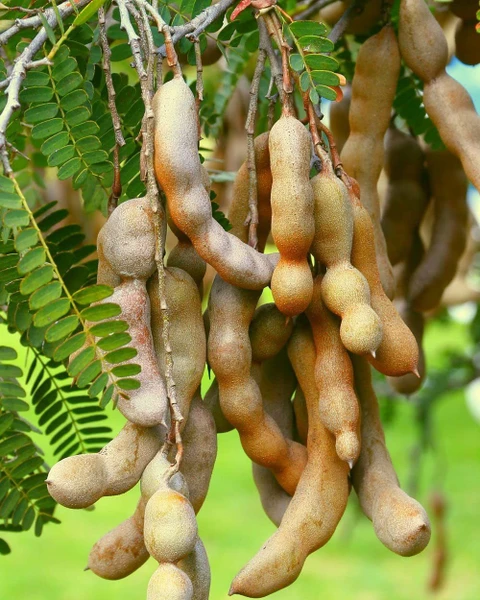
Tamarind is a slow-growing, long-lived tree that can reach heights of 25–30 meters in its natural habitat. It produces long pods containing pulp and shiny brown seeds. The pulp has a distinctive sour-sweet flavor, widely used in chutneys, beverages, sauces, and medicinal preparations.
Tamarind trees are drought-tolerant, sun-loving, and resilient—making them perfect for container cultivation when given the right soil mix and conditions. Growing tamarind from seeds is a fascinating process, especially during the first month when the seedlings undergo rapid and visible transformations.
2. Germinating Tamarind Seeds
The journey begins with healthy tamarind seeds. You can collect seeds from fresh pods or buy them from a nursery.
Steps for germination:
- Clean the seeds – Remove any pulp residue from tamarind pods.
- Soak seeds – Place them in warm water for 24 hours to soften the hard seed coat and speed up germination.
- Prepare containers – Use small cups, seed trays, or nursery bags filled with a light potting mix (50% garden soil + 30% compost + 20% sand).
- Planting depth – Sow each seed about 1 inch deep and lightly cover it with soil.
- Watering – Water gently to keep the soil moist but not soggy.
Within 7–15 days, the seeds start to sprout depending on temperature and soil conditions. Warmer environments accelerate germination.
3. Tamarind Seedling Growth Progress in the First Month

Week 1: Germination Phase
During the first week, the soaked tamarind seeds begin to crack open. A small root (radicle) emerges, anchoring itself into the soil. The top of the seed (plumule) starts to push upward, indicating successful germination.
At this stage:
- Maintain consistent moisture in the soil.
- Keep the container in partial sunlight to avoid scorching young sprouts.
- Avoid overwatering, as the tender roots are prone to rot.
By the end of week one, you’ll notice tiny green shoots emerging from the soil—your tamarind seedlings are officially alive!
Week 2: Seedling Establishment
In the second week, the seedlings grow quickly. The first pair of cotyledon leaves (seed leaves) expand, providing energy for initial growth. Shortly after, the first true leaves begin to appear, resembling delicate, feathery leaflets typical of tamarind.
At this stage:
- Move the seedlings to an area with bright, indirect sunlight for at least 5–6 hours daily.
- Water lightly every two to three days.
- Keep the soil loose to ensure good air circulation for the roots.
You can expect seedlings to be about 3–5 inches tall by the end of this week.
Week 3: Vigorous Leaf Growth
During the third week, tamarind seedlings enter a rapid growth phase. The stem thickens, and multiple leaflets form on each branch. The plant starts to look more like a miniature tree.
Key care tips:
- Gradually expose the seedlings to full sunlight for 2–3 hours a day to strengthen them.
- Rotate the containers to ensure even sunlight exposure.
- Add a small dose of diluted liquid fertilizer or compost tea once a week to boost growth.
By the end of week three, the seedlings may reach 6–8 inches in height, with several pairs of bright green leaves.
Week 4: Root Development and Hardening
The final week of the first month focuses on root strengthening. Beneath the soil, a strong taproot begins to develop, which is crucial for future growth and stability. The plant’s stem becomes sturdier, and the leaf canopy expands.
To prepare seedlings for transplantation:
- Gradually increase exposure to direct sunlight (at least 6 hours daily).
- Reduce watering frequency slightly to encourage deeper root growth.
- Inspect each seedling for pests or deformities before transplanting.
By the end of the first month, healthy tamarind seedlings should be 8–10 inches tall, with well-developed roots ready for their next stage—transplanting into pots.
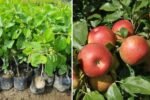
4. How to Transplant Tamarind Seedlings from Containers to Pots
Transplanting is a delicate but rewarding process. Proper technique ensures the young plants adapt quickly without transplant shock.
Step 1: Choosing the Right Pot
- Size: Start with a 10–12 inch diameter pot for young seedlings. As the plant grows, you can move it to larger pots (16–20 inches).
- Material: Use clay, terracotta, or thick plastic pots with drainage holes at the bottom.
- Depth: Tamarind develops a deep taproot, so ensure the pot is at least 12–14 inches deep.
Step 2: Preparing the Soil Mix
Tamarind prefers well-draining, nutrient-rich soil with a neutral to slightly acidic pH.
Recommended mix:
- 40% garden soil
- 30% compost or cow manure
- 20% sand or perlite (for aeration)
- 10% coco peat or leaf mold
Add a handful of bone meal or neem cake powder to provide slow-release nutrients and protect against soil-borne pests.
Step 3: Transplanting the Seedlings
- Water the seedling in its container a few hours before transplanting. This helps reduce root damage.
- Loosen the soil around the roots gently using a small stick or spoon.
- Lift the seedling carefully by holding its base, ensuring the root ball remains intact.
- Place the seedling in the new pot’s center, making sure the root collar is level with the soil surface.
- Fill in the gaps with soil mix, pressing gently around the base.
- Water thoroughly to settle the soil and eliminate air pockets.
After transplanting, keep the pots in a shaded area for 3–5 days before moving them back into full sun. This transition helps the seedlings recover and adjust to their new environment.
5. Post-Transplant Care for Healthy Growth
Once your tamarind seedlings are comfortably settled in their new pots, follow these care tips for steady growth:
Sunlight
Tamarind thrives in full sunlight—at least 6–8 hours daily. Place the pot on a terrace, balcony, or any sunny location. Without adequate sunlight, growth may slow, and the plant will appear weak.
Watering
Keep the soil slightly moist but never soggy.
- Water every 3–4 days during summer.
- Reduce to once a week in cooler months.
Overwatering can cause root rot, so ensure proper drainage.
Fertilization
Feed the plant every 45 days with organic compost or a balanced NPK fertilizer (5:5:5). During active growth periods, apply vermicompost or liquid seaweed fertilizer for added nutrients.
Pruning
When the young tamarind plant reaches about 1.5 feet, pinch off the tip to encourage side branching. Regular pruning keeps the tree compact and manageable in pots.
Pest Control
Common pests include aphids, mealybugs, and leaf miners. Use neem oil spray every 15 days to prevent infestations. Keep the area around the pot clean to avoid fungal growth.

6. Common Mistakes to Avoid
- Overwatering: Tamarind roots dislike standing water. Always ensure good drainage.
- Transplanting too early: Wait until seedlings are at least one month old or 8–10 inches tall before repotting.
- Insufficient sunlight: Lack of sunlight weakens growth and delays leaf formation.
- Disturbing roots during transplant: Always handle the seedling gently to avoid damaging the taproot.
7. Future Growth Expectations
After successful transplantation, tamarind seedlings continue to grow steadily. Within 3–4 months, you’ll notice thicker stems and a well-shaped canopy. By the end of the first year, with proper pruning, your potted tamarind tree can reach 2–3 feet tall and look like a miniature version of the majestic full-grown tree.
Though it may take several years for a potted tamarind to produce fruit, the process of nurturing it from seed to tree is deeply rewarding. With patience, proper care, and love, your small container-grown tamarind could one day yield tangy pods right at home.
8. Conclusion
Growing tamarind seedlings in containers and transplanting them into pots is a wonderful journey for any home gardener. The first month of seedling growth reveals the plant’s resilience and beauty, while careful transplanting ensures it thrives for years to come.
By providing the right sunlight, soil, and watering routine, you can enjoy watching your tamarind tree grow strong and healthy—even in limited spaces like balconies or terraces. Whether you’re growing it for its ornamental beauty or future harvests, nurturing tamarind from seed to sapling is an experience that connects you deeply with nature’s rhythm—a perfect project for both gardening enthusiasts and research studies alike.
Leave A Comment